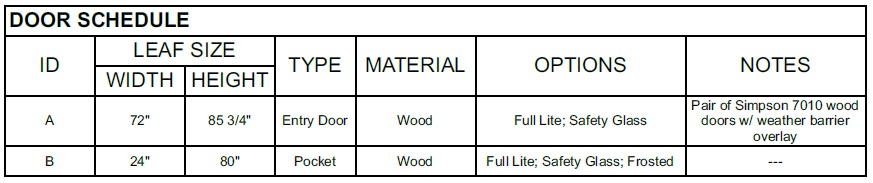
I'm documenting the renovation of my 1929 "English Cottage"-style house located in the Irvington Historic District in Portland
Author: Bill Dickens
I grew up on a hill country farm in New Zealand, then lived and worked in Hong Kong. I moved to Portland, Oregon in 2009. I'm presently renovating my 1929 "English Cottage" house in the Irvington Historic District.
Plumbing rough-in needs to happen before electrical and mechanical rough-in as drainage requires specific placement and gradients whereas electrical and mechanical have more routing flexibility.
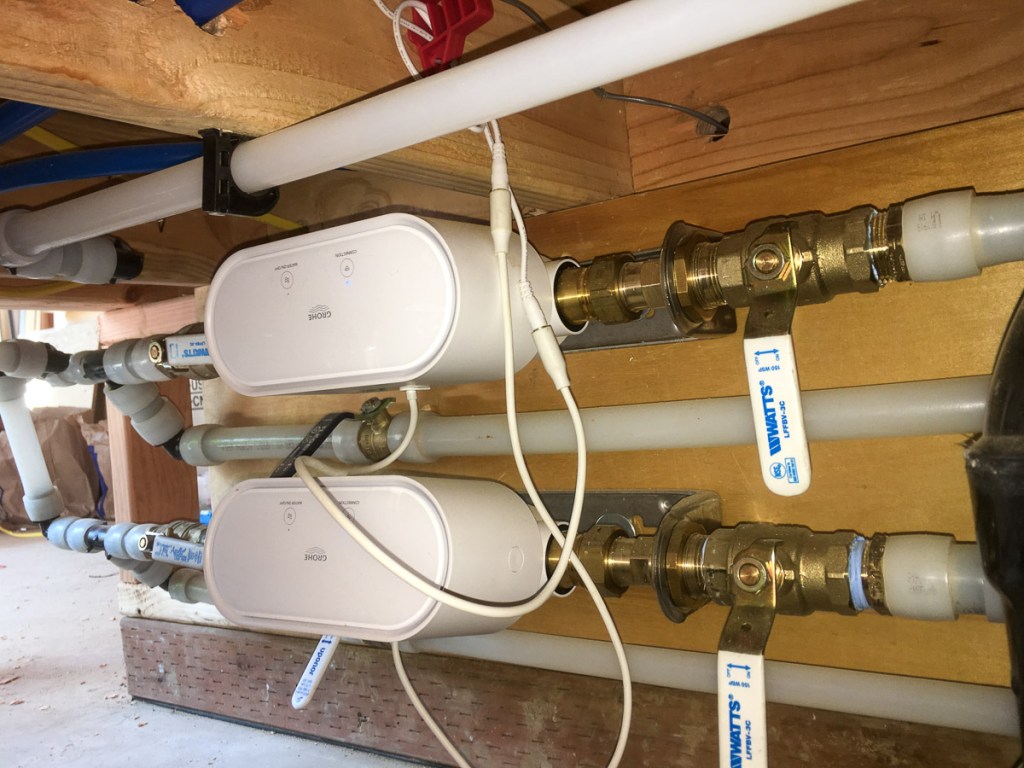
Grohe Sense Guard
As the hot water cylinder will be buried away in the dead-corner of the kitchen cabinets I wanted to be able to detect water leaks and automatically shutoff the water. I went with Grohe’s Sense Guard system. I needed two of these for the City Water and Rainwater supplies. There are a bunch of valves so each unit can be bypassed and maintained.
Once installed and connected to WiFi and my phone app I’m able to receive notifications of water leaks, remotely turn water service on and off, and track water usage in gallons, water temperature and pressure.
Supply lines
Bathroom, shower, and kitchen hot and cold lines were installed as home-runs to manifolds using 1/2-inch PEX. The toilet, laundry and outdoor faucet were run as 1/2-inch purple PEX to a rainwater manifold. Each homerun line can be individually isolated with a valve located at the manifold.
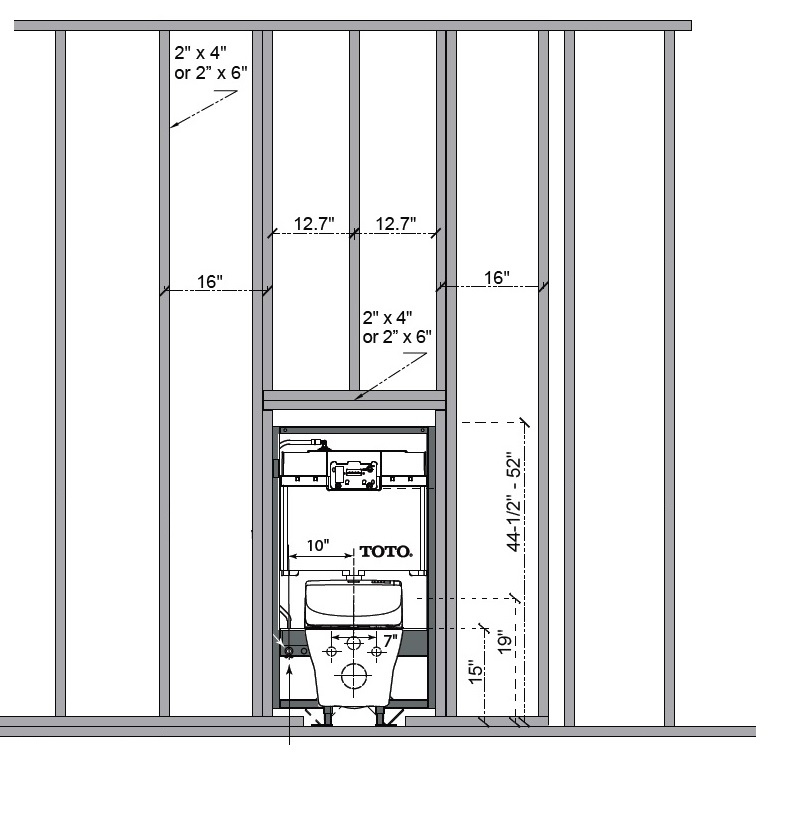
Toilet
The back wall of the bathroom is framed out an additional 6-inches. This provides space for an in-wall tank for the wall-hung toilet and for routing shower lines without intruding into the insulated 3.5-inch framing cavity.
Baseplate for the 6-inch plumbing cavity
Toto provides a detailed framing plan for their wall-hung toilets.
There is an electrical outlet installed to left of the toilet for a Toto bidet toilet seat.
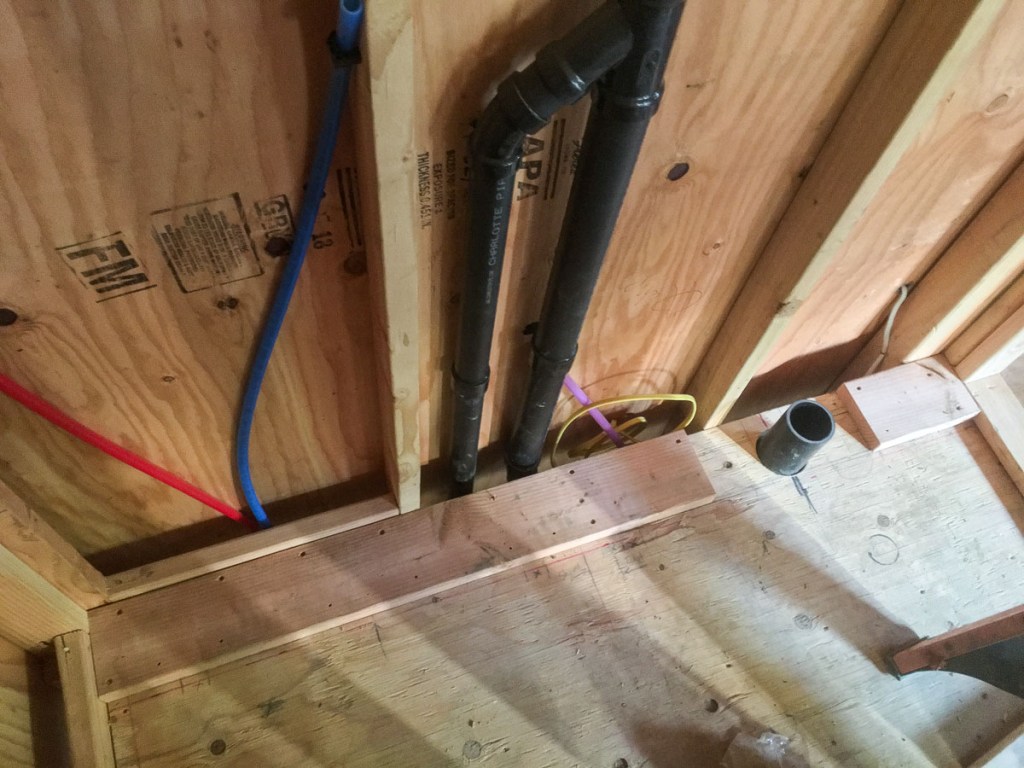
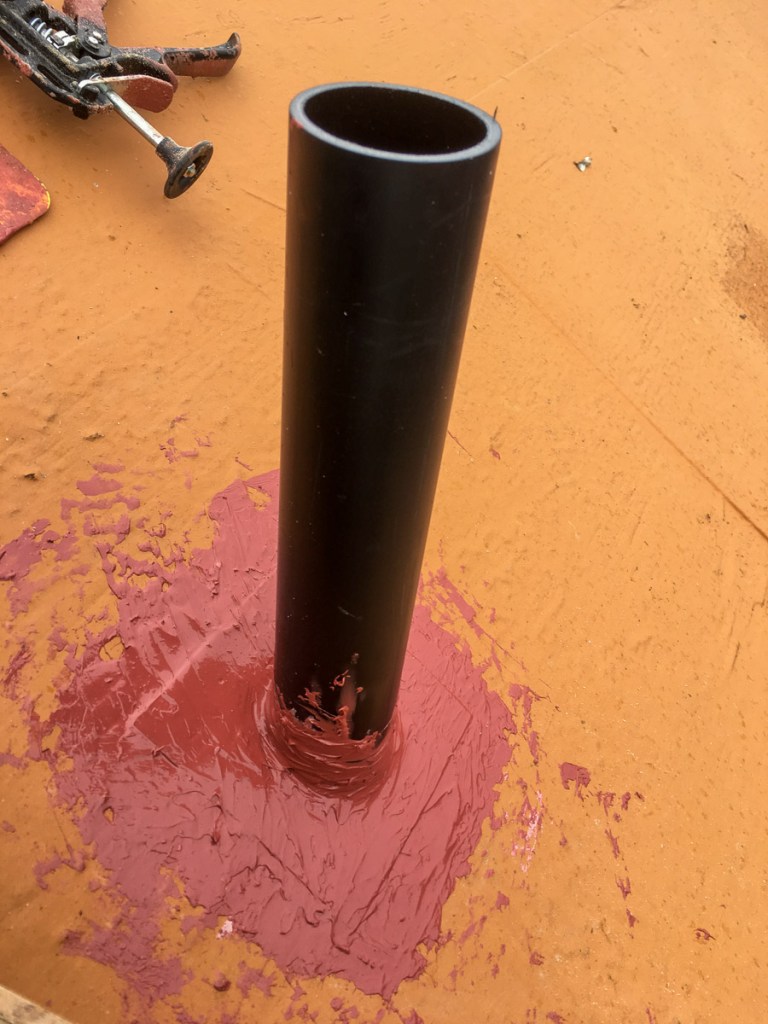
Vents
The toilet and shower are vented through the roof. The roof penetration was sealed using a Roflex 30 gasket from 475 High Performance Building Supply and this was then sealed with Prosocco liquid membrane. The basin, kitchen, and laundry drains are vented using Air Admittance Valves as there was not enough room to run vents through walls.
Roof Vent and Roflex 30 gasket
Outdoors Faucet
I used Aquor’s “House Hydrant” connected to the rainwater manifold for the outdoor faucet. Aquor is based in Washington state. https://aquorwatersystems.com/
I’m using a pocket door between the bathroom and kitchen; no space to swing a door.
Johnson Hardware vs. Hafele
Initially I went with a door frame and track provided by my door/window supplier – based on a Johnson Hardware 1500 frame and mechanism. $267 for the frame, track, slider mechanism, and 2-foot wide door panel. However the metal bracing was lightweight and the framing had a lot of flex. Furthermore Hammer & Hand have a guide to installing pocket doors and they explicitly say:
Do not use Johnson Pocket Door Kit 1500, 1500HD, 1500SC, 2511, or 2000
Instead they recommend using Johnson Pocket Door Kit 2710 or 2711. They don’t give any reasons however I’d think it’s about durability.
My other concern was about maintenance of the track. All of the Johnson Hardware frames would require the wall be taken apart to replace a damaged track. Presumably the tracks would be good for a couple of decades or more of life, however, that didn’t seem acceptable to me.
After more research I settled on a Hafele frame and track. The framing is made of a sturdy wood/metal composite and the track slots into the cavity with no hidden screws at all allowing the track to be removed and replaced without cutting into the wall.
Hafele Slido Pocket Door
I bought the:
Hafele frameset from The Builders Supply in Austin, TX “HAF_94272000 Hafele 942.72.000 Pocket Door Frame Set, Slido” for $309. (this kit comes with a track – no need to purchase the track separately)
Soft-close slider set from Cabinet Parts “Slido Classic 40-P Fitting Set with 1 Side Smuso Soft-Close HAF-940.43.000” for $133.
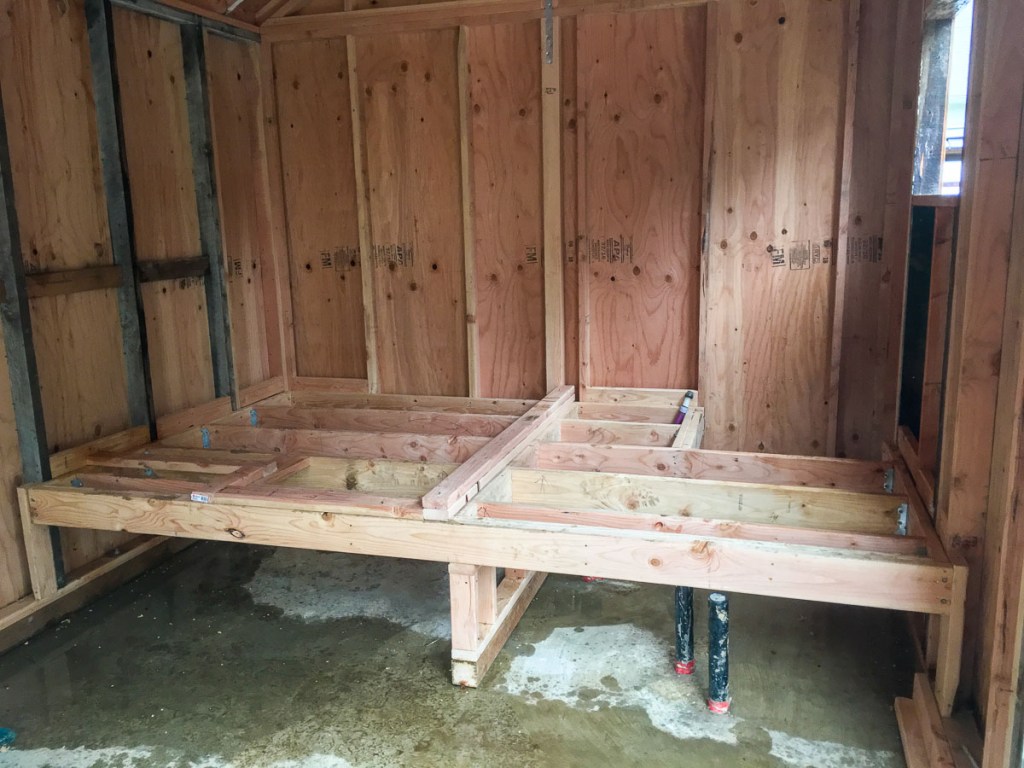
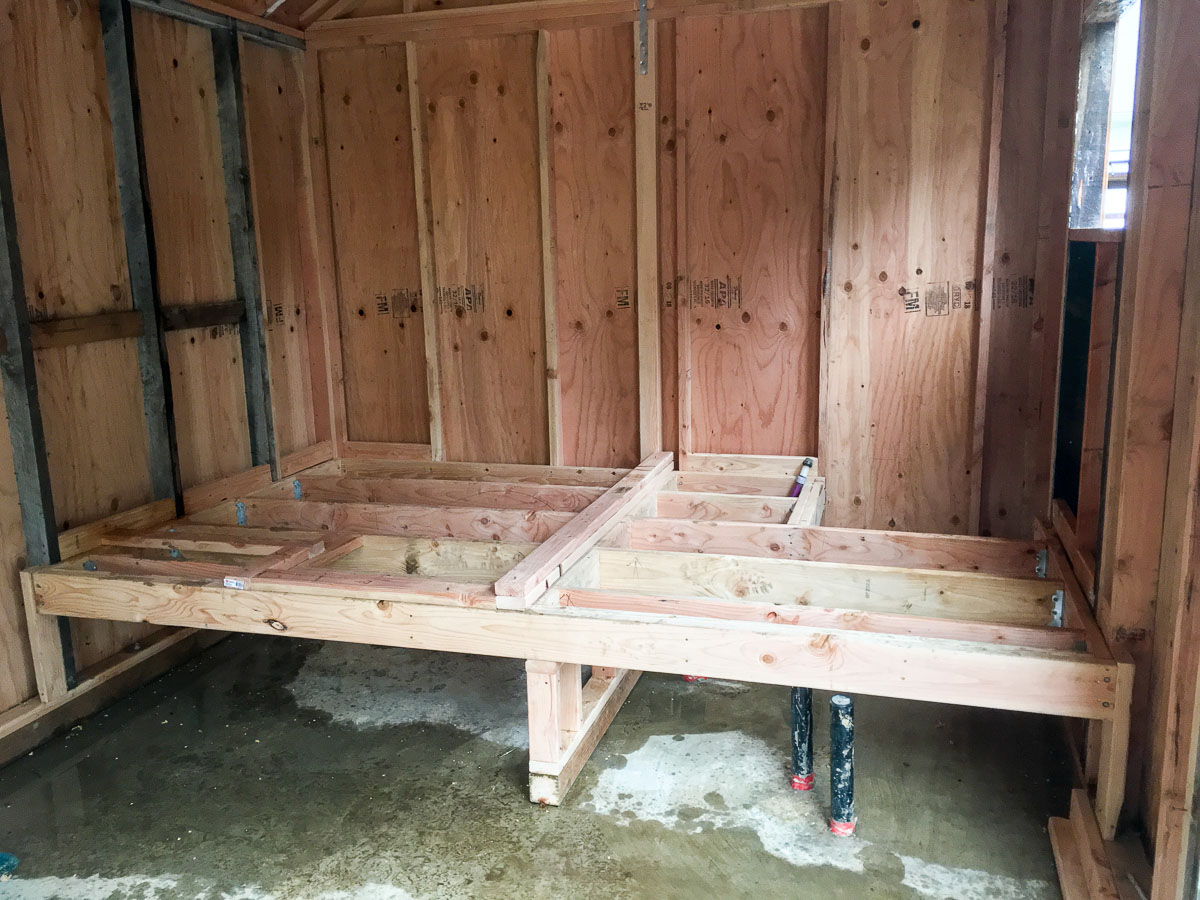
The kitchen and bathroom are located on a raised platform providing 2 feet of utility space under the kitchen and space to stow a Queen sized bed under the bathroom.
My builder constructed the floor framing first and tied this in to the wall studs. The framing is supported down the center where the bathroom/kitchen wall will go by a 2 foot high wall built on a pressure-treated 4×4 resting on a rubber membrane.
A space was left in the kitchen corner for the hot water cylinder. The kitchen units will be built in such a way that the tank can be removed and replaced during the life of the kitchen.
There were are couple of options for the floor/wall sequence. i) Install the internal wall framing then lay down plywood sheathing (3/4″) between the walls. ii) Install the floor sheathing in one continuous run and then build the walls on top of the floor sheathing. The builder recommended ii) floor sheathing first – there are several advantages – better isolation of the bathroom and kitchen from the utility space and bed storage area below. Better floor strength.
I was wondering how the internal walls would tie in with the rafters. One part of the bathroom wall aligned with a rafter so that was easy. Where they didn’t align he installed blocking between the rafters and the attached the top plate to that. Because of the angled roof it was easier to install one stud at a time rather than build as a complete wall on the flat and then raise into place.
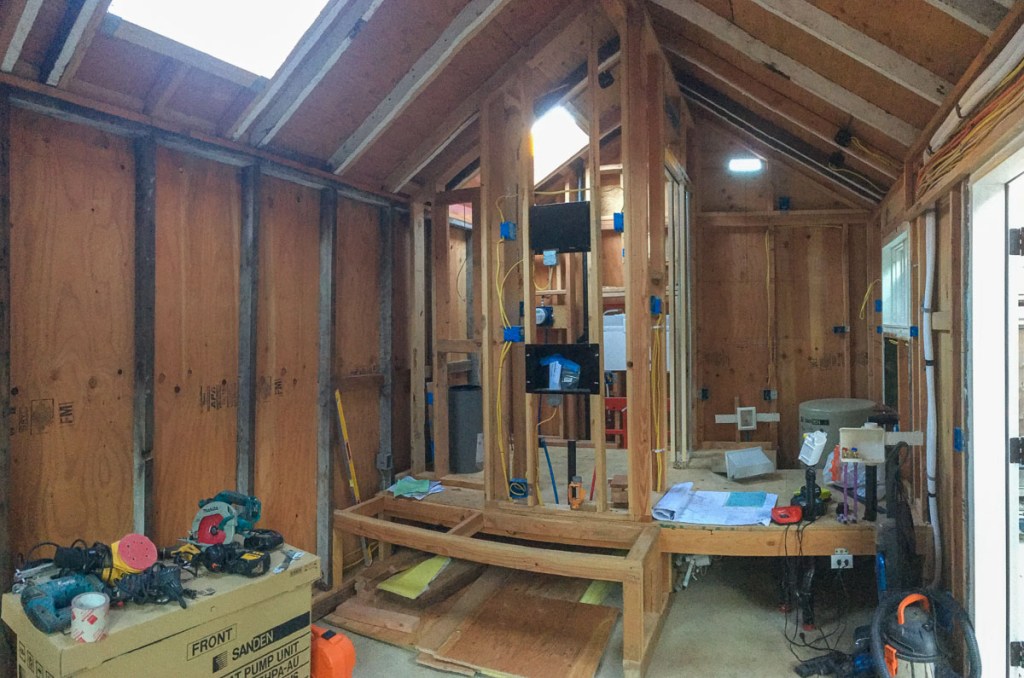
Bed cavity and shelf for media equipment/TV etc on the right; closet on the left protrudes back into the shower space.
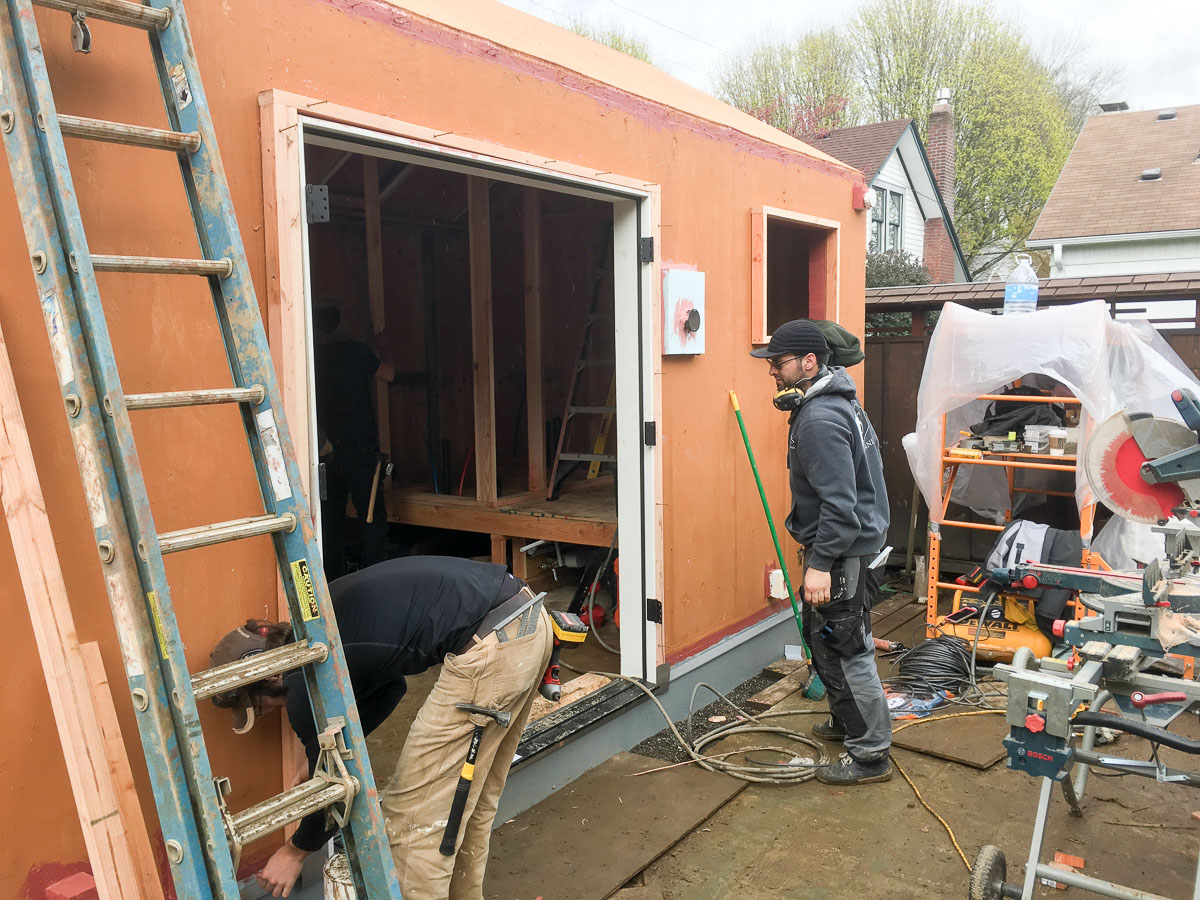
With the electrical rough-in date approaching I needed to get the doors and windows installed to make the structure weather-proof. The builder scheduled a day for his crew to come on-site and do the installation.
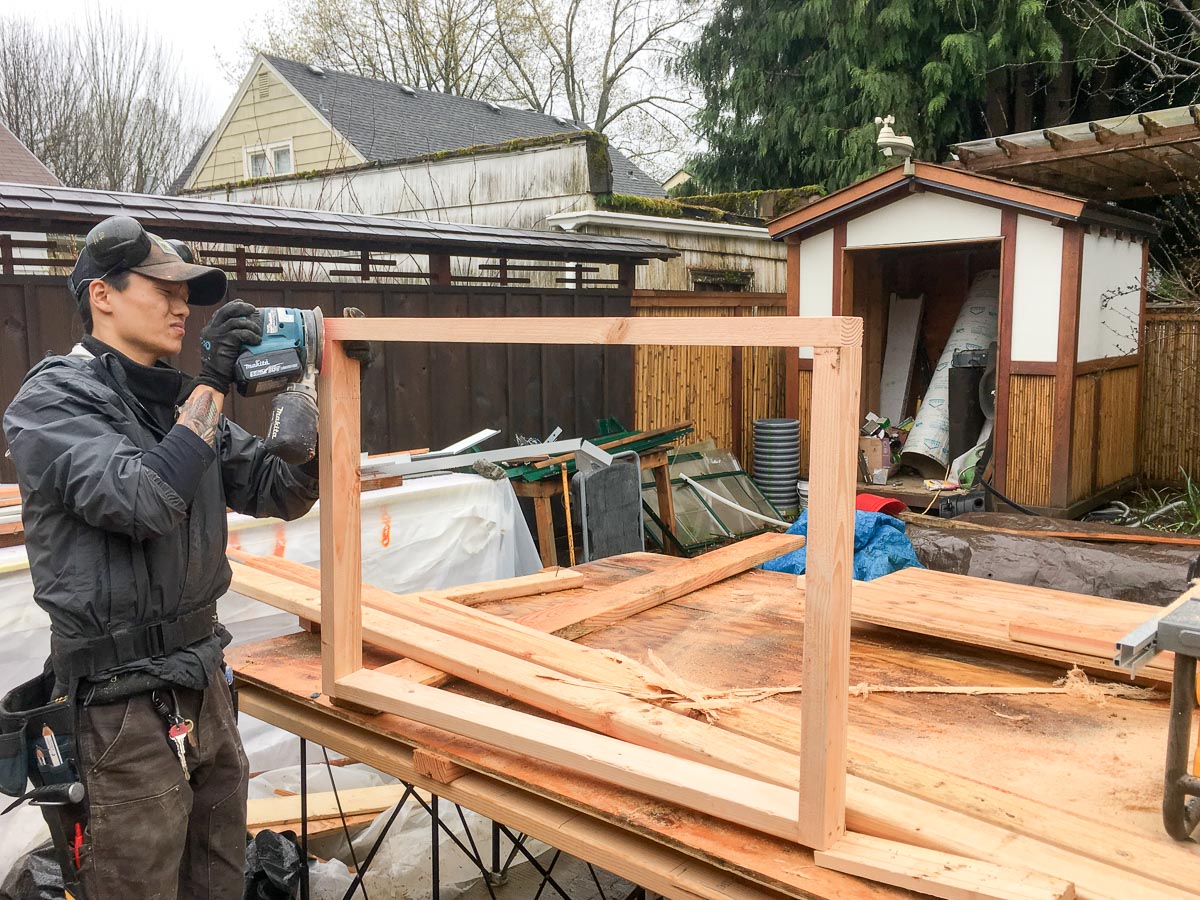
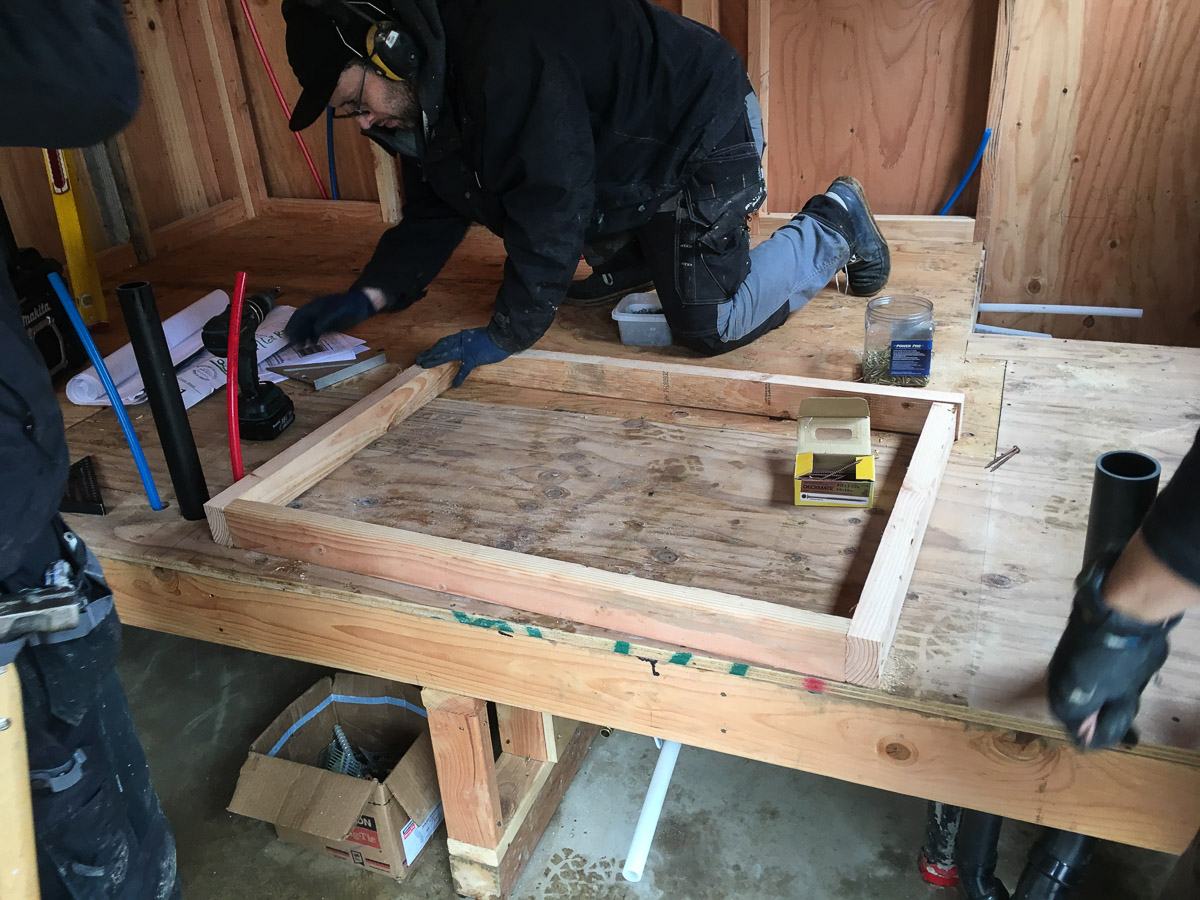
Building window and door bucks
The window and door openings were not framed with bucks to extend out past the exterior insulation layer as I only made the decision between innie/outie windows after the structural framing was complete. So the first task was to build frames to extend out the door and window openings.
The builder had his crew build the window bucks as a complete frame that was then screwed onto the structure as one piece. This allowed for an easier and higher-quality build than tacking separate pieces of frame directly to the structure.
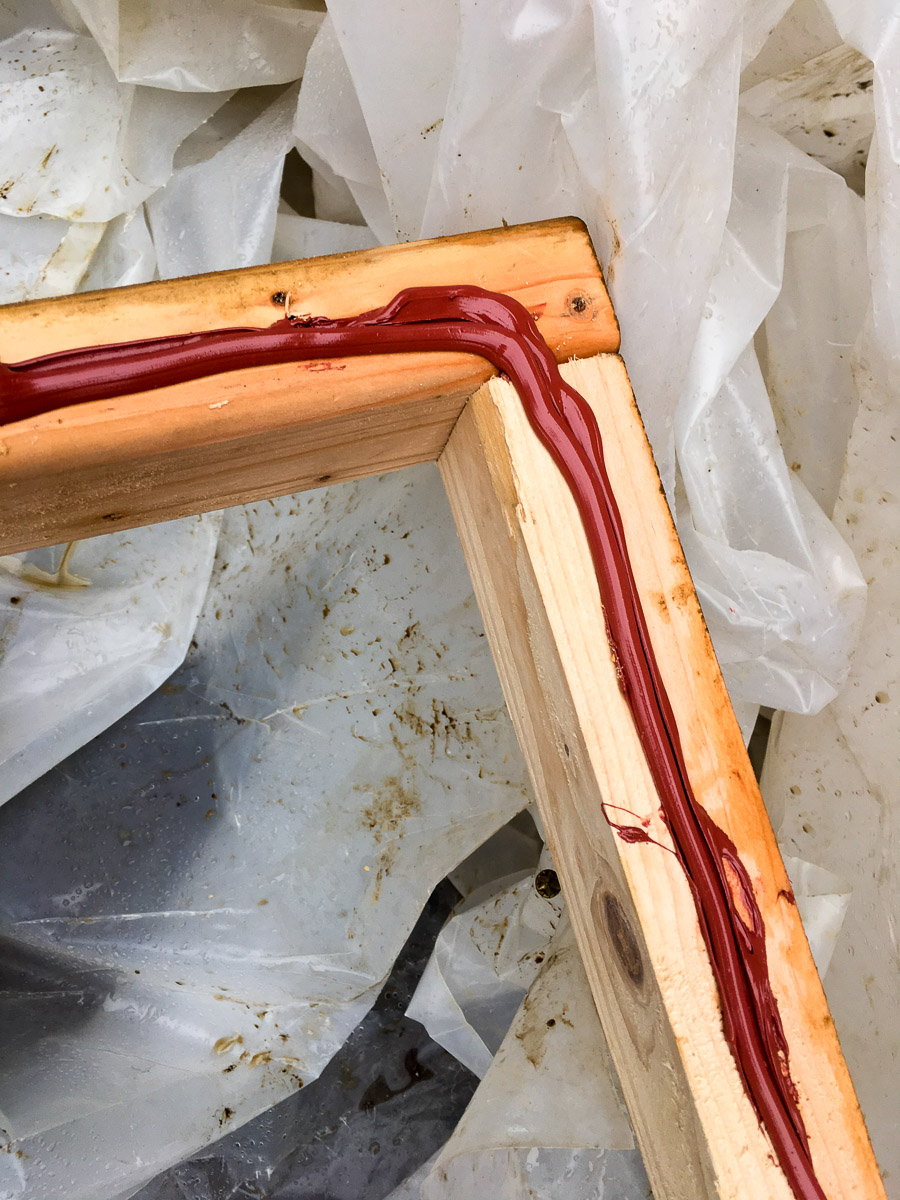
I flashed the bucks to the sheathing using Prosoco Gap and Crack filler and Fast Flash.
Tremco ExoAir Trio
From the Hammer & Hands blogs I picked up on a new system for mounting and sealing windows and doors based around a Tremco product.
ExoAir Trio is a self-expanding joint sealing tape that is used in place of traditional spray-foam sealant to weatherproof windows and doors. It was my the first time to try this technique and the builder hadn’t used it before. We ended up using a combination of traditional shimming , Tremco ExoAir tape, and spray foam to install the windows. Now that I know how it works, I would be able to much more easily use this Tremco product for any future window installs.
Here’s the Hammer & Hand video demonstrating how to set a window using Tremco tape and Shim Screws.
My observation is that this is a significantly easier method for aligning and installing window frames vs traditional methods and that it provides a significantly better weather and air seal than using spray foam.
Installation of the living room window
Installation of the doors
The builder recommended a metal sill pan under the door sill and the window guy at Western Pacific agreed. It’s cheap compared to the cost of a door, it’s good insurance against water leaks through onto the floor, and although not required by code in Portland, it’s mandatory in a bunch of other states.
Recommendations
Based on this experience my suggestions are:
The Tremco tape can be ordered in 3 different thickness, each thickness being rated for a different sized gap between the window frame and the rough-opening: 3/16” – 3/8” gap, 1/4” – 9/16” gap, and 3/8” – 3/4” gap. I had a range of gap sizes so I went with the smallest thickness tape. As it turned out this was a very tight fit (too tight) around the door, good fit for the small kitchen window and the sides of the large window, and way too small for the bottom and top gaps on the large window. It only comes in lots of 3 rolls and it’s expense to order a bunch of different sizes for a one-off project like mine. So my suggestion is when sizing your windows/doors and rough-openings, try to keep the gaps top/bottom/sides consistent so you can use just one variant of Tremco tape. If you end up with a large gap as I did on the large living room window then you can always use spray-foam after the window is installed to complete the gap sealing.
Don’t shim in the traditional way by pushing shims all the way through the opening. You need to ditch that method completely. It only creates a path for water and air penetration through the frame which is exactly what you are avoiding by using this Tremco product. Also you don’t have time to mess around shimming once the tape is in place and starting to expand. Instead use the shim technique demonstrated in the Hammer & Hand video above where the bottom sill is shimmed part-way through the foam layer only and the shims are set perfectly level before you apply the tape or install the window.
It’s really important to cut the tape longer than each frame dimension and to bunch up the tape at the ends of the sill as shown in the video. On those corners where I did not cram enough tape into the corner, the tape started pulling back from the corner once it started expanding, This left a couple of corners with a large gap in the expanded foam tape that I then needed to spray-foam to seal.
Make sure the white side of the tape goes to the interior. It’s a partial vapor barrier and you want to direct any water outwards, not inwards.
Use shim screws to fasten the window to the framing and to adjust the horizontal left/right position. (You will have already got the vertical top/bottom alignment correct by using the correct thickness shims on the bottom sill before applying the tape.)
It took over a week for the tape to fully expand and close some of the wider gaps – perhaps due to the cooler weather.
Shim Screws
You can buy Shim Screws from Conservation Technologies:
I chose to drive them flush with the frame surface and leave them exposed as they have an attractive stainless steel head although you could always fill, sand, and paint over.
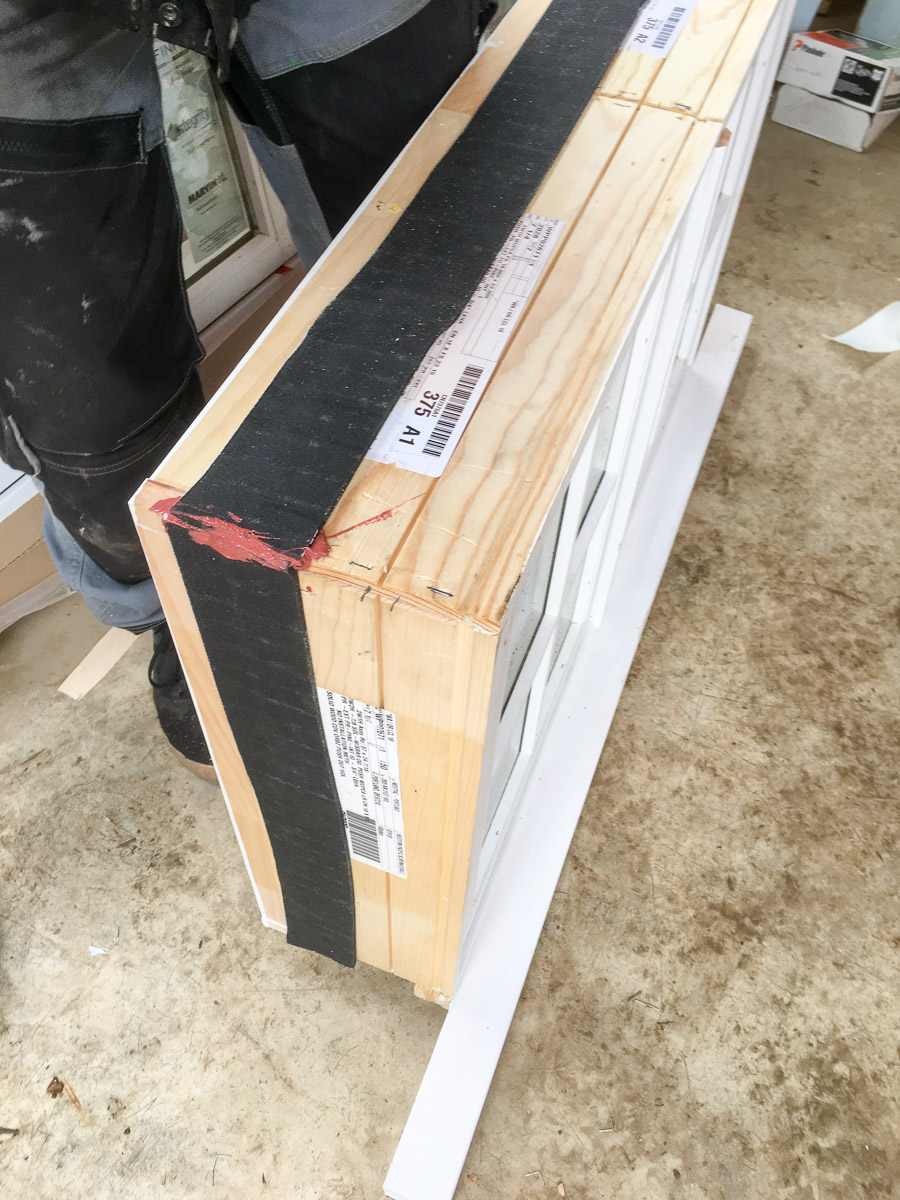
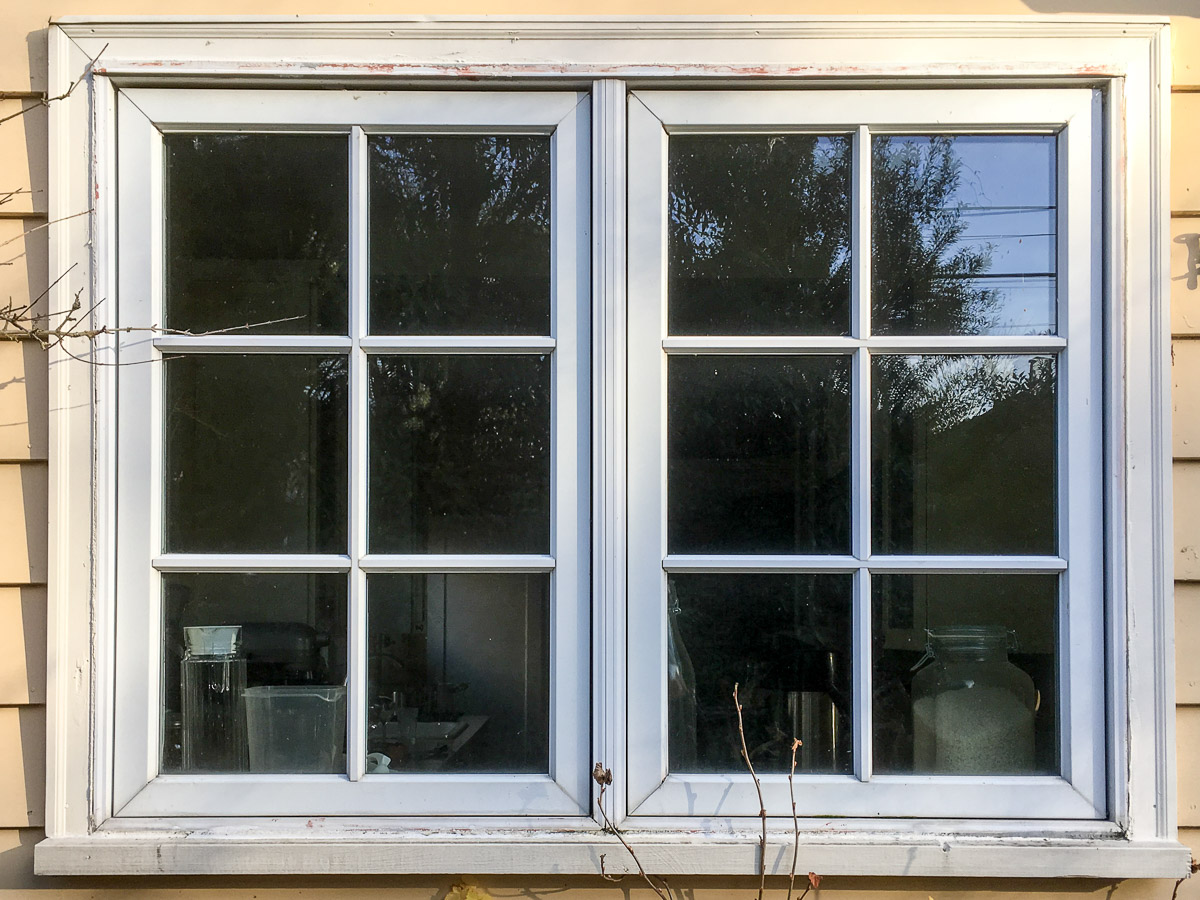
The door and window products were specified on the architect’s plans: Simpson french doors and Marvin windows. The Marvin windows are well constructed and weather-tight – important given the likely exposure to weather due to the short roof overhangs of the “English Cottage” style. On the overhand Marvin doors would have been expensive and Simpson was a good balance of cost and quality. Velux was specified for the two skylights.
The builder recommended Western Pacific in NW Portland as the supplier. They are a large organized building materials supplier located in NW Portland. I scheduled meetings with Western Pacific’s window and door people and ordered the doors, windows, and skylights. The skylights came within a week, the windows and doors around 3-4 weeks. I provided the door lock to Western Pacific and they drilled for the lock-set and hung and fitted the doors in their shop before delivery. (On installation, the door alignment with the frame was pretty much spot on.)
The window frame is set back inside the exterior insulation layer so it’s in a warmer location, less risk of condensation on the interior glass
The window is recessed away from rain and wind
The architect suggested that the innie windows create deeper and more interesting shadow lines on the building facade
The advantages of Outie Windows:
Most American homes are built with Outie windows so it looks normal
The main house has Outie windows (there’s no exterior insulation so the shallow wall depth means outie/innie choice doesn’t exist). The ADU details are supposed to match the main house as it’s in a Historical District.
It creates a deep interior sill that provides useful interior space in such a small structure
The French Doors are outswinging so they will be Outies by default. So Outie windows will align with the plane of the doors.
So I went with Outie windows. As the rough framing had already been completed by the time I made this decision, this narrowed my installation options.
Main house windows: the ADU “Outie” windows will match these where the window is set level with the back of the siding
The platform is built – 2x6s on hangers. The bathroom is on the left, kitchen on the right. The bed slides under the cavity to the left. The right will be used for plumbing, and electrical runs.
Cavity reserved for the hot water tank
The floor is left open in the corner of the kitchen for the hot water tank which will slide in under the kitchen counter and rest on the concrete slab.
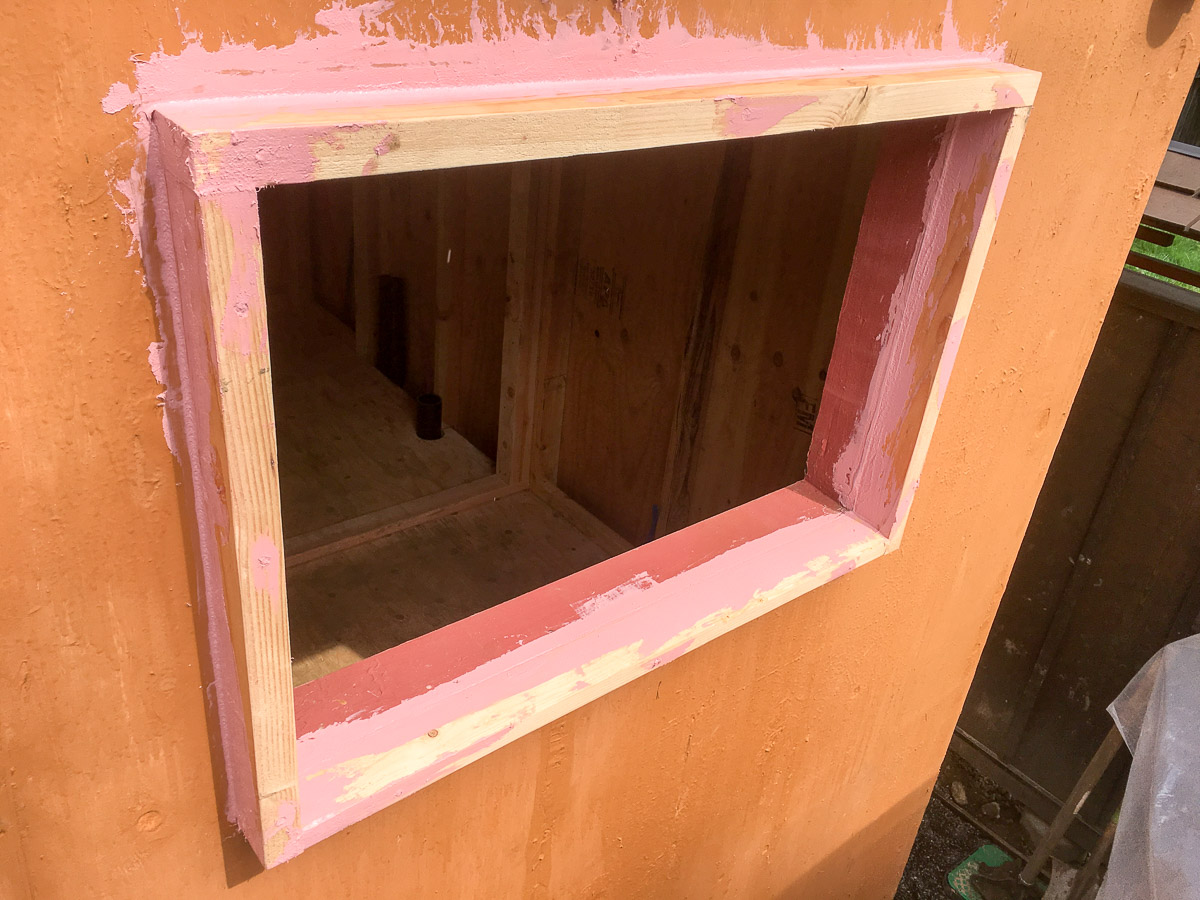
Window Rough-Ins
I added beveled siding strips onto the window sills to provide a drainage slope to the exterior. The window rough-in had already been flashed with Prosoco Gap & Crack Filler. I layed out three stripes of Prosoco FastFlash and then tacked in the siding.
As this reduced the rough-in vertical dimension by 1/4-inch I updated the window supplier (Western Pacific) with the new rough-in size.
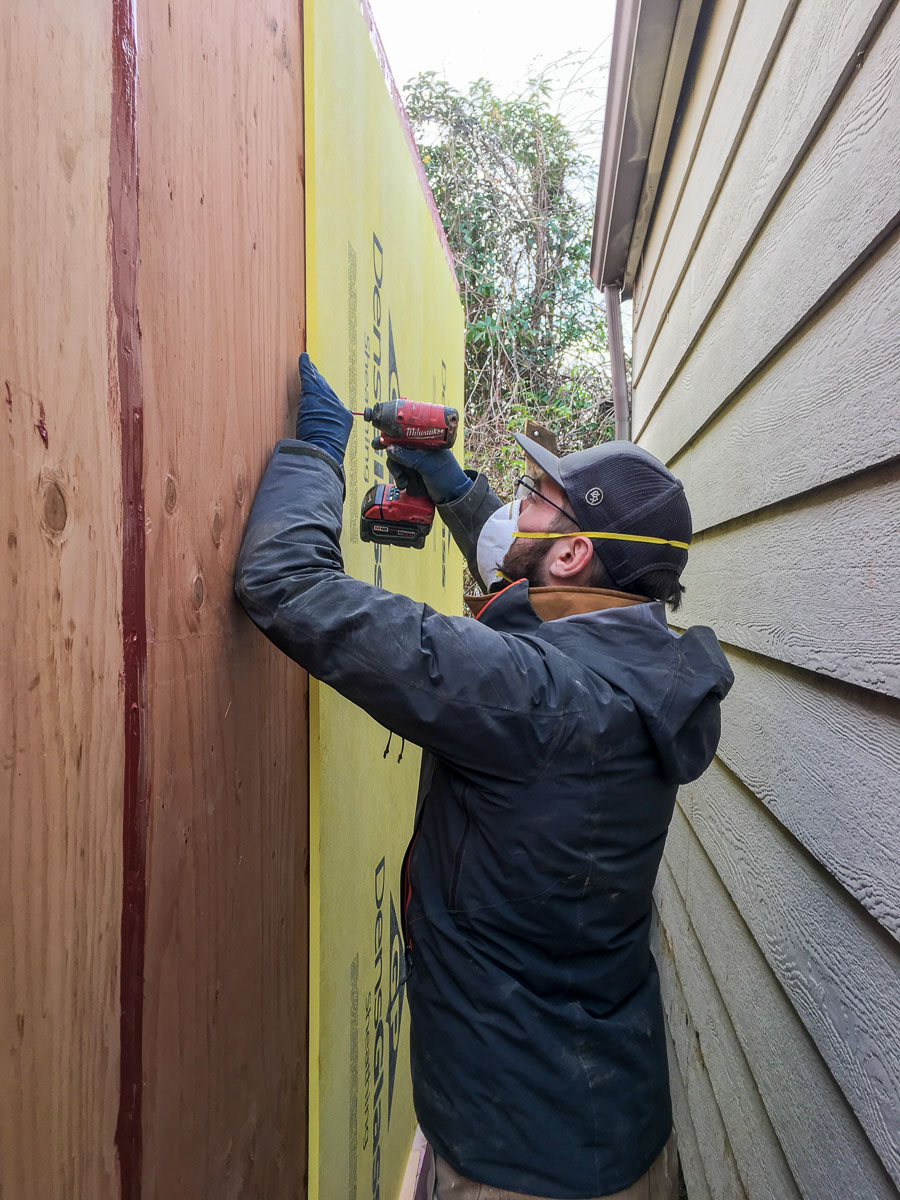
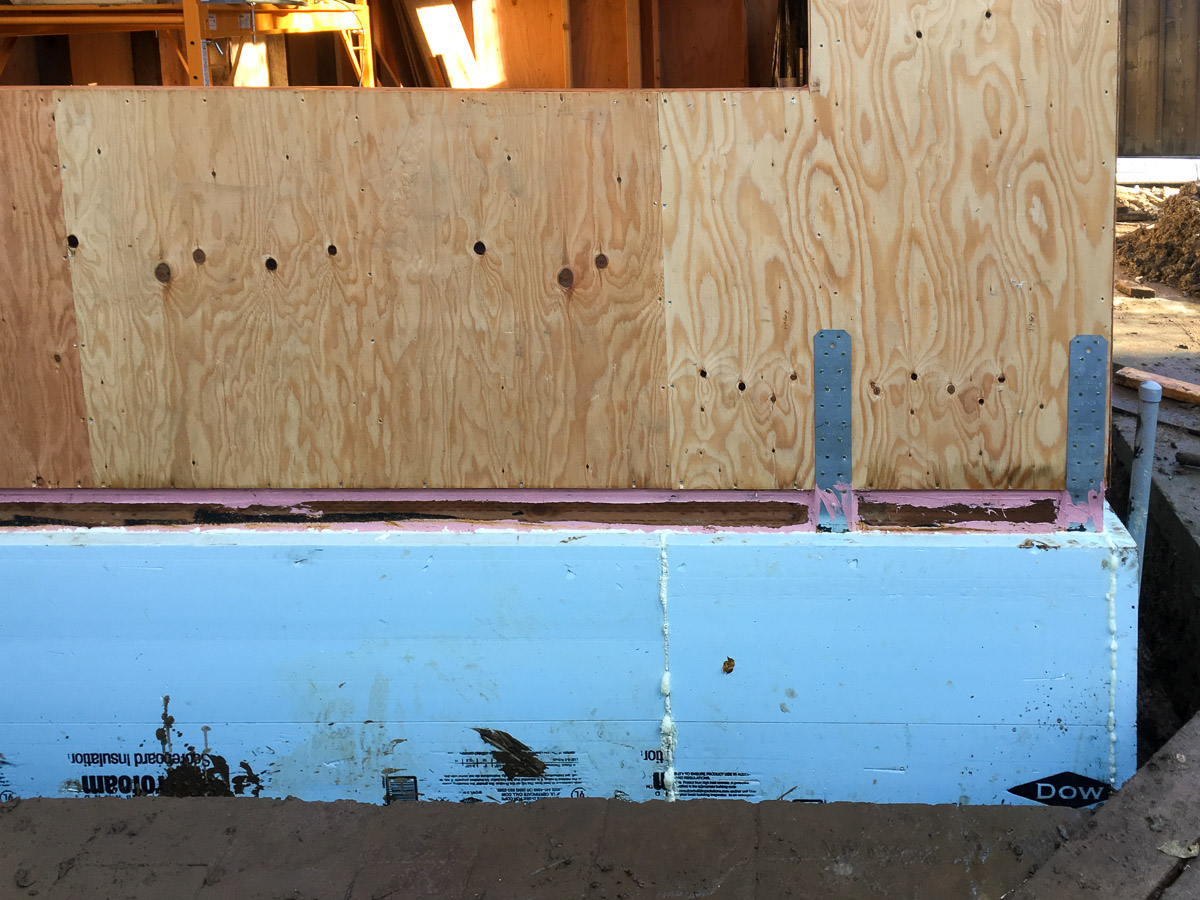
The north side of the ADU is fire-rated as it’s within 3 feet of the property line. This means DensGlass paneling goes over the ply sheathing on the north side, the first 4 feet of the upper roof deck will be fire-resistant plywood, and the interior north wall will be covered in fire-rated gypsum rather than standard drywall.
The DensGlass is not structural; that’s the job of the underlying nailed plywood. So the panels are screwed in rather than nailed.
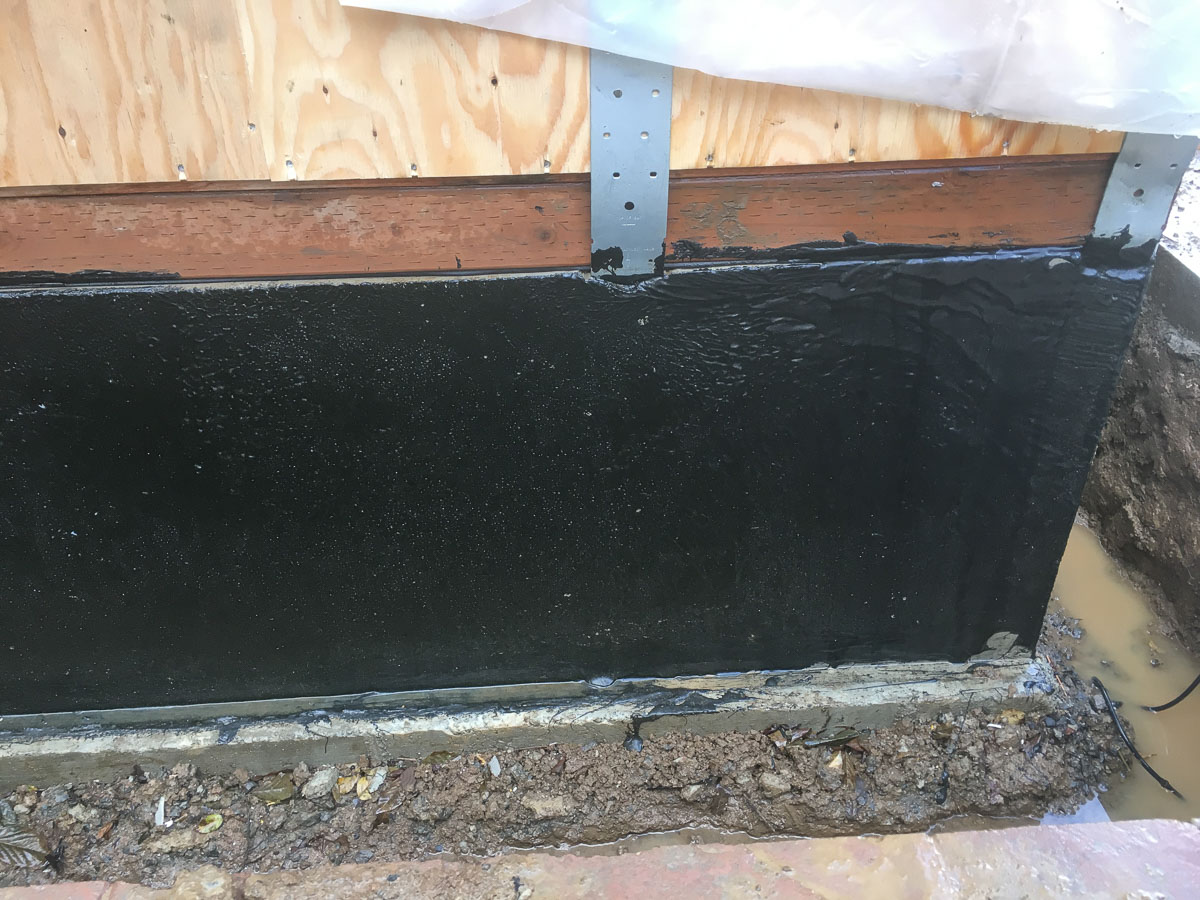
TREMproof 250GC waterproof coating has already been applied to the 2-foot deep slab edges, then 2 inches of XPS foam glued on using Dow EnerFoam. Now it was time to complete the slab drainage and protect and finish the above-ground part of the slab
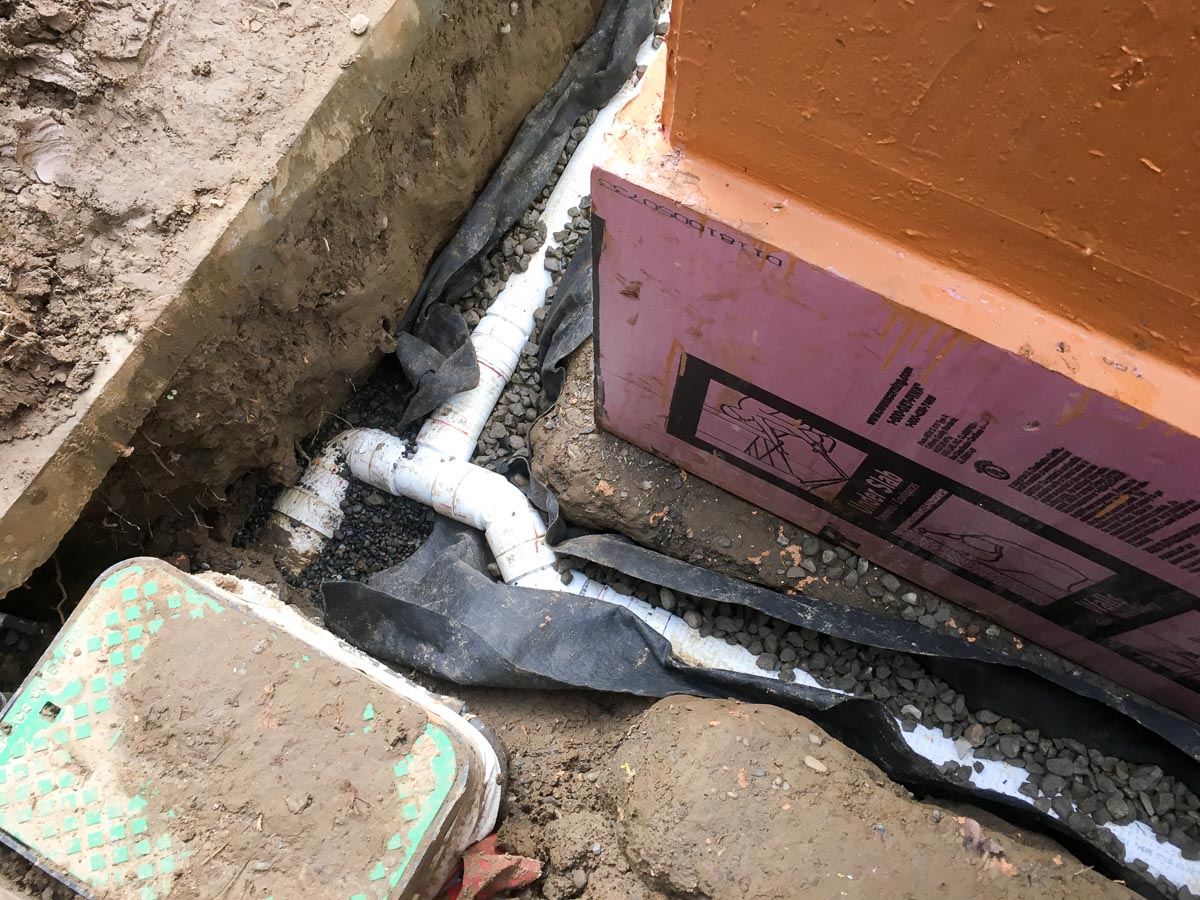
Footing Drain
Providing a footing drain was probably not required as it’s only a 2 foot deep edge-thickened slab, however I already had a dry well available that had previously been used hold rainwater from the back half of the garage roof.
The sequence was:
I used 3-inch perforated ABS drainage pipe sloped at 1/8-inch/foot around the perimeter.
Dig and correctly slope the trench
Geotextile fabric to help keep the drain clear of silt
2-inches of 3/4-in clear gravel
3-inch perforated ABS drain pipe
Adjust drain slope then cover in 2-inches of gravel
Wrap the remaining width of geotextile over the top of the gravel burrito style to slow down silt infiltration
3-inch perforated pipe bedded in gravel
I then used Dow EnerFoam to glue drainboard to the foam. The drainboard extends one foot from the top of the XPS insulation, down to the perforated drain pipe
I then filled in the trench to just below the top of the drainboard using soil and more gravel.
Drainboard glued to the XPS using Dow Enerfoam
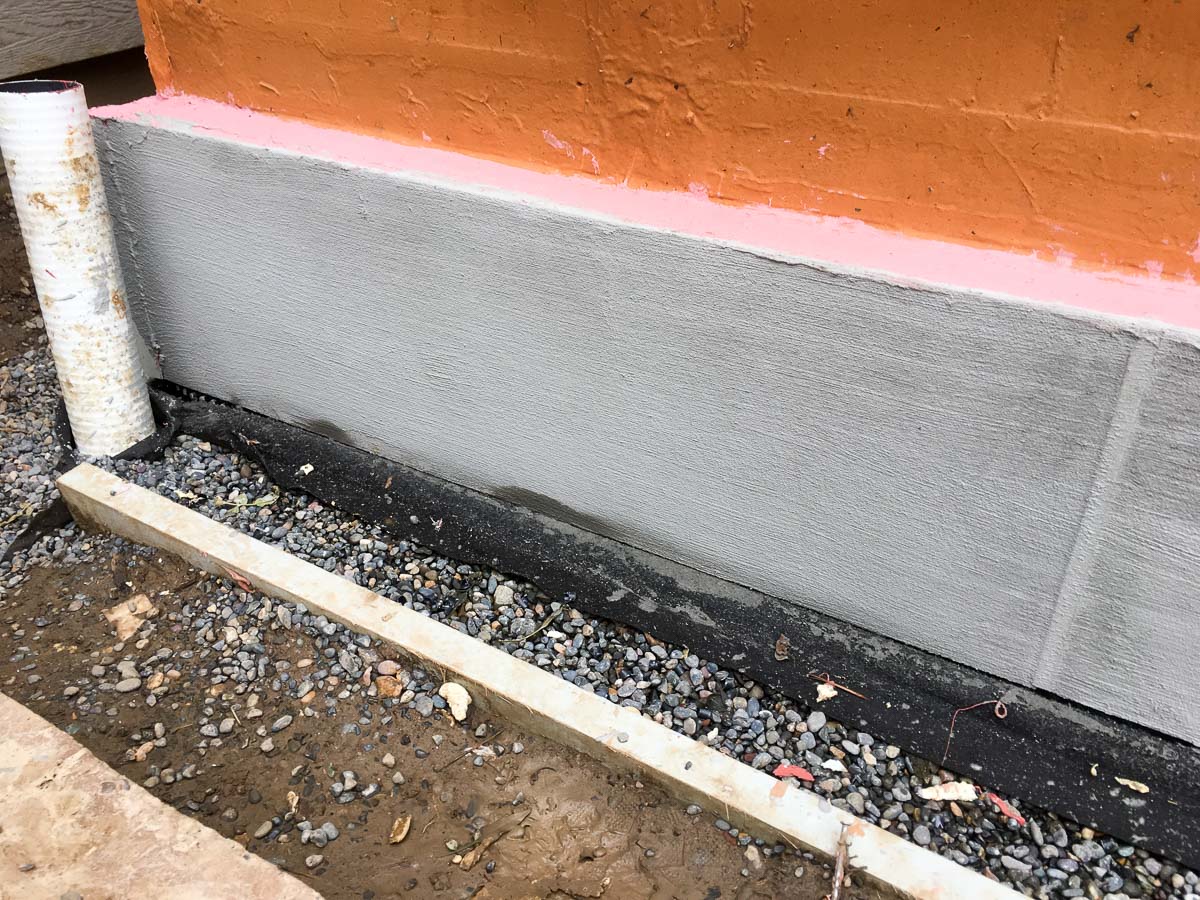
Finishing the Exposed XPS
The XPS needed to be covered and protected. Perhaps the best product available is Finex produced by a Canadian company. It contains little or no wood fibers and it’s rated for exposure to soil. However there is no Oregon distribution and the cost of shipping it down was too high for such a small project.
Hammer & Hand have used coated Hardiepanel in some of their projects so that’s what I did.
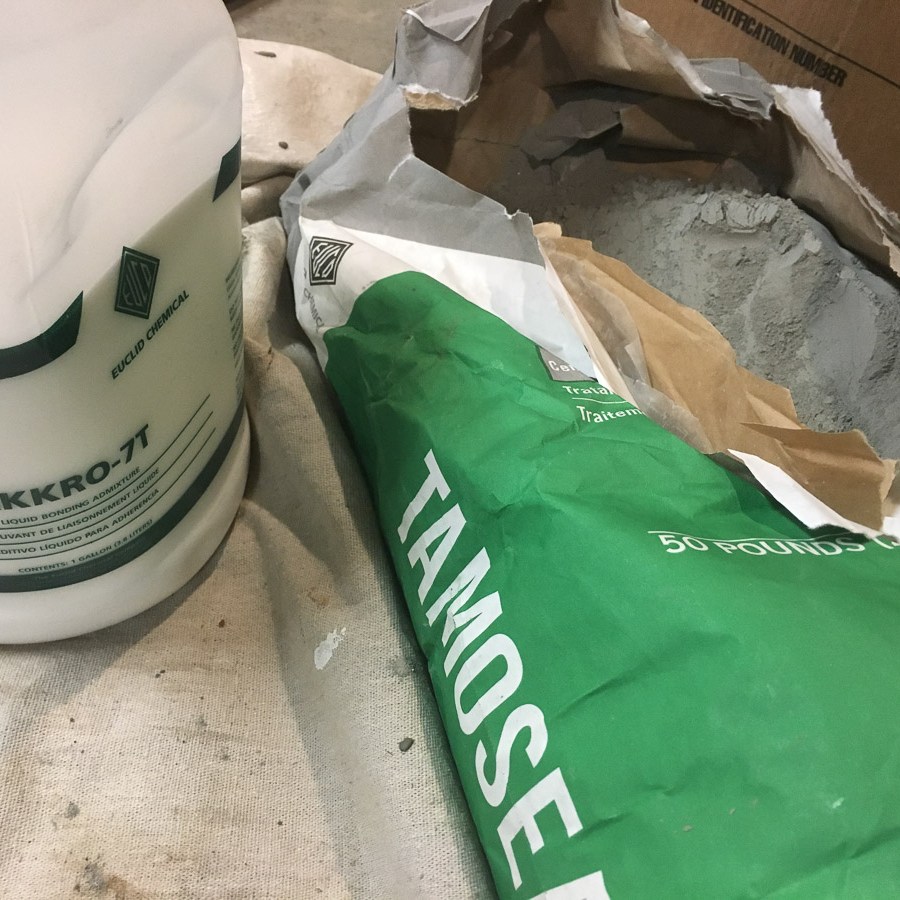
First cut the panels into foot-wide strips (for my foundation 8-inches above grade, 4 below), then apply one coat of Tamoseal on the front surface and four edges using a mason’s brush. Mason’s Supply in SE Portland has all the materials. The older guy at Mason’s took time to write down the mixing rations for the Tamoseal and the bonding acrylic for my application. The customer service there is excellent.
I then glued these coated panels to the XPS using Dow Enerfoam. I used Tamlyn flashing strips to protect the panel edges at joins and corners. Parr Lumber on SE Stark St in Gresham stocks this trim (my local Parr Lumber branch on MLK does not). There’s a display of the trim types on the left of the counter as you go in so easy to select what you need.
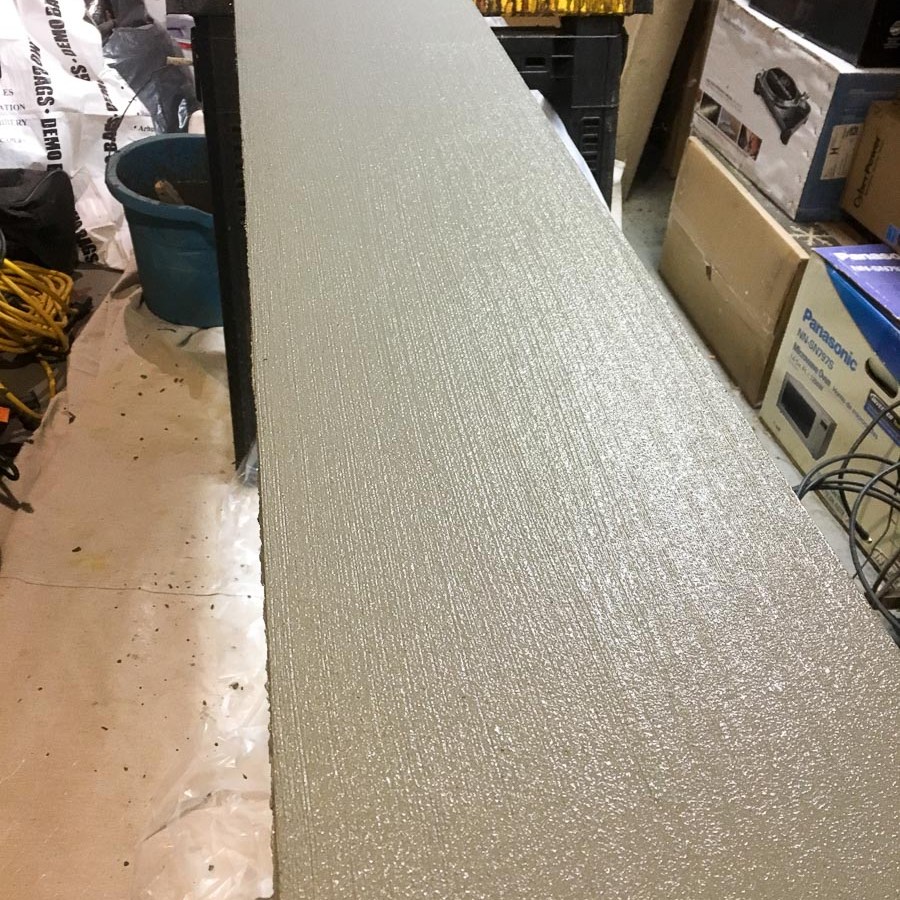
I then coated the mounted panels with a second coat of Tamoseal.
Tamoseal-coated HardiePanels attached to the XPS foam. (Tamlyn flashing strip visible on the right.)
I then applied two coats of Drylok (probably overkill).
Then two coats of paint.
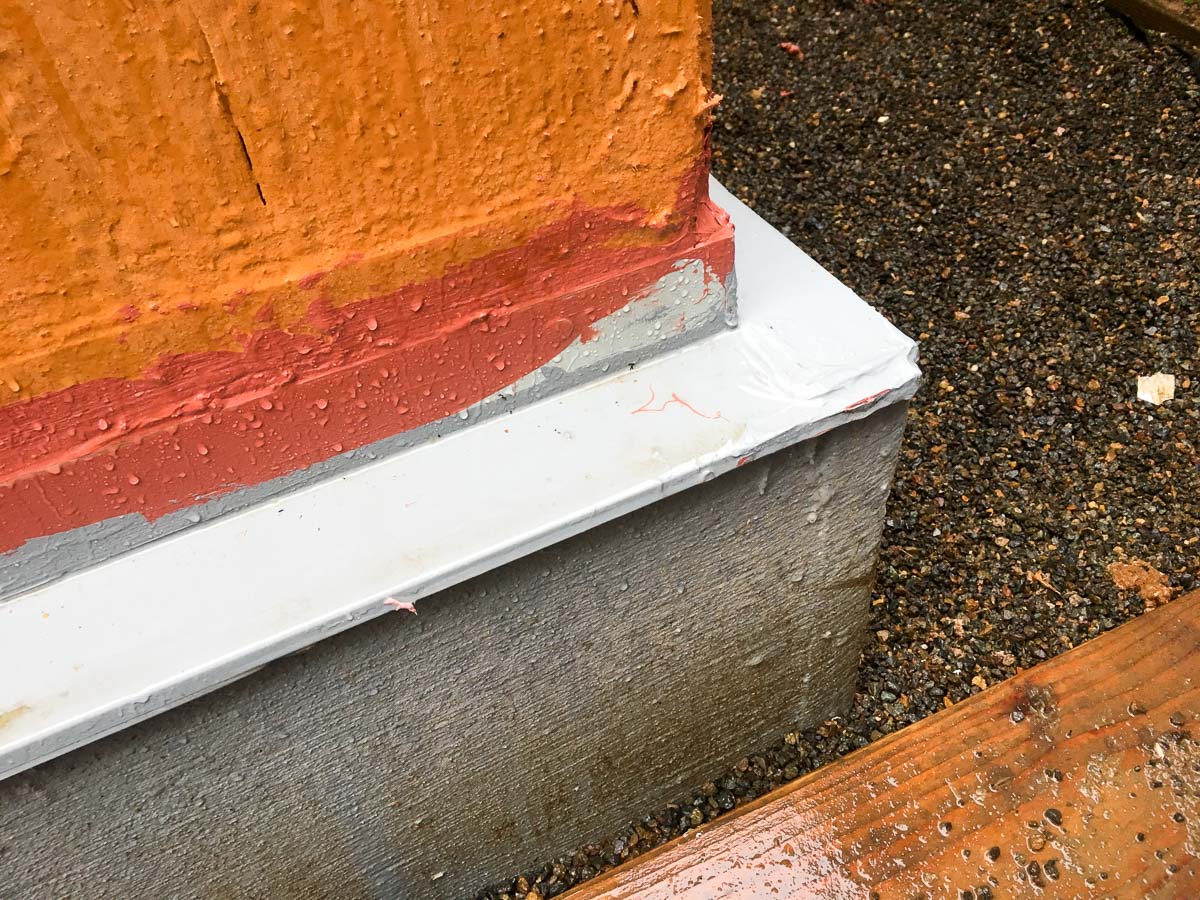
Finally I installed metal Z-flashing over the top of the XPS to protect it and keep the rain off. I’ve found the easiest place to buy this is Lakeside Lumber in Tualatin. There have an excellent selection graded by 1/4 and 1/2inch. I applied a bead of Prosoco FastFlash to the back top of the flashing, placed it in position then nailed in every 1-2 feet using stainless steel shingle nails. The flashed over the top seam using FastFlash. Do not flash the bottom; water needs to be able to freely drain out.
I then covered the bottom 4 inches of the hardiepanels using 1/4-inch clear gravel. I did this rather than use soil as I want water to drain away from the hardiepanels as quickly as possible given this product is not rated for ground contact.
Another technique I picked up from Hammer & Hand was the use of liquid flashing in place of traditional housewrap.
There are some advantages to liquid flashing: it’s relatively straighforward to apply – which is not entirely the case with housewrap which needs to be carefully shingled, especially so around window openings.
Liquid flashing also serves as an air barrier which is not the case for housewrap. Peel and stick membranes can block water and air however they’re expensive and I’d think difficult to apply without experience.
The product Hammer & Hand uses is made by Prosoco – a Portland based company. It’s well adapted for the Pacific Northwest as it can be applied in a damp environment and moisture helps it cure.
Initially I had the product shipped down from Small Planet Supply in Washington state but then found a local distributor: Atlas Supply in SE Portland.
It comes in sausage tubes which require a special caulking gun – not the usual Home Depot/Lowes product range at all. It’s an excellent caulking system: high capacity tubes, the nozzle doesn’t dry up and clog so easily. Best of all there is no bulky tube to dispose of later. Just the thin compressed skin. Here’s a photo of the reusable nozzle and the used skin.
Hammer & Hand also provide a bunch of videos that explain how to apply these products. This video demonstrates the R-Guard Joint & Seam Filler
My Experience
I used R-Guard Joint and Seam Filler wherever there was a gap between two plywood sheets, also between the framing, the concrete slab and the slab insulation foam. I also used it to fill in any large holes or imperfections in the plywood outer layer.
I used R-Guard FastFlash to fill in nail holes, to cover where two plywood sheets butt up to each other with little or no gap, and to flash the window and door rough openings.
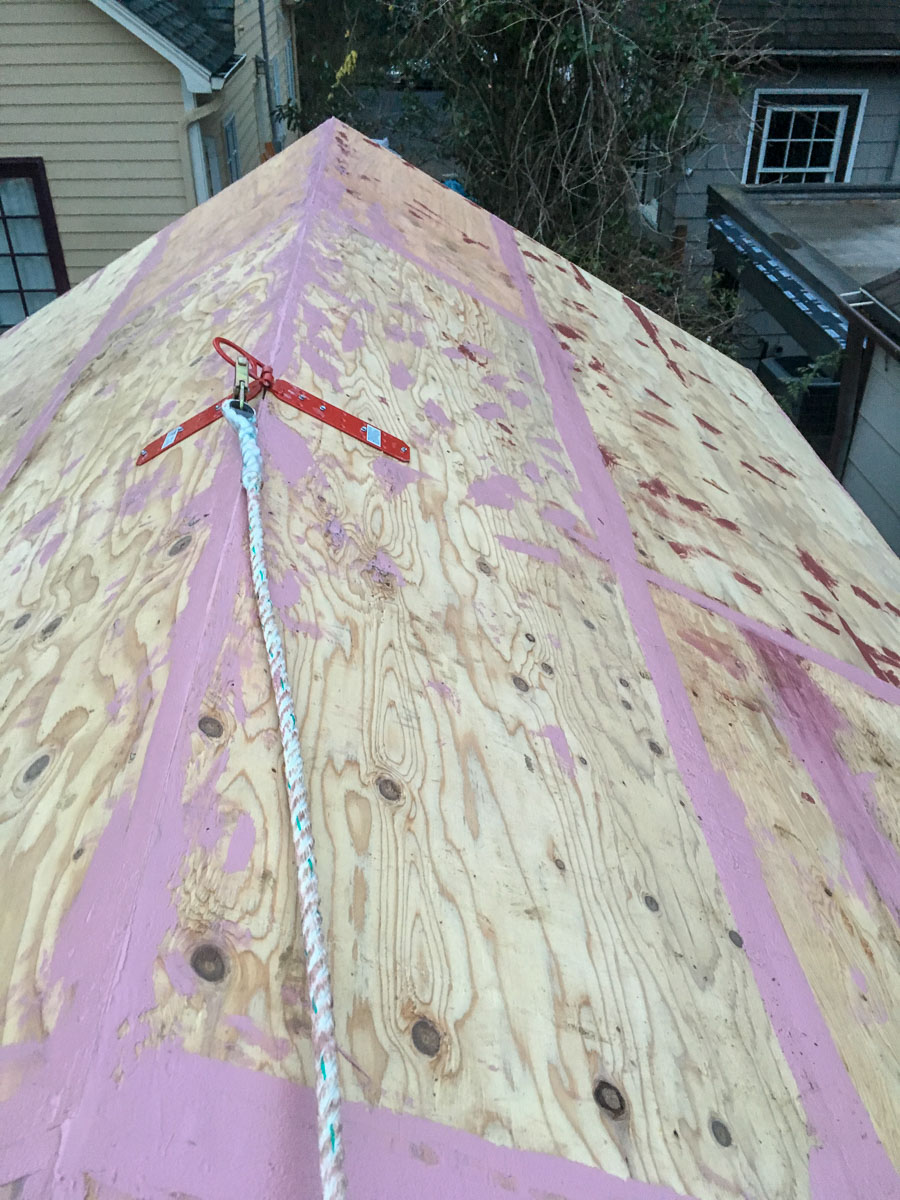
I used R-Guard Cat 5 to cover the roof and walls.
Some comments:
It’s more efficient to keep two caulking guns loaded – one with Pink Joint & Seam filler, the other with Red FastFlash. Initially I only used one gun and found myself continually swapping between the two products which wastes both product and time.
The most efficient way to work is to setup your ladder, then apply both Joint & Seam filler, and the FastFlash to that section of wall. Then move the ladder and do the next section. Finally, once both products have cured, then roll on the Cat 5 liquid membrane on the roof and walls.
I think it worth covering all knots in plywood sheathing with Red FastFlash. It’s extra product and work, however if you don’t do this then when you roll on the Cat-5 membrane there will be gaps left around the edges of some knots.
Protect adjacent surfaces with plastic before rolling on the Orange Cat 5. It sticks tenaciously and probably don’t come off whatever it lands on.
The product literature suggests these products can be applied in a damp environment however there are limits to this. The Joint and Seam and FastFlash fillers can be applied to damp surfaces but it requires more force on the plastic spreader tool to get it to adhere compared to a dry surface. They skin over quite quickly so you only need a half-day or ideally a full 24 hours of rain-free conditions.
The Cat 5 liquid flashing is another story. The surface is better dry as it’s only rolled on. It’s hard to get enough force on the roller to get it to adhere well to damp surfaces. I found that the Cat 5 membrane was not well adhered on one section of roof sheathing that had been quite damp when I rolled it on. You also need at least 2-3 days of no rain in cool winter temperatures, to allow the Cat 5 membrane to skin over and partly cure. It could be different in summer. The first time I applied Cat 5 to the roof it rained 3 hours later. This turned the surface into a spongy crater-like mess. Worse there was a wind-storm and a bunch of leaves and seeds from a nearby cedar tree embedded themselves in the membrane. I ended up spending hours picking out debris from the membrane, Finally I applied a second coat. This time when there was 4 days of clear weather forecast.
Here’s the structure after applying the Joint & Seam Filler and the FastFlash
Here’s the structure after the Cat 5 liquid membrane is applied:
The foundation design includes a waterproofing layer, rigid insulation, then drainboard and a protective cover.
Hammer and Hand
Hammer & Hand – a Portland-based construction company (they also have an office in Seattle) – are an awesome resource for constructing energy-efficient houses based on the latest building science. They have a repository of how-to videos for various projects that I have found invaluable. Their online “Best Practices Manual” and their youtube channel contain excellent information for DIYers.
One of their projects – the Pumpkin Ridge Project – contained a bunch of techniques for waterproofing and insulating foundation walls. In particular the use of an elastomeric waterproofing membrane, foam glued on using an adhesive expanding foam, and the use of Tamoseal-coated Hardiepanel to protect the foam above-grade. https://www.youtube.com/watch?v=tzLiXk-VXUY https://www.youtube.com/watch?v=IpvGF4dxNfo&t
Waterproofing
On the main house I used a bentonite-backed membrane (Tremco HDPE/Bentonite Sheet Membrane) to water-proof the basement walls below grade. It’s a sturdy product and I expect it will outlive the house. However that would be overkill for the ADU concrete slab where there is no interior living space to protect from water intrusion. One option was to get in a contractor to spray on a waterproof layer however it would have been difficult to do this at a reasonable cost. It would have also mean having to plastic wrap the fence and neighbor’s garage to protect against spray drift.
So instead I opted to roll on a waterproofing membrane myself. I’m a fan of Tremco products so I went with a roller grade of TremProof 250GC.
I’m gradually getting to know the main building product suppliers in Portland. TremProof is distributed by Dealers Supply Co. It’s a massive warehouse in NW Portland and a temple of Building Science Chemistry.
TREMproof is super-viscous (several minutes of mixing before use helps) and it pretty much destroys any clothing it comes in contact with – in that it’s never coming off.
It stuck tenaciously to the concrete although less so in a couple of spots where the concrete was wet. So only apply this to dry-ish concrete. Because of the cool temperatures (30s/40s) it took several days to cure. I’d think it could take some rain within 24 hours of application. Moisture helps the product cure although I’d think heavy rain could cause problems.
I caulked the seam between the concrete slab, and the mudsill to prevent water from running down behind the foam. (Prosoco R-Flash Joint & Seam Filler.)
Insulation
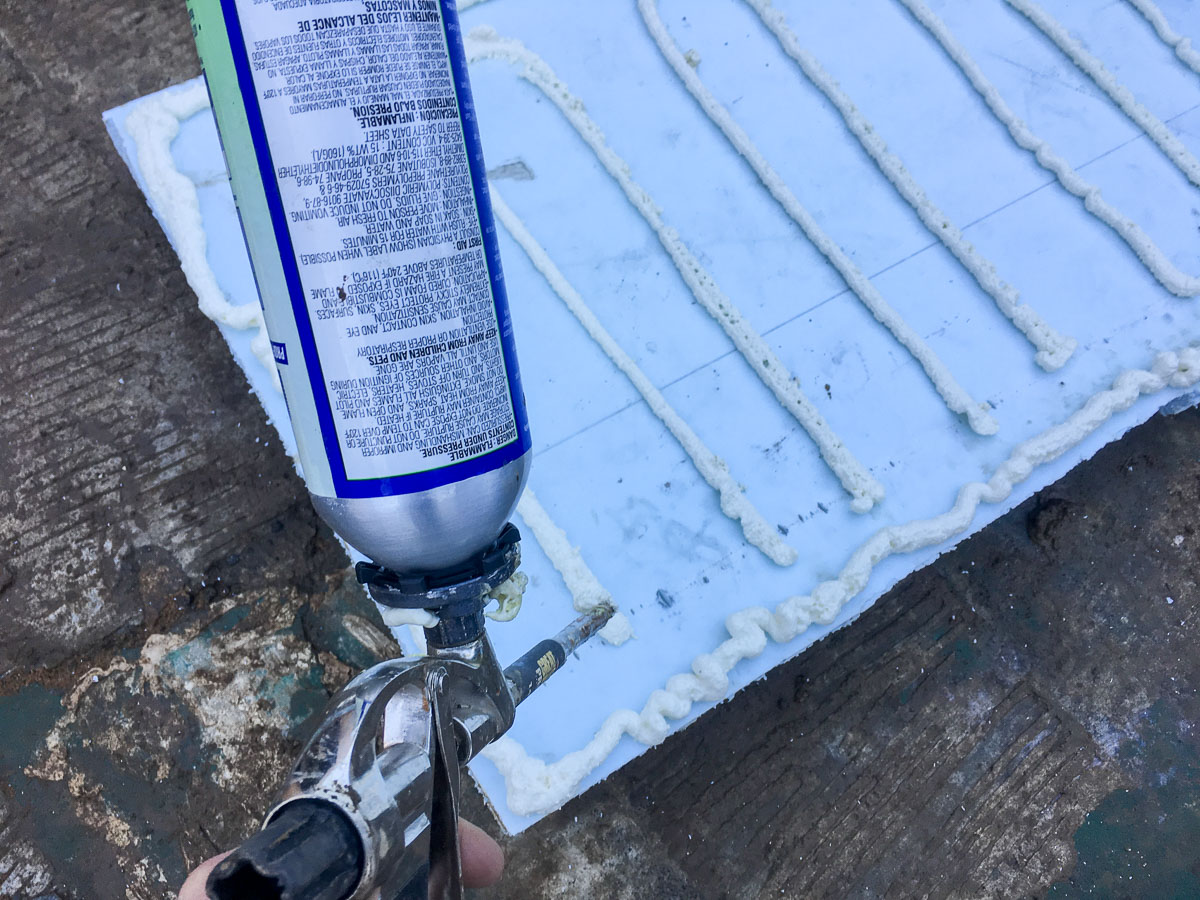
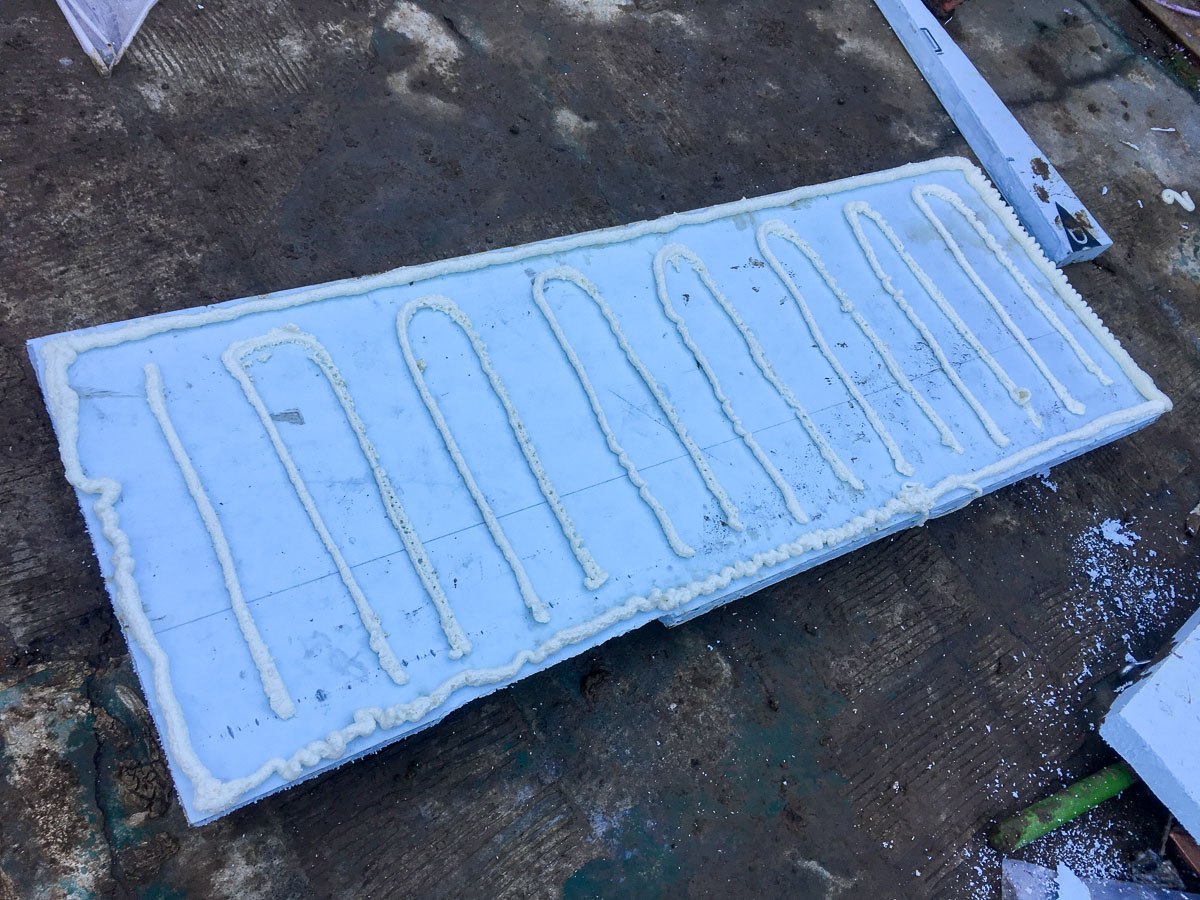
I’m insulating the outside of the slab using 2-inches of XPS foamboard. On the main house I used Hilti Insulation Anchors to attach the foam to the concrete. This requires drilling into the concrete slab. However Hammer & Hand use an adhesive foam – Dow ENERFOAM Foam Sealant – to glue the foam to the concrete. It’s an expanding foam – similar to Dow’s Great Stuff range – but with an adhesive mixed in. You can find more information here:
I couldn’t find a distributor in Portland – it’s definitely not at Home Depot or Lowes – and the consumer-grade expanding foams they stock are not the same kind of product at all. However Amazon was able to get it shipped from New Jersey within about 5 days. Because of the nature of the product it has to come by ground transportation – it can’t go air freight.
Hammer and Hand talk about covering the entire back of the XPS panel however that seems like a huge amount of foam and the gun doesn’t distribute it fast enough to do that, so I sprayed in a pattern. You only have a few minutes to get the panel pressed in place against the foundation wall as it starts to firm up quickly. It’s possible to move the XPS around against the wall to get it in position for a minute or two and then the adhesive really starts to grab on. I pounded the panel using my hand to squash the foam against the wall and get the gap as narrow as possible. I then used bracing to keep the panel under pressure while the adhesive sets up. It could potentially be braced for as little as 30 mins as it sets in place quickly.
It holds the foam in place very strongly. For example it was easily able to take the weight of heavy DensGlass panels being rested on the foam while they were being installed.
Protective Cover and Drainboard
This will be done at a later time as I need to have the city inspect the insulation before I cover it over.