An update after a very long break. I did finish this project, then moved to Florida, and I’ve been busy since, so the blog got paused.
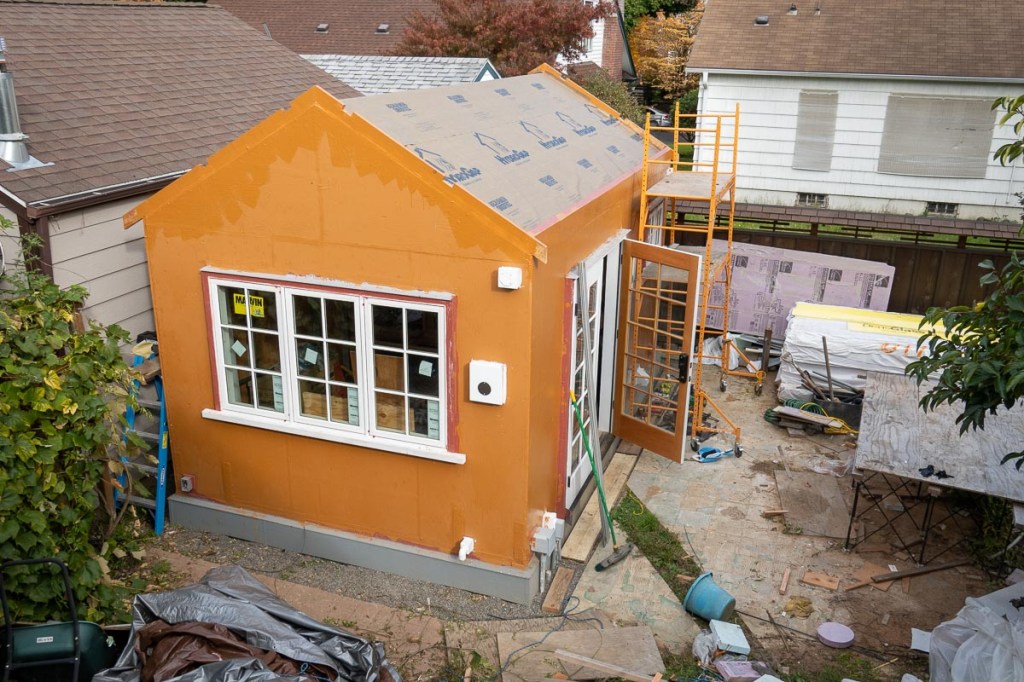
Here’s the final result completed in early 2021.
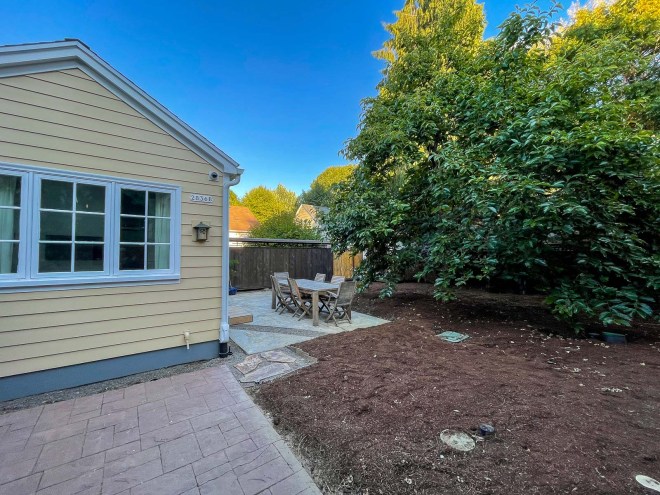
View of the ADU from the main house driveway
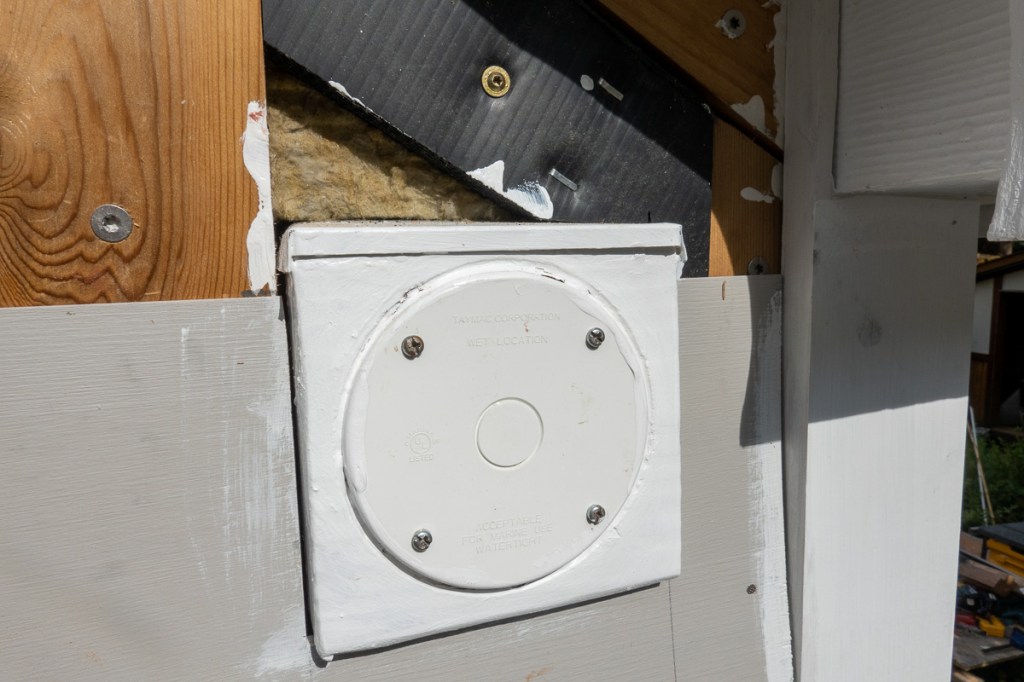
I added a secure entrance to separate it from the main house. Also added a USPS post box and package delivery drop.
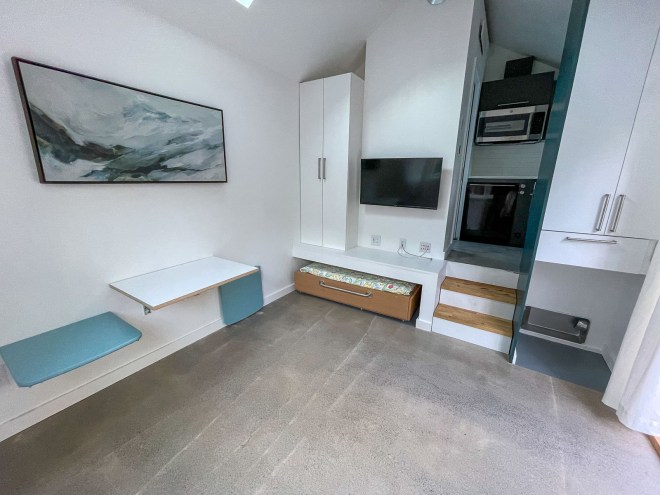
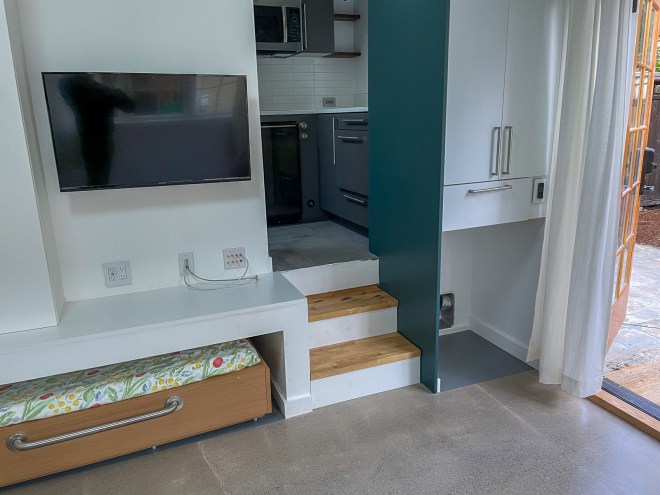
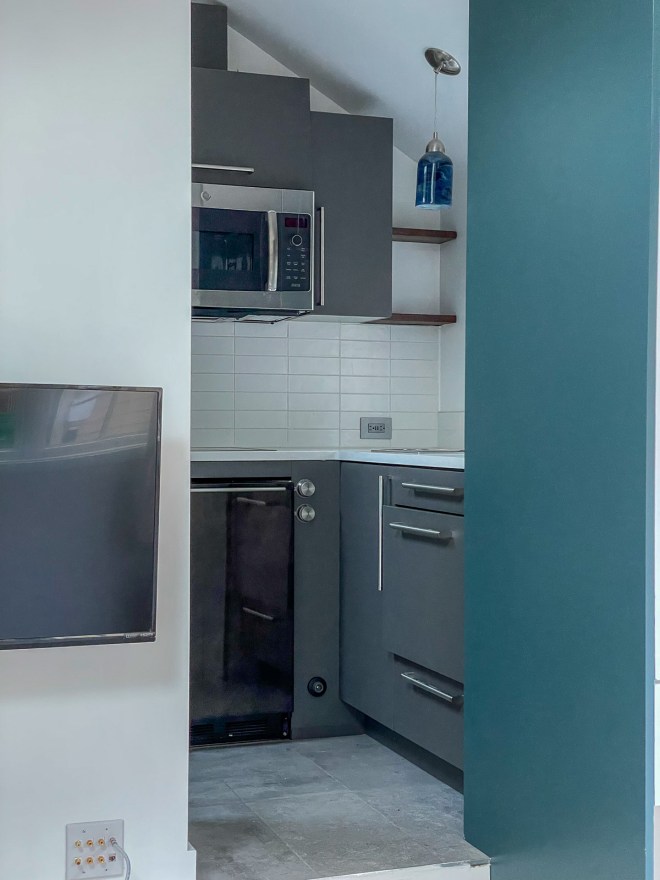
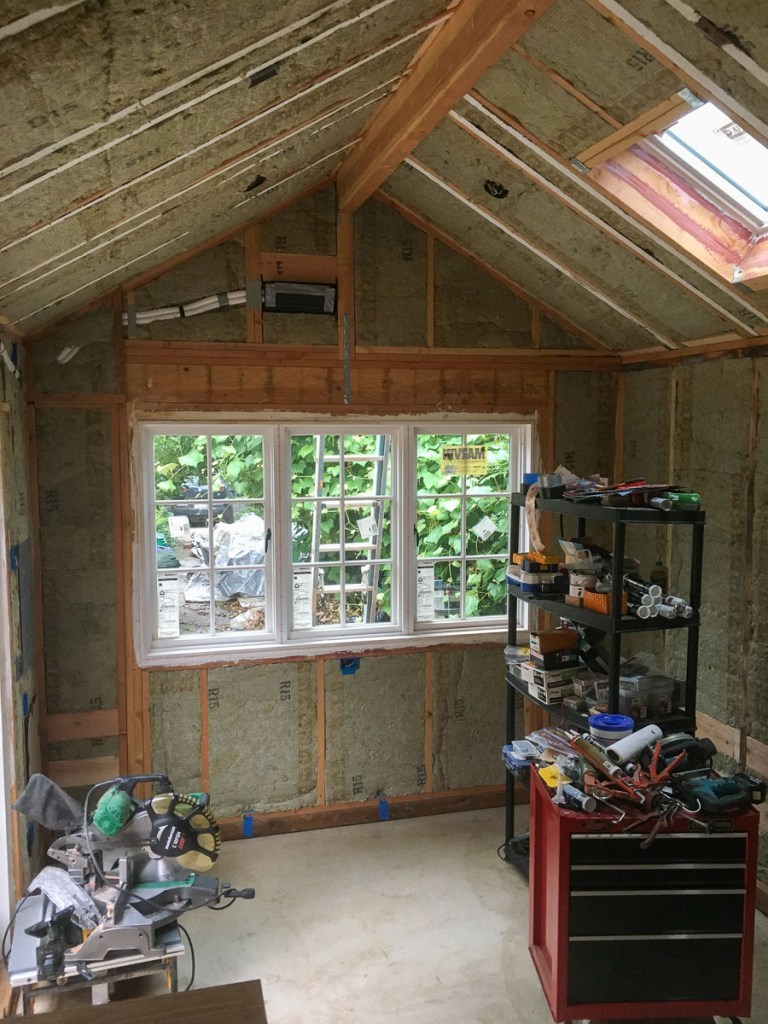
ADU and Garden, Outdoor diningMain roomSteps to the kitchen and bathroomKitchenKitchen from the bathroomMain room ceilingBathroom from the kitchenShower product niche and lighted mirrorBathroom vanity
Then in April 2021 I moved to Florida. But that’s a whole other story!! Now my new project is a 1964 concrete Florida house, located in the original neighborhood built to house the Apollo mission workers.
The corner trim pieces (1-inch dimensional cedar) went on first nailing into the corner strapping.
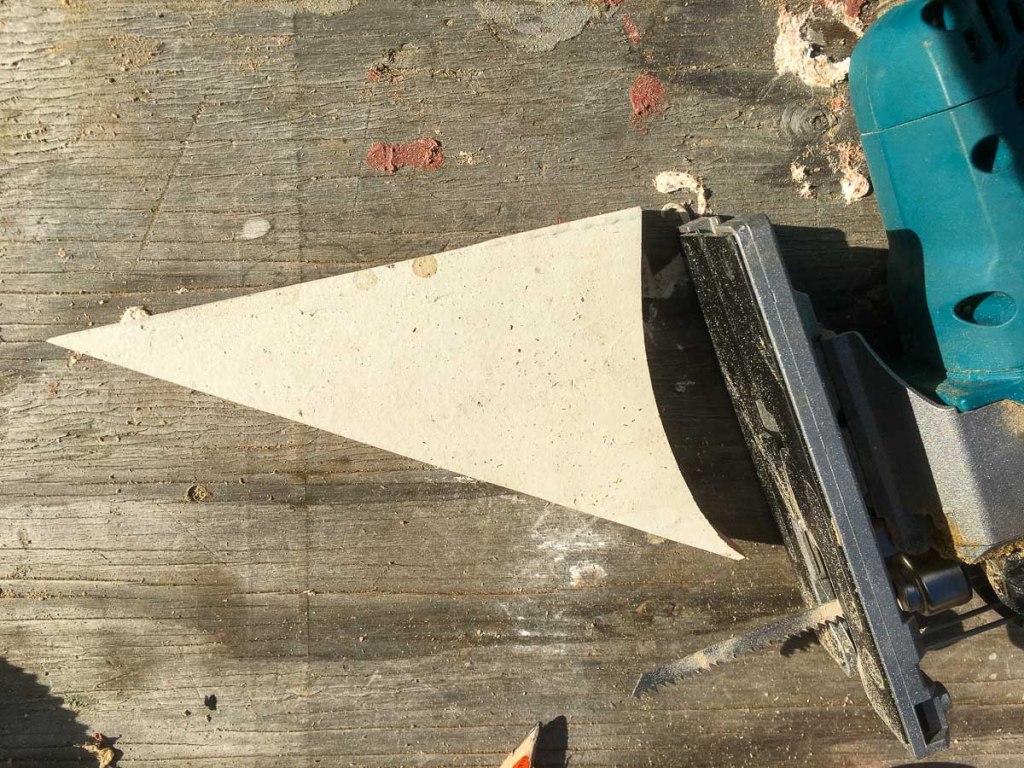
Beveled Cedar Siding
I used primed beveled cedar siding. This was a major expense coming in around $2,600 for the wood. (Sourced from Parr Lumber)
I used the Gecko Gauge SA90376 Siding Installation Tool. This facilitates one-person siding installation and also helps ensure the boards go in level.
I left a 1/8-inch gap between the siding and the corner trim to allow for expansion and contraction. This gap was later filled with latex sealant.
I put metal flashing behind each butted joint.
I used Simpson S4SND5 4d Cedar Siding Nails 1-1/2″. These stainless steel nails are more costly than regular hot-dipped or galvanized but are relatively immune to corrosion from the cedar wood resins. I drilled a hole and hand drove the nails to reduce the risk of splitting the boards.
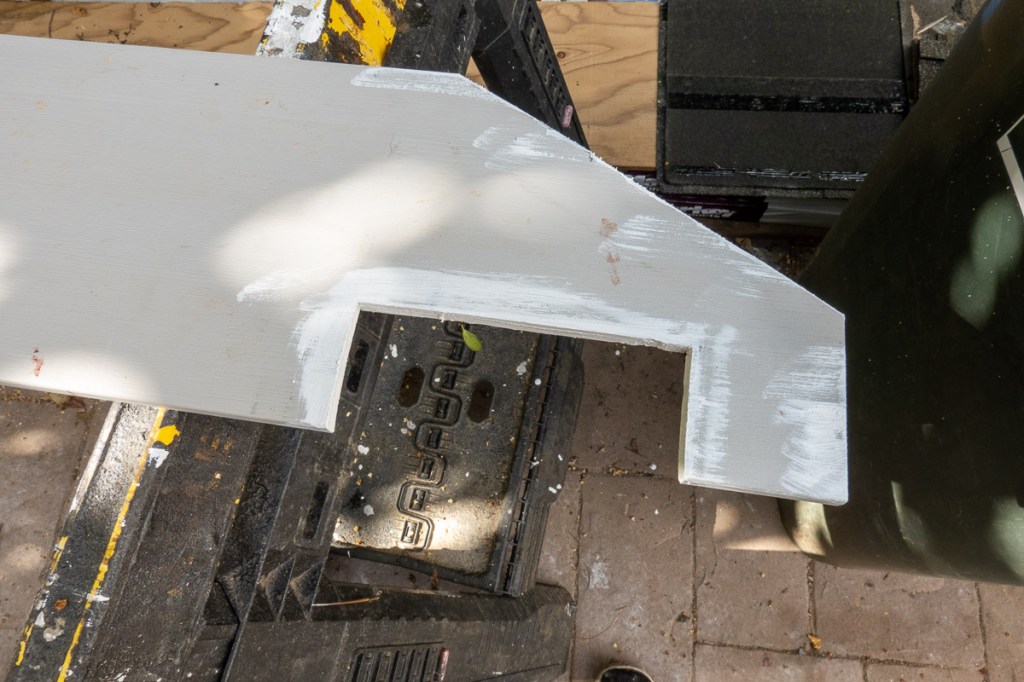
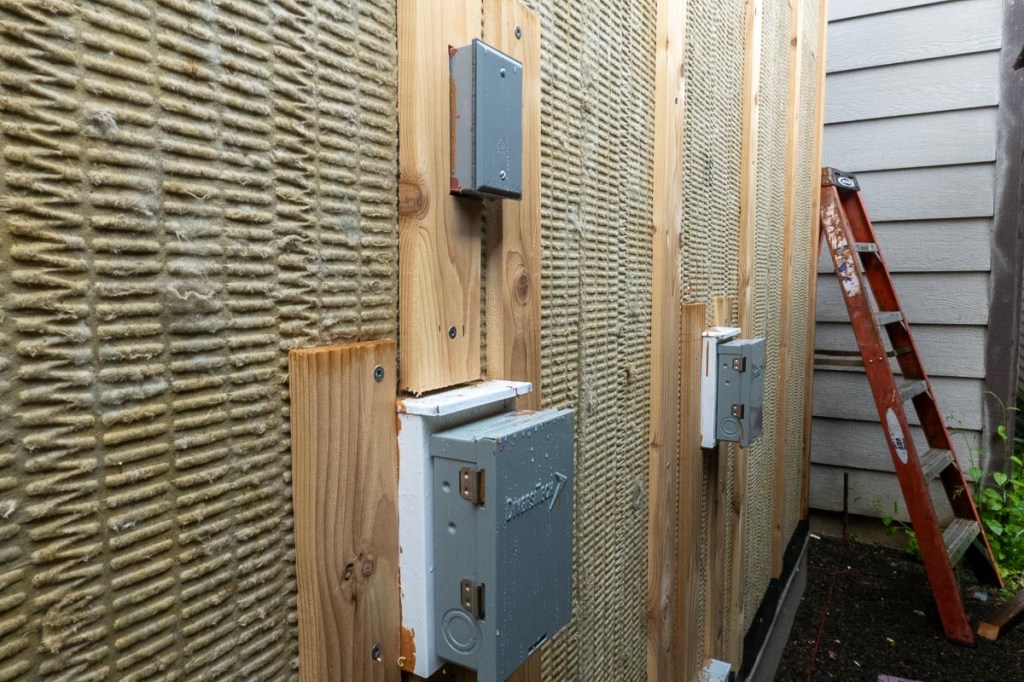
All cut surfaces were primed before installation. In this case I’m fitting the siding around a security camera mounting point.
Trimming out the Rainscreen
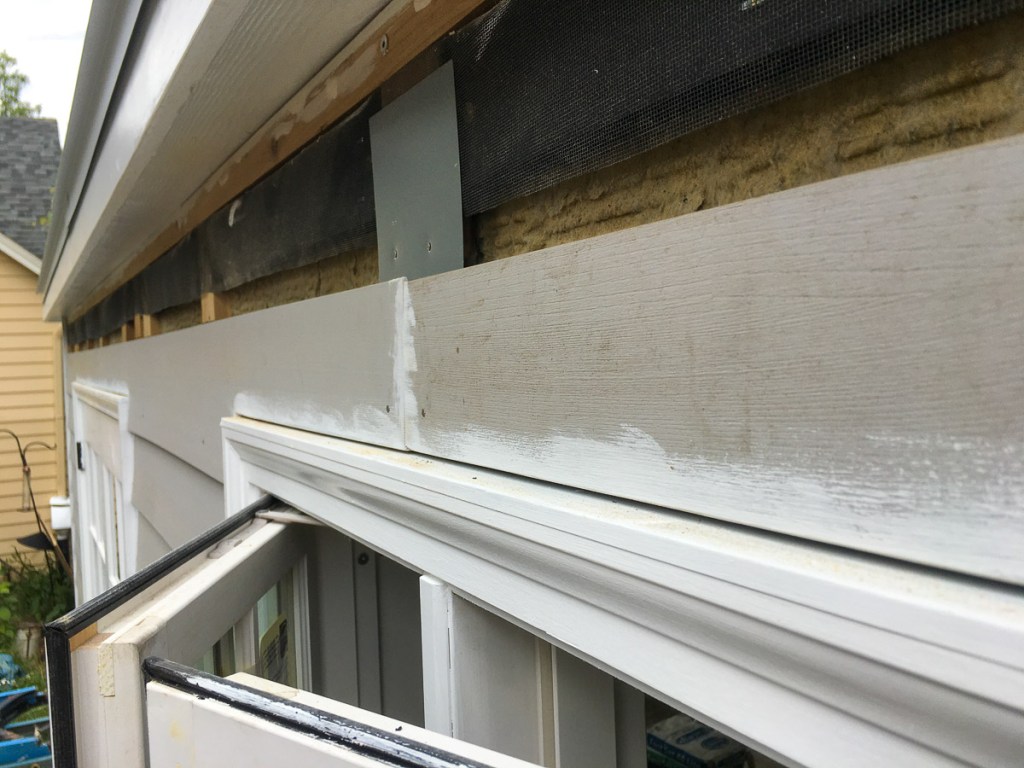
Above each window and above the door frame there is a ~1/4-inch gap to allow air to move into the rainscreen cavity.
I used a table saw to rip trim piece that go at the top of the wall at the gables and eaves. The 1/4-inch gap allows air to rise up inside the rainscreen cavity and escape out the top. I used insect screen to prevent bug intrusion through this gap.
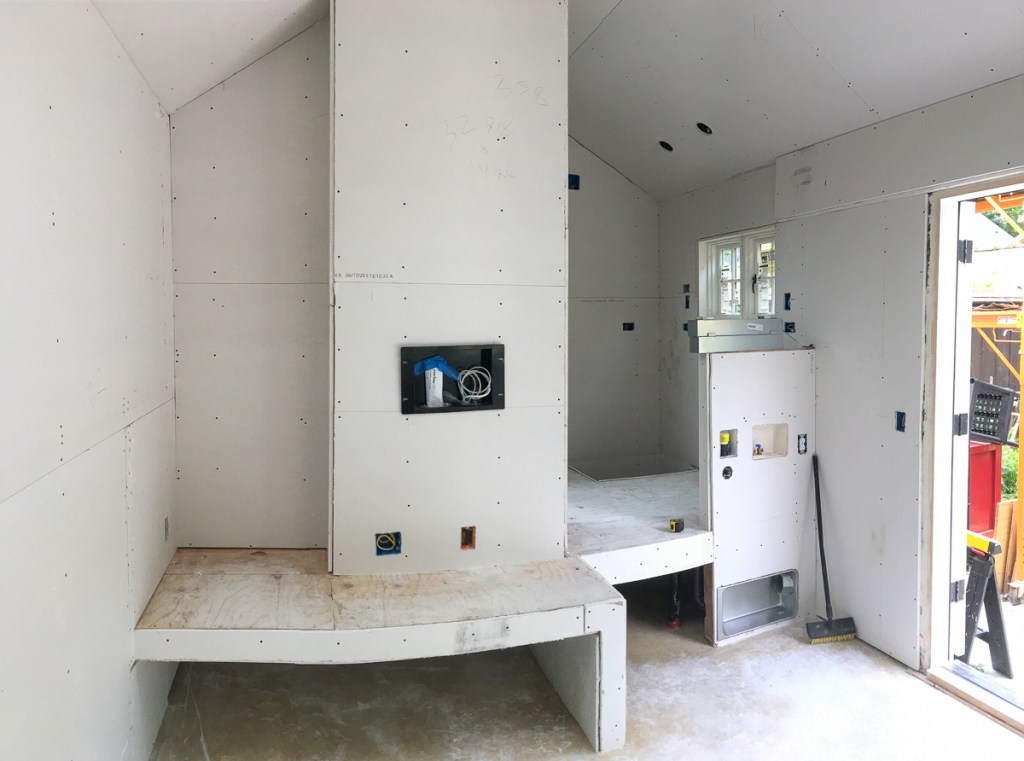
I used “Alternative Drywall” and they did an excellent job.
I specified 5/8-inch Type X board as one wall was required to have a 1-hour fire rating. To keep things simple the drywaller used this material throughout. The contractor used Certainteed.
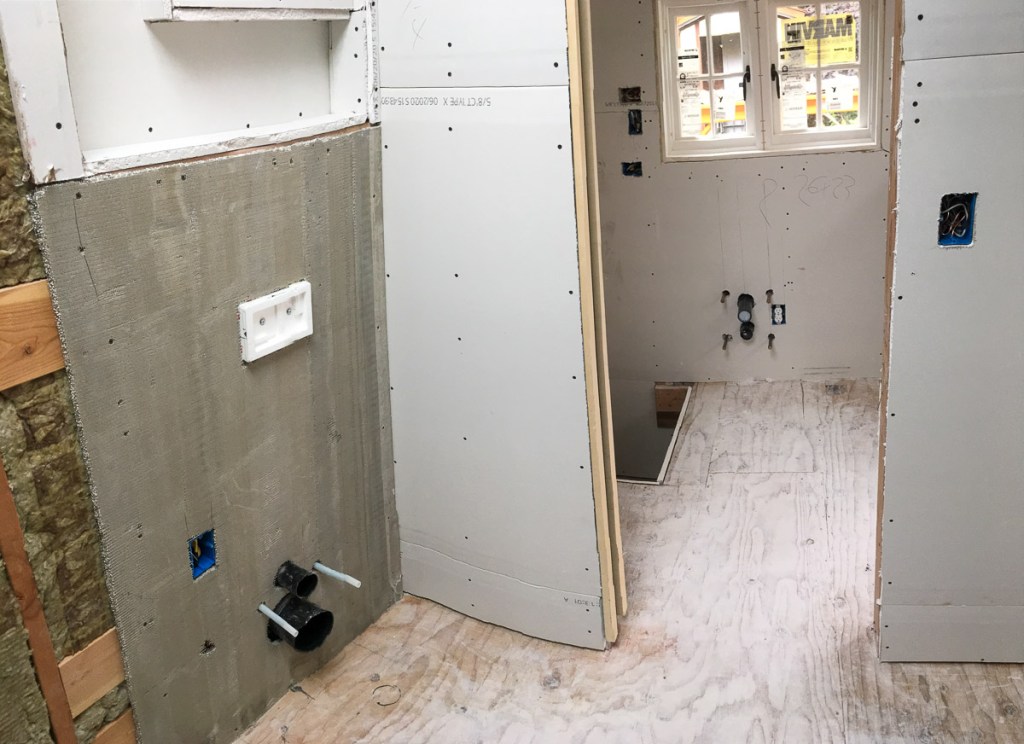
The wall behind the wall-hung toilet cannot be drywall; instead it needs to be cement board. The contractor used National Gypsum PermaBase 5/8-inch for this.
I was unable to source 5/8 Permabase a month later when I went to start on the shower construction. The only thickness available to a consumer like myself was 1/2-inch. So I used a combination of DuRock 5/8-inch and PermaBase 1/2-inch for the rest of the bathroom.
Permabase 1/2-inch is available from Florida Tile in NW Portland. They won’t sell direct to a home owner so I purchased through Campbell’s Tile Concepts. Durock 5/8-inch is available from GTS Interior Supply also in NW Portland and they will sell direct.
Drywall Installation
They completed the job by spray-painting with a primer coat.
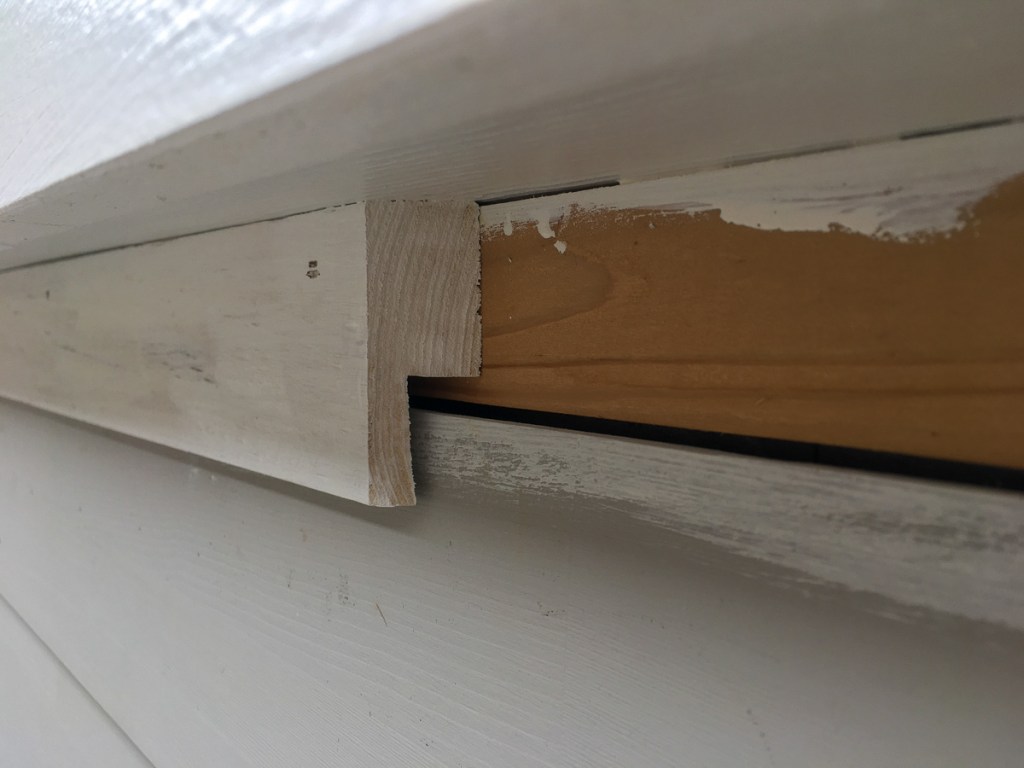
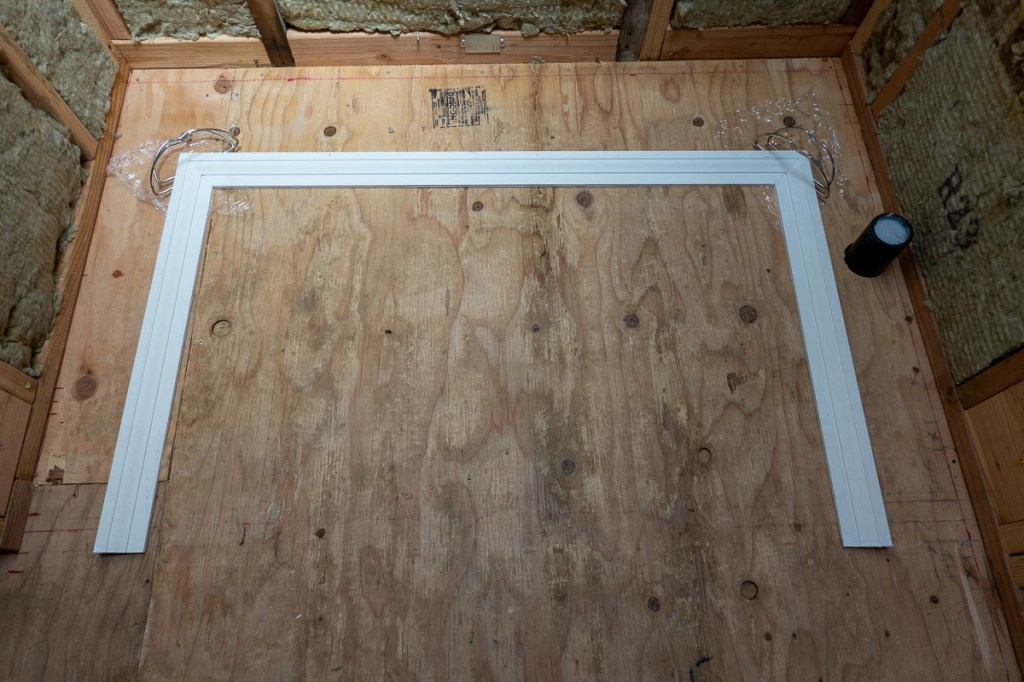
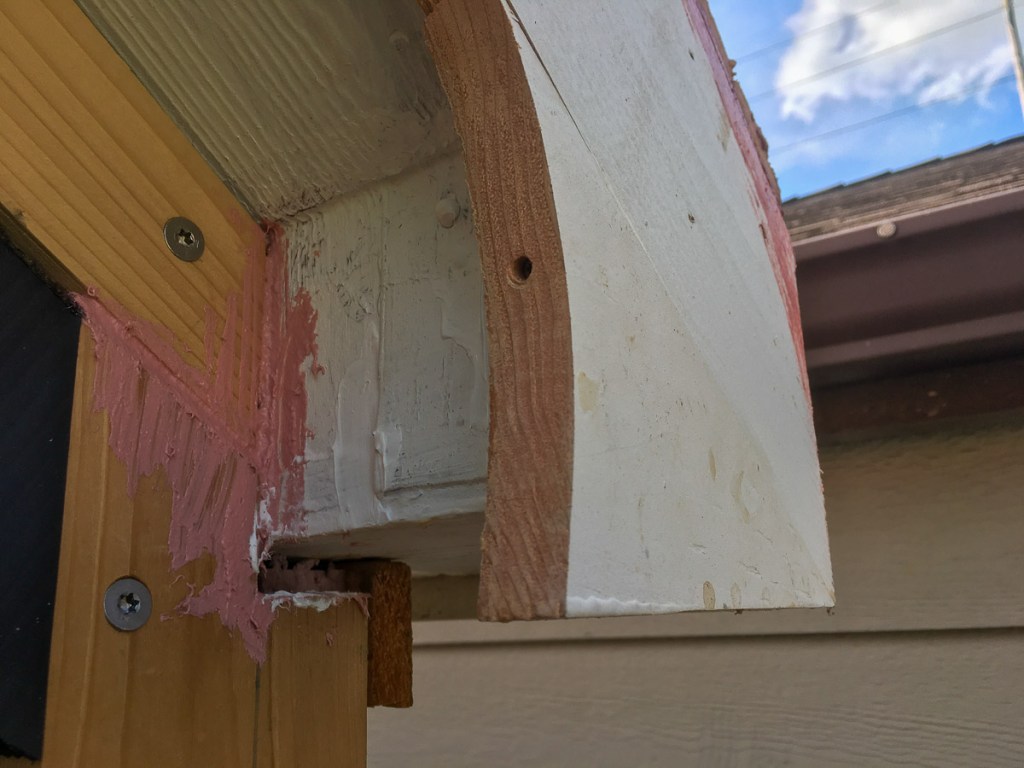
A miscalculation here. I planned my window and door bucks and the metal cap flashing assuming the trim would be 3/4-inch thick. Wrong! Trim comes in 5/4-inch standard. If I’d left the trim at 5/4-inch then it would have protruded too far out forcing me to extend the metal flashing.
So I had to rip the trim down to 3/4-inch on a table saw.
I assembled the trim on a workshop table, glued and tacked them together using butterfly clips Then installed the trim in one piece like a picture frame. It’s easier to get the miters good and true this way rather than putting it together piece by piece on a vertical surface.
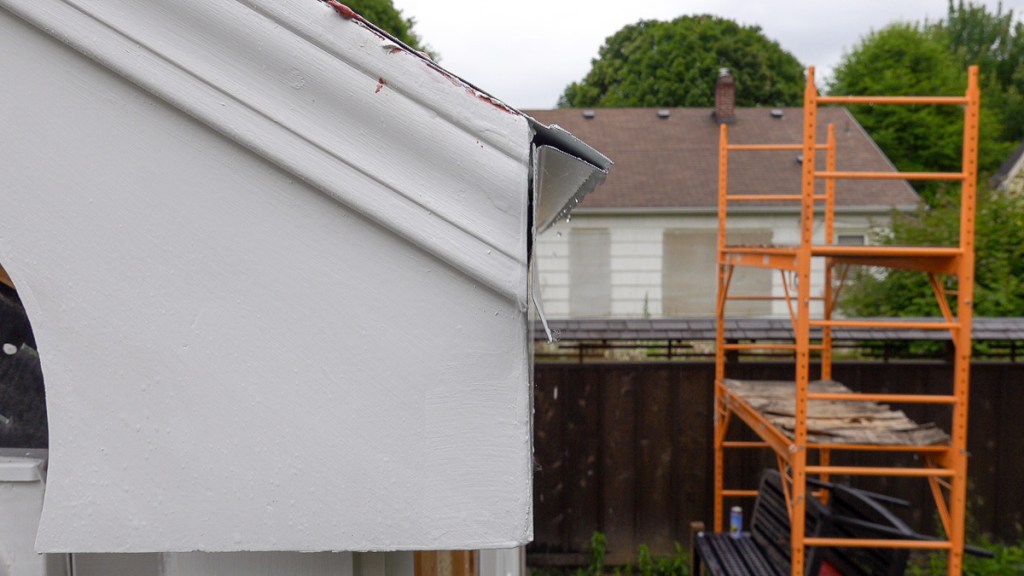
Gable End Detail
As it’s a historic structure I needed to add a gable detail back in.
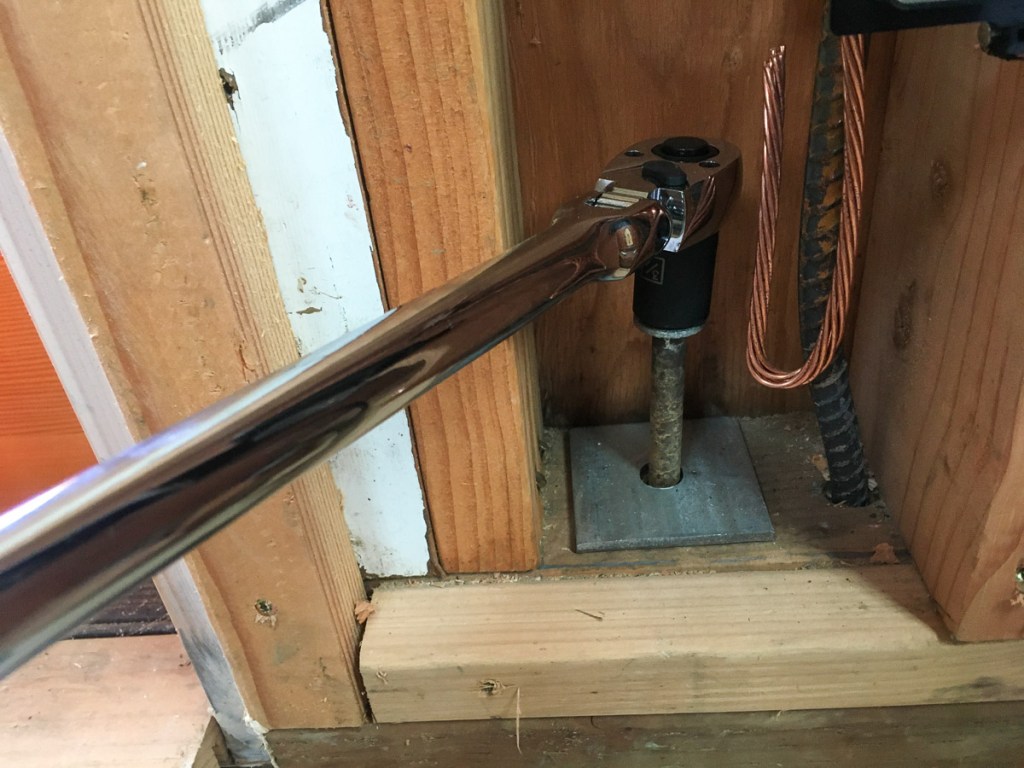
During a previous inspection – I think it was for framing – the City had called me out on the anchor bolts.
Portland code requires the anchor bolts be installed with square washers to prevent pull-thorough under load. The builder had installed with no washers. I thought they needed the washers but the builder said it passes without.
Sometimes I have a feeling that the City comes down harder on DIY homeowners than the builders, although I’ve heard the opposite as well.
Anyway, I backed out the bolts – an good drill helps – also used a wrench where headroom was restricted. The washers are kind of spendy at around $5/each.
I was concerned the replacement bolts would not go in quite as tight so I epoxied any that were going in too easily.
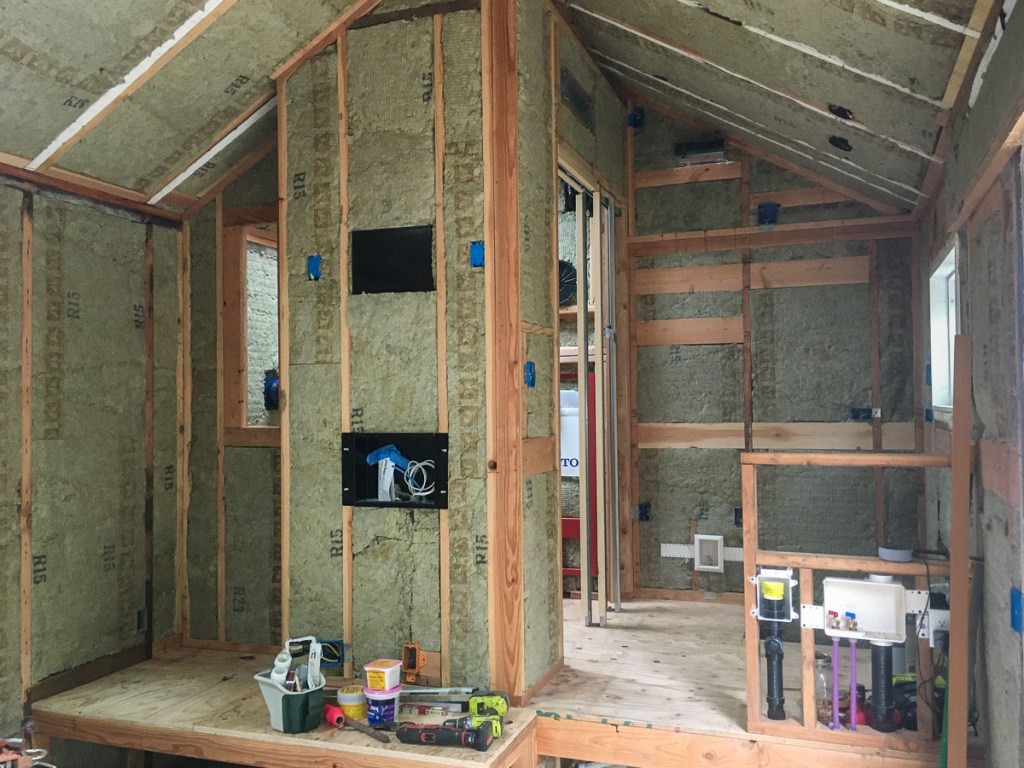
I used Rockwool ComfortBatt for the interior insulation.
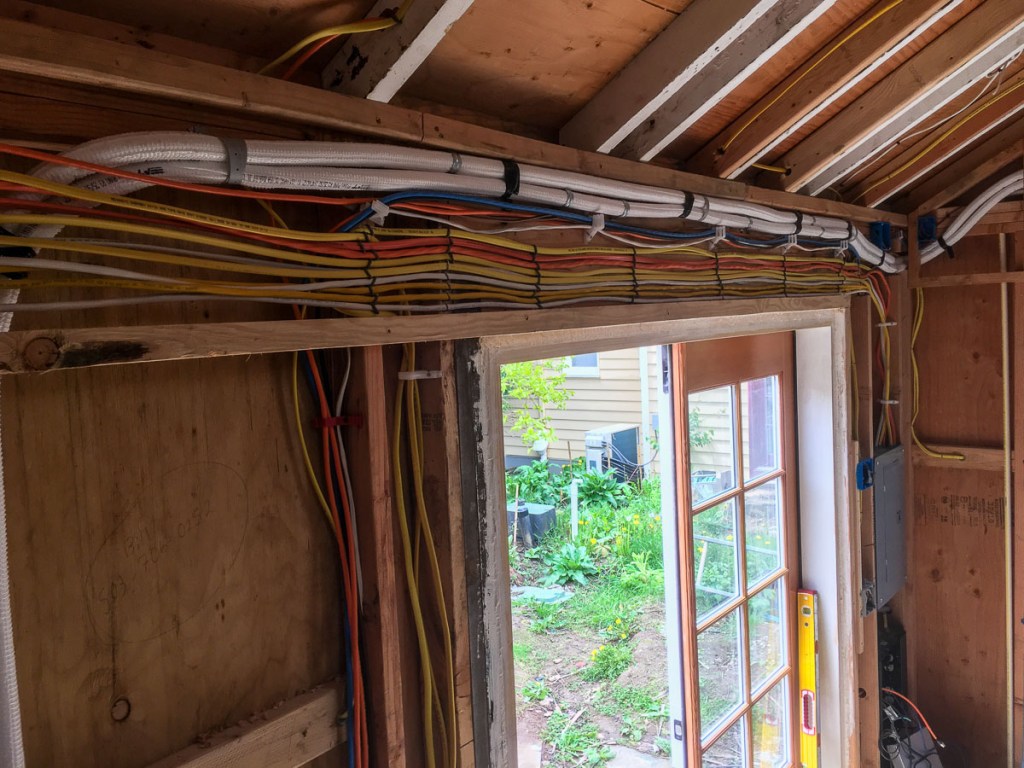
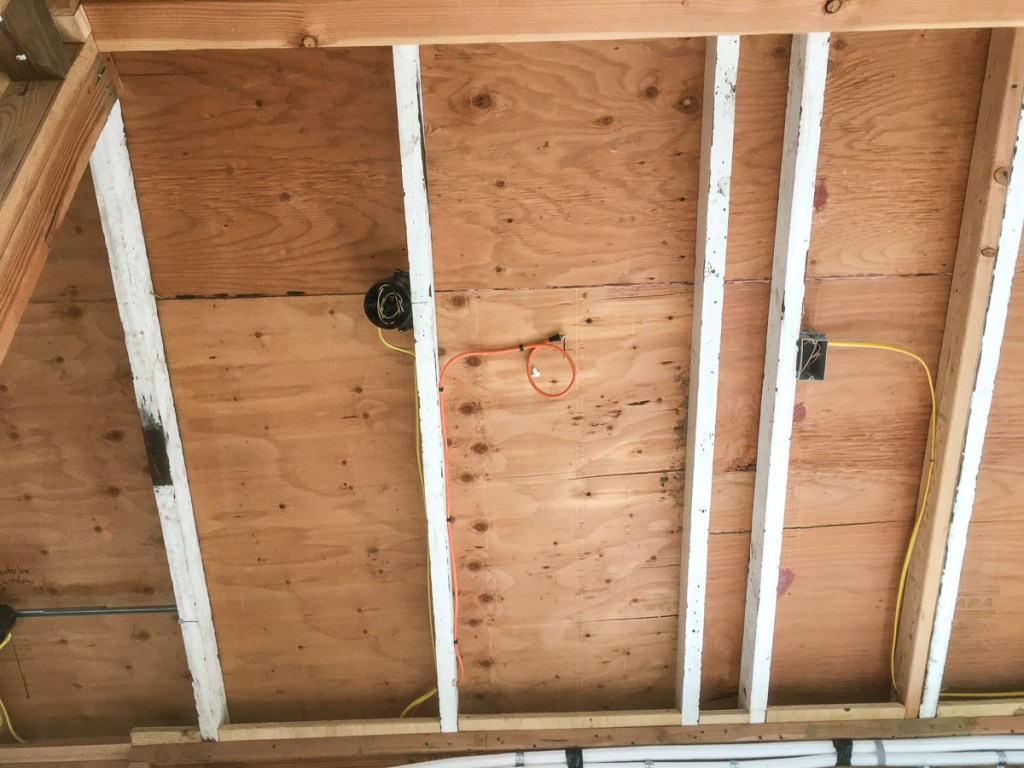
Before installing the insulation I photographed the wiring to keep a record of this before it was covered over.
I also installed insulation in the interior walls for the bathroom. It’s a small space so anything the helps reduce noise coming from the bathroom, plumbing noise, is good.
I used Rockwool for both exterior and interior insulation. It’s slightly more expensive than XPS however not a big deal considering most of the cost is labor.
I was wondering how difficult it would be to work with, whether it would compress too much under the strapping, however overall I found it easy to cut and install.
Stud markup
I carefully marked out the location of all the studs on the exterior using a marker pen. This is important to get right as the strapping has to be fastened by long screws through up to 2-inches of rockwool and the ply sheathing to hit the center of the stud.
Exterior Rockwool panels
Rockwool cuts easily with any serrated blade.
I used 2-inch rock wool on two sides. I was limited to 1-1/2-inch rockwool on the two sides within the lot setbacks.
For the back of the ADU I ran out of rockwool and had to switch to XPS for half the wall as there was no 1-1/2-inch rockwool available locally. (2-inch seems to be a standard thickness.) I transferred the stud markings onto the rockwool as I installed each panel.
I used Round Cap roofing nails to hold the panels in place until the strapping was installed. It’s only necessary to use 4-6 of these per panel as the strapping is what will really hold them. You need to think about the length of the nails and whether you’ll be embedding them into a stud if you want to avoid penetrating the sheathing and creating a potential path for water and air.
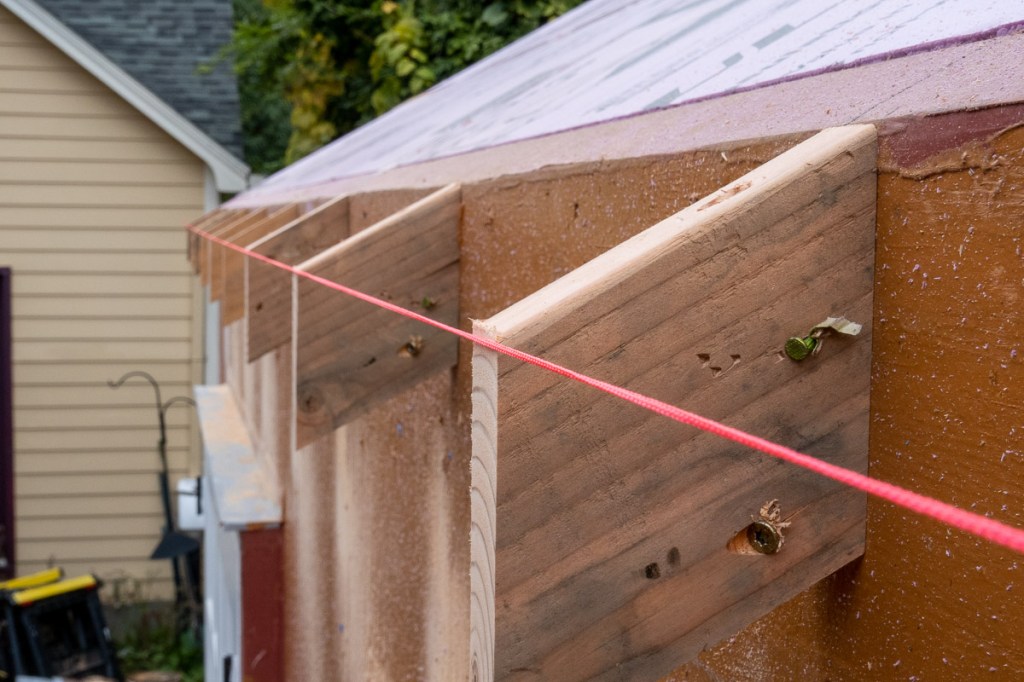
Strapping
I used 1×3 strapping for the interior field, 1×4 strapping for the corners. Cedar happened to come in the length I wanted however this made the strapping actually quite expensive. It was overkill and I suspect some kind of spruce or fir would have made more sense.
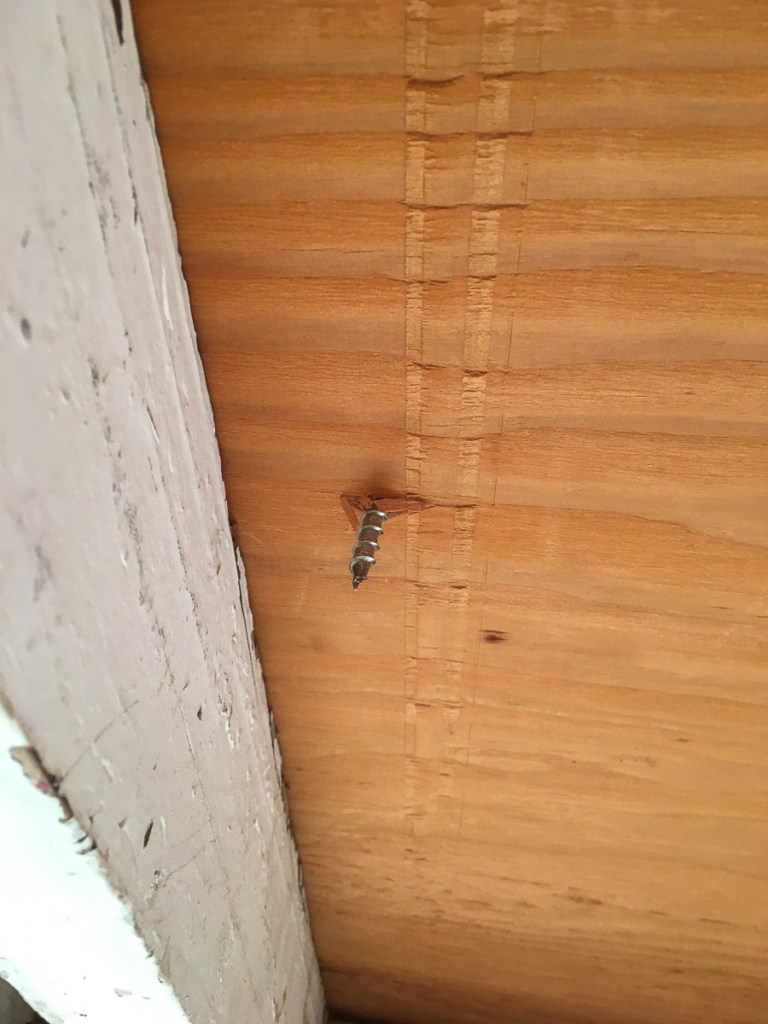
Having carefully marked up the stud locations it was easy to drive in the long screws and hit the stud. Once again you need to think about the length of the screws to stop short of hitting any electrical wiring.
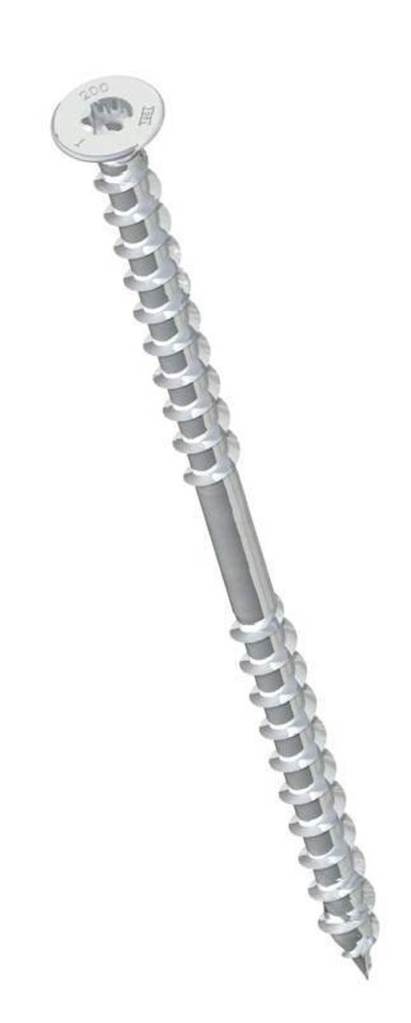
I used Heco Topix Therm Insulation Screws and they’re available from Small Planet Supplies.
These screws allow you to smoothly move the strapping in and out into alignment and create a flat wall plane for the siding. They cost quite a bit however they’ll save you a bunch of time and frustration trying to get the wall aligned.
It’s necessary to add small pieces of strapping next to penetrations like electrical outlets and vents so that the siding will be properly supported. It’s also needed on the gable ends where each course of siding will need a nailing base. This took almost as long as installing the main panel strapping.
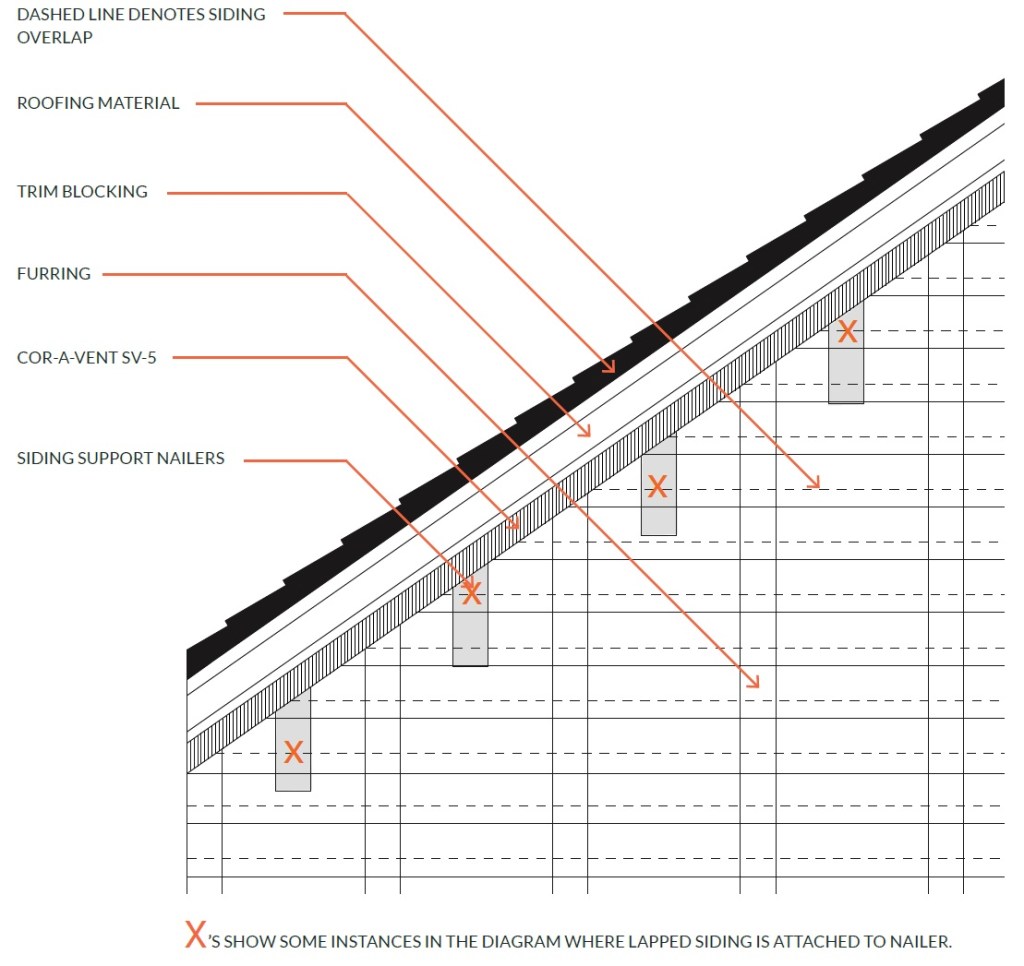
Rainscreen
I nailed in Cor-A-Vent 3/4-inch strips at the bottom and top of each course of strapping. This will allow airflow from the bottom up and out the top at the gables and eaves and help keep the inside of the siding dry.
I nailed blocking at the top of the wall on the eaves and gables and stopped the strapping and Cor-A-Vent a 1/4-inch short of that to allow a gap for airflow.
Hammer & Hands best practices manual contains a bunch of detail on how to do this.
Before installing the rockwool panels I had tacked on insect guard around the perimeter of the base of the wall. After installing the rockwall, strapping and Cor-A-Vent, I then wrapping the insect guard up and tacked it to the strapping. This will prevent insects (ants) from getting up into the insulation which is where they would love to be.
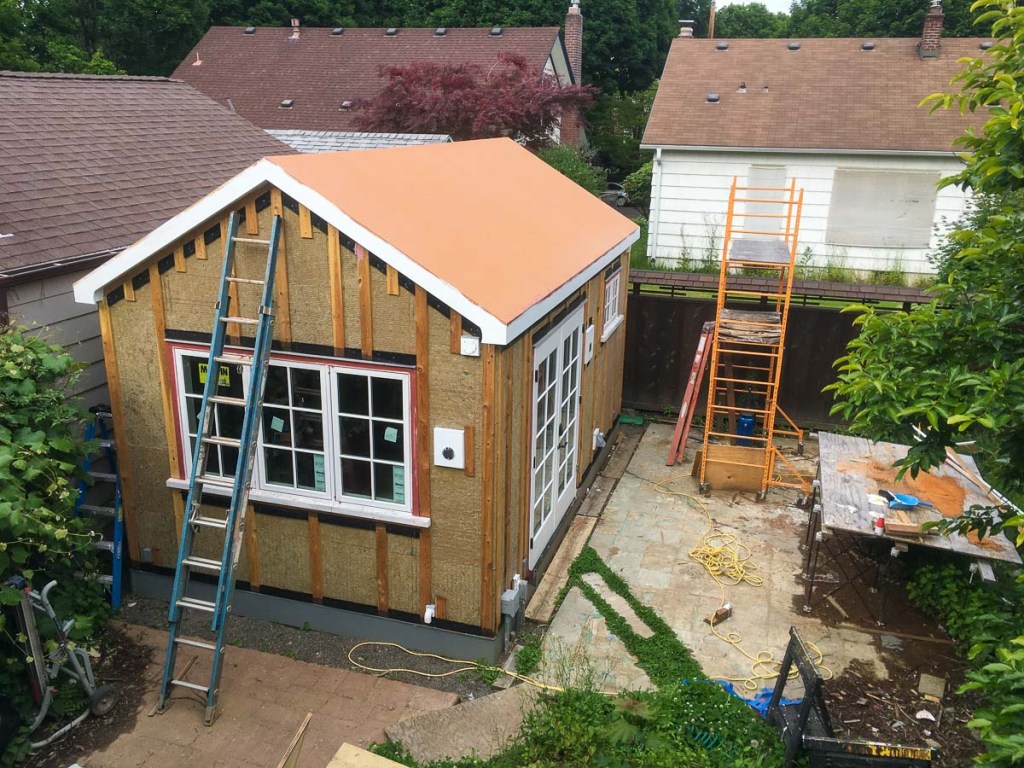
The Completed Insulation and Rainscreen
Here’s the ADU with the exterior insulation, strapping, and rainscreen completed. You can see the gable-end strapping here that will support the siding courses. You can also see the Cor-A-Vent installed below and above the windows.
I installed a bunch of blocking on the interior for bathroom and stairway grab rails, the shower partition glass, kitchen cabinets, the wall-hung microwave, and the heat pump head unit. Using 2×6 gives plenty of surface area to later play around with layouts.
I photographed and wrote-down the heights and locations of all the blocking so later I can still locate the blocking when the drywall is up.
I also installed blocking in one corner of the living room where I plan to install a wall hung table and chairs.
Because the blocking has to be quite precise I selected the following table/chairs and did the whole layout before adding the blocking. It’s an Irish company but they ship to the US. If I manage to find a local company then I’ll be constrained to my blocking.
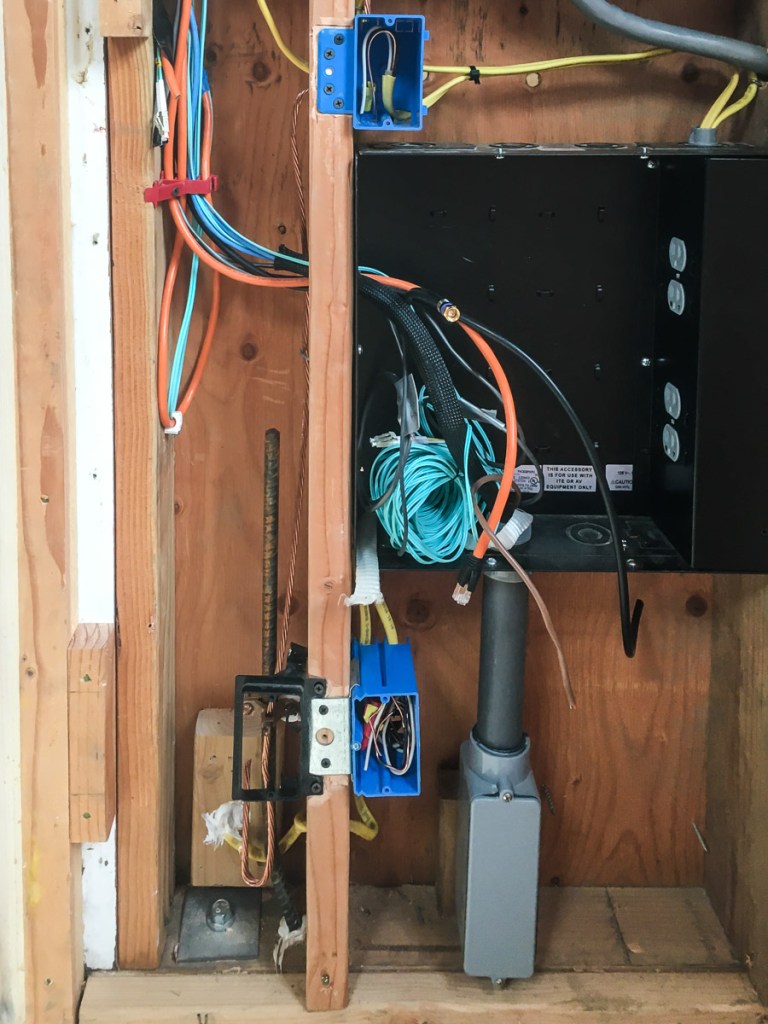
The ADU Feed comes off the house 200Amp disconnect panel and passes through a privately owned meter so that ADU power usage can be sub-billed. The line runs through the basement ceiling and then underground conduit to the ADU.
Two conduits were also run underground from the house to the ADU for data lines.
In the photo below – left to right: (1) 100 Amp power (2) Extra conduit from house for data (3) Data conduit (4&5) Extra conduit running to the ADU rear for future solar/storage. There is also an outdoor power outlet to power a future ONT (Optical Network Terminal) should fiber internet be run to the ADU at some point. The ADU panel is directly behind this wall.
Circuits were run through a 1.5″ wiring chase above the door to avoid having to drill a large number of holes through all the rafters. The heat pump cable-set and data cables were also run through the same chase.
Service disconnects for the AC and water heater heat pump were added to the rear of the ADU. Above them is the required power outlet for servicing the heat pump.
A media/comms box was mounted below the power panel to serve as a hub for internet connection, cable, and a modem. It’s possible to pull data cables through conduit from the house to this box.
An in-wall media box was mounted behind the TV location complete with recessed power outlet and conduit to channel AV cables within the wall. Another media box was mounted behind the bathroom mirror location to service a future smart mirror. The in-wall boxes were sourced from: https://www.standsandmounts.com/InWallGearBoxes.aspx
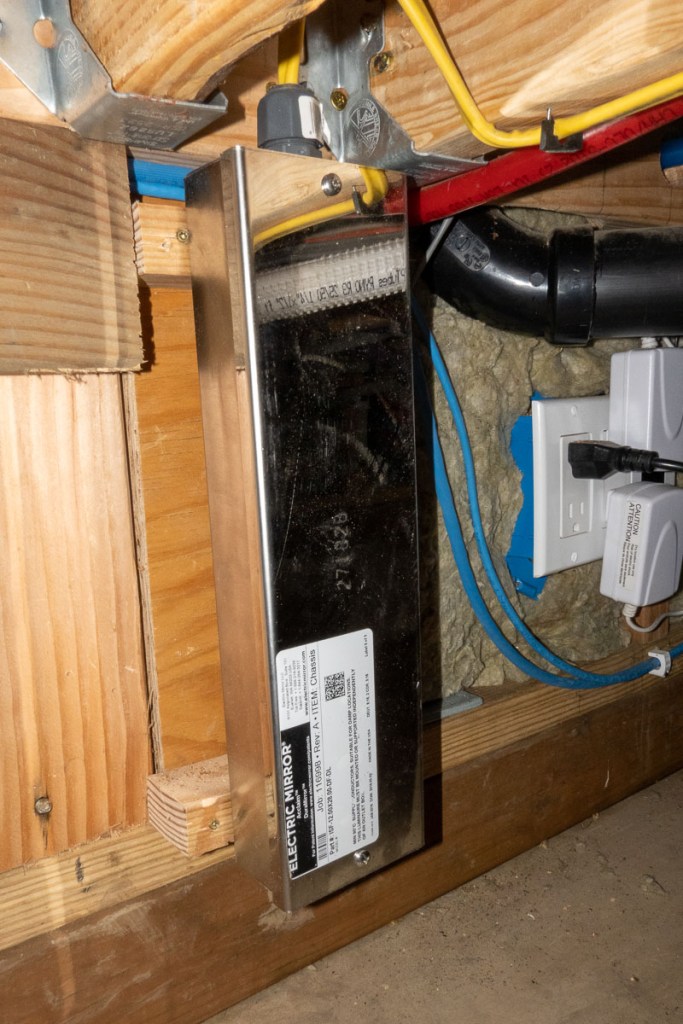
A recess was framed in the shower for an “Electric Mirror” lighted and heated in-shower mirror. The low-voltage converter box was located under the platform and is controlled by a light switch next to the shower cubicle. Electric Mirror is located in Everett WA. https://www.electricmirror.com/product/acclaim-fog-free-mirror/
As space is very limited in the ADU, my plan is to locate as many services in the ceiling as possible to reduce clutter on shelves. So I ran speaker cable for ceiling mounted speakers in the living room and bathroom. There is a CAT8 ethernet cable run in the ceiling for a ceiling mounted WiFi access point. I ran cable to connect Amazon Echo devices in the living room and bathroom ceilings – once again removing the need for a clutter of devices sitting on shelves. Get them all out of the way and put them in the ceiling.
These various data cables are just left under the insulation and will be drywalled over. I have carefully made a note of their exact locations. Then once the ceiling surface is finished and painted I will use a hole saw to cut through the ceiling, locate the cables and wire up the various devices: WiFi, speakers, Amazon Echos. This will greatly simplify the ceiling drywalling and finishing.
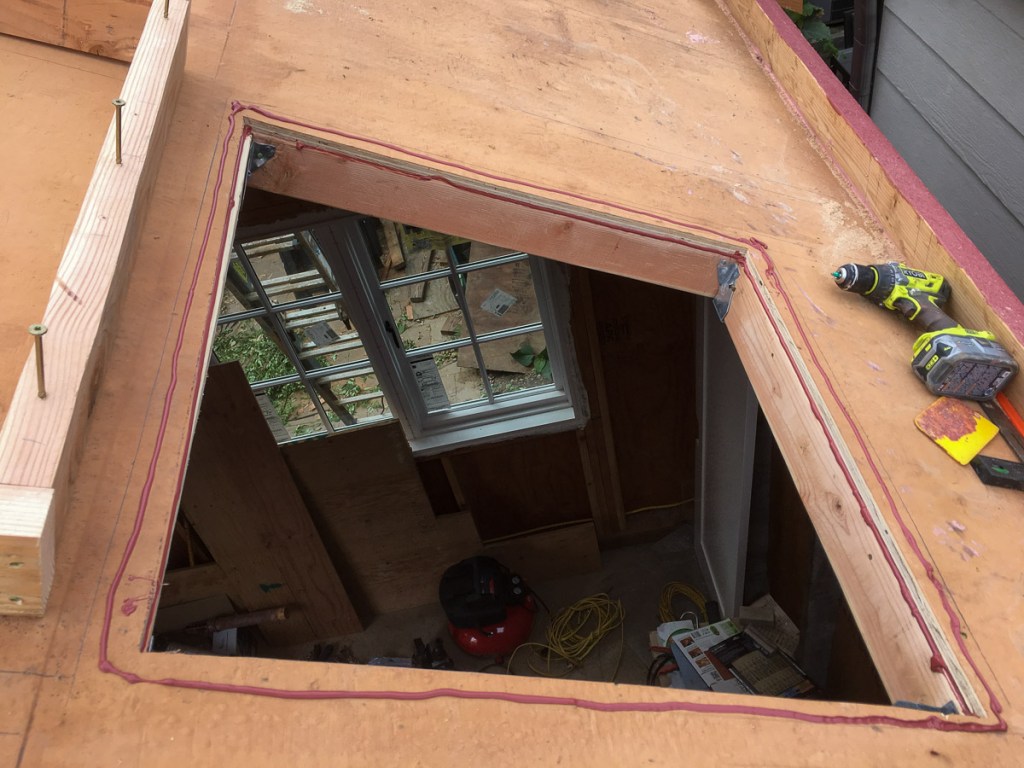
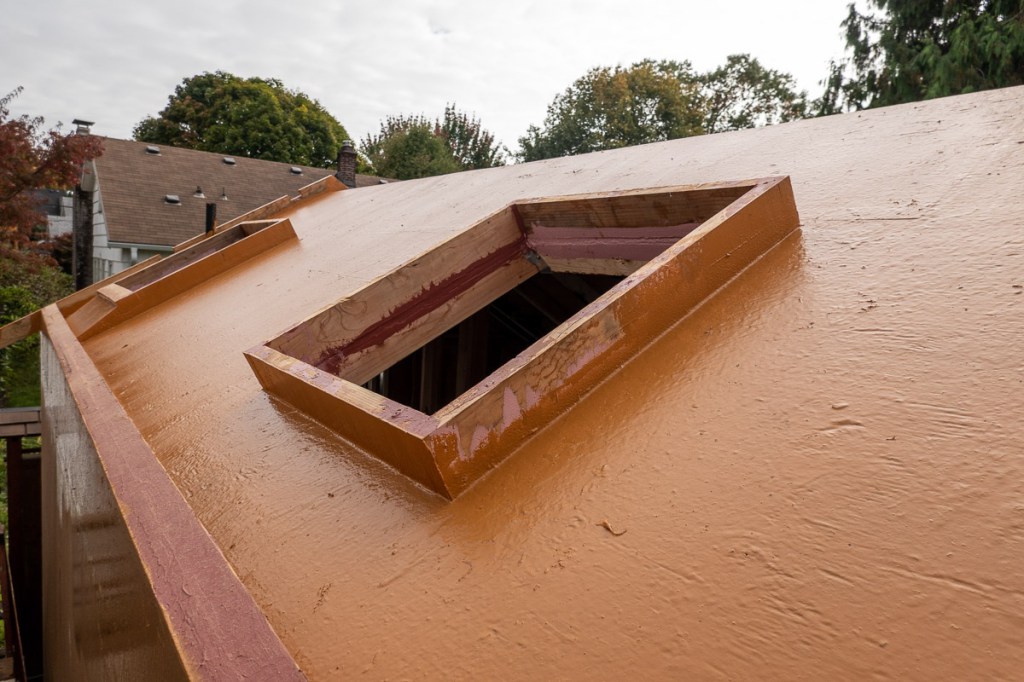
The roof was designed as an unvented “hot” roof. A 4-inch box is built on top of the roof sheathing, filled with foam and a final 3/4-inch roof deck screwed down on top to provide a nailing plane for the shingles. It’s air-tight so any moisture that gets in will rely on inward/outward drying.
First I built a framed 4-inch high box around the outside of the roof. I used cutting jigs and a circular saw to cut 1-1/2-inch notches in the gable ends for lookouts. The eave-pieces were cut sloped top and bottom. so they install vertical.
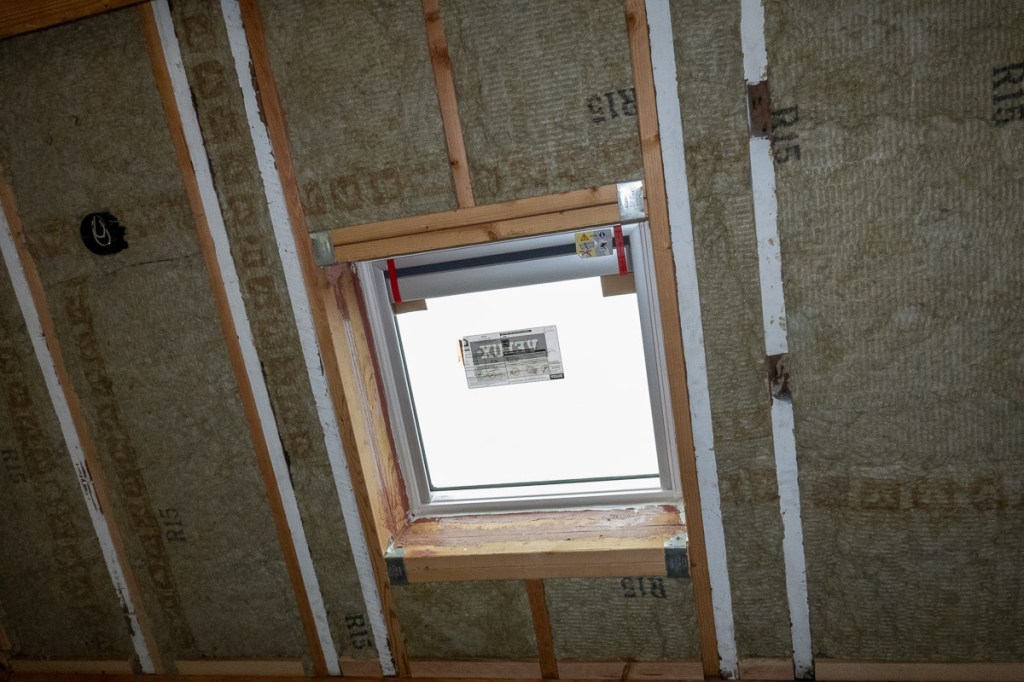
Next I built 4-inch high boxes for the skylights. Prosoco Fast-flash was used to seal between the sheathing and the boxes. The whole roof box was then sealed on the inside and outside using Prosoco Cat5 liquid flashing.
DensGlass extends the fire-break from the sheathing up to the top of the roof assembly.
I lined the bottom of the roof box with wrap to isolate the liquid flashed sheathing from the rigid insulation. The reason was I’d read some people have reported squeaking noises from roofs with rigid foam as solar heat causes the foam to expand and contract against the sheathing. I suspect it’s not necessary but it should reduce any abrasion of the flashing membrane during daily heat/cool cycles.
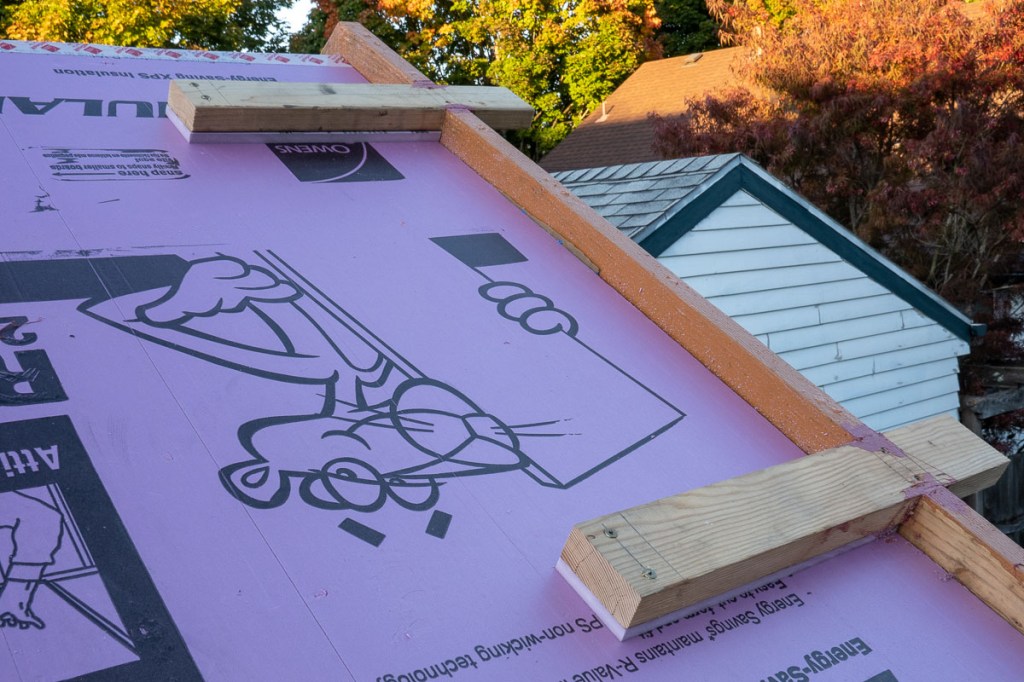
Next a layer of 2-inch XPS foam was installed and taped. The gable-end lookouts (2x4s on the flat) were screwed down over the first layer of insulation back at the first rafter. The eliminates thermal bridging from the lookouts to the roof sheathing. I could get by with lookouts on the flat as the overhangs are short. (For substantial overhangs it would have been necessary to use 2x4s vertically.) The second layer of foam was then applied and taped down. I decided against using Rockwool for the roof insulation as I was concerned about it’s compressiblility when the top roof deck is screwed down. The XPS foam is sufficiently dense that it provides a solid base for the top roof deck. I believe Rockwool could be used for the roof assembly, now that I have some experience working with rockwool for the exterior walls. It would take a little more fiddling around to get the deck screwed down true and level but it should work okay.
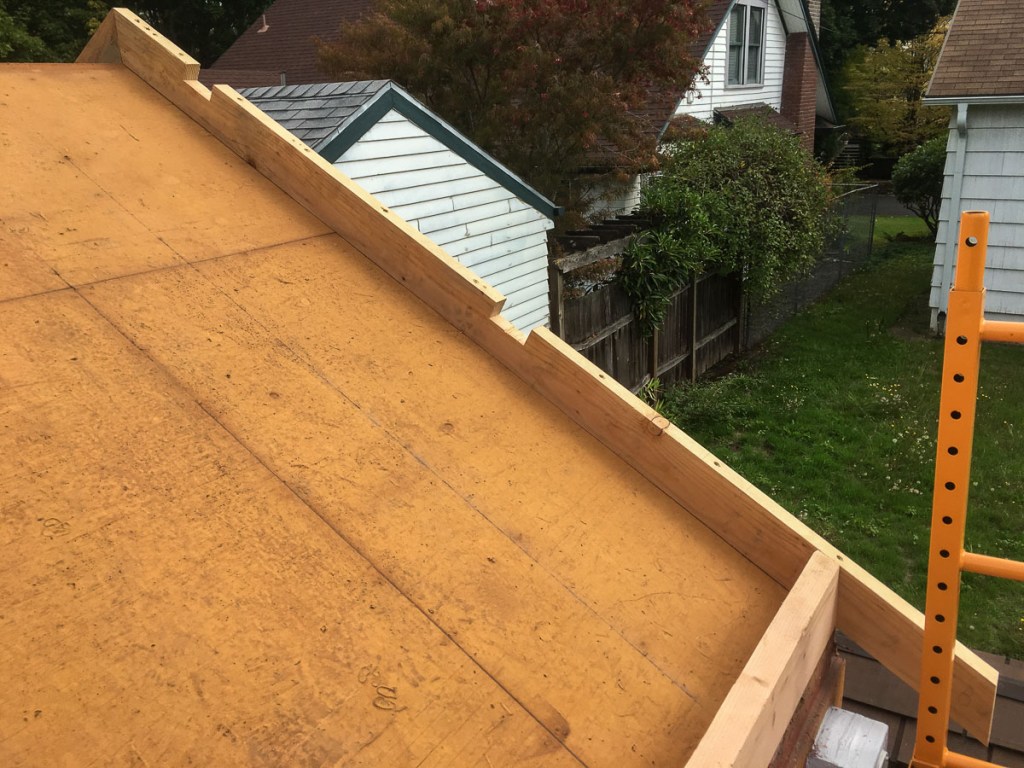
Next the eave rafter tails were cut and screwed on to the 4-inch high roof assembly box. It’s not possible to use the actual structural rafters as i) they are too low down given there’s a 4-inch roof assembly built on top of the roof sheathing and ii) the structure is built as a smooth box with the rafters cut smooth with the sheathing so that the exterior insulation can wrap completely around.
The eave overhang is short and the roof slope is working with us so lookouts were not needed. The rafters are screwed into the side of the structure. The gable-ends provide good rigidity to the whole eave structure. If the overhangs were significantly larger then obviously some stronger structure would have been needed. I didn’t worry about getting all the rafter ends the correct length. Just build them longer than needed, then cut with a circular saw using a string line and a cutting jig.
I then installed the sub-fascias (cut down from 2x6s) and built the bird-boxes at the gable/eave ends.
The top roof deck was then installed over the roof assembly and insulation. (3/4-inch ply – fire-rated on the north-side due to proximity to the property-line).
I used Heco Topix screws to secure the ply through 4 inches of foam through the sheathing and into the interior rafters. These screws are a brilliant design. There are two groups of threads set at the same pitch. This allows any 3/4-inch strapping or ply sheet to be fastened through thick insulation so that the screw head self-countersinks without compressing the insulation. The screw can be tweaked in and out to really dial in the level of compression and get the roof deck super flat. Heco Topix screws are available from from Small Planet Supply and come in a variety of lengths to suit your insulation thickness.
Installing these screws through thick insulation requires very accurate measurement and marking of the rafter locations on the roof – accurate to within 1/8 – 1/4-inch to make sure you hit the rafter right in the center. I made a jig to help ensure they went in true. Out of 200 or so screws only 3 missed the rafter – due to a measurement error.
Video of installing the screws. The rafter locations are marked on the ply. After screwing down the entire roof deck I then went back and retweaked all the screws to get the deck super flat.
I then ran a router around the ply perimeter to get a constant 3/4-inch overhang that will cap the fascia.
Finally I liquid-flashed all the plywood seams and also around the junction of the underside of the ply deck and the sub-fascia to make the roof assembly air-tight, then applied Cat5 on the roof deck to water-proof it.