TREMproof 250GC waterproof coating has already been applied to the 2-foot deep slab edges, then 2 inches of XPS foam glued on using Dow EnerFoam.
Now it was time to complete the slab drainage and protect and finish the above-ground part of the slab
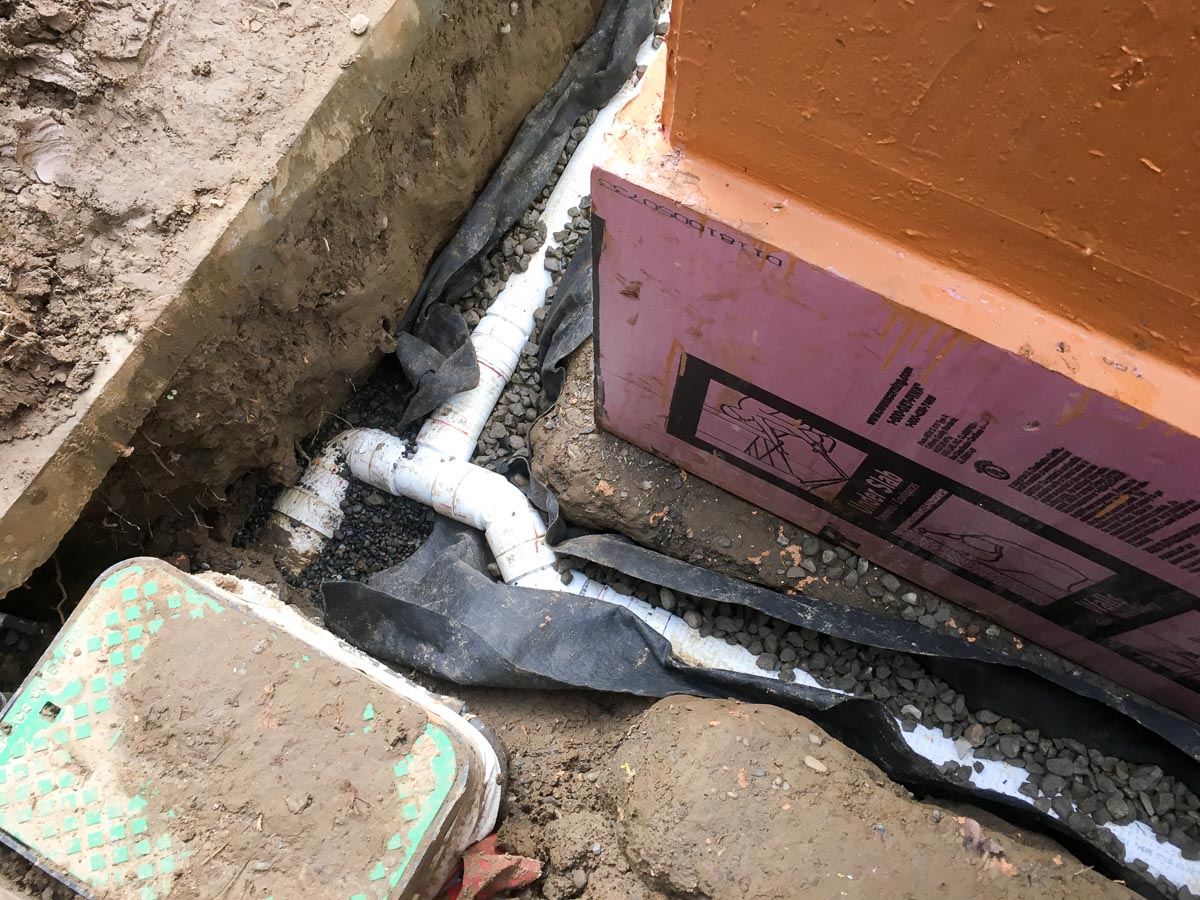
Footing Drain
Providing a footing drain was probably not required as it’s only a 2 foot deep edge-thickened slab, however I already had a dry well available that had previously been used hold rainwater from the back half of the garage roof.
The sequence was:
I used 3-inch perforated ABS drainage pipe sloped at 1/8-inch/foot around the perimeter.
- Dig and correctly slope the trench
- Geotextile fabric to help keep the drain clear of silt
- 2-inches of 3/4-in clear gravel
- 3-inch perforated ABS drain pipe
- Adjust drain slope then cover in 2-inches of gravel
- Wrap the remaining width of geotextile over the top of the gravel burrito style to slow down silt infiltration
I then used Dow EnerFoam to glue drainboard to the foam. The drainboard extends one foot from the top of the XPS insulation, down to the perforated drain pipe
I then filled in the trench to just below the top of the drainboard using soil and more gravel.

Finishing the Exposed XPS
The XPS needed to be covered and protected. Perhaps the best product available is Finex produced by a Canadian company. It contains little or no wood fibers and it’s rated for exposure to soil. However there is no Oregon distribution and the cost of shipping it down was too high for such a small project.
Hammer & Hand have used coated Hardiepanel in some of their projects so that’s what I did.
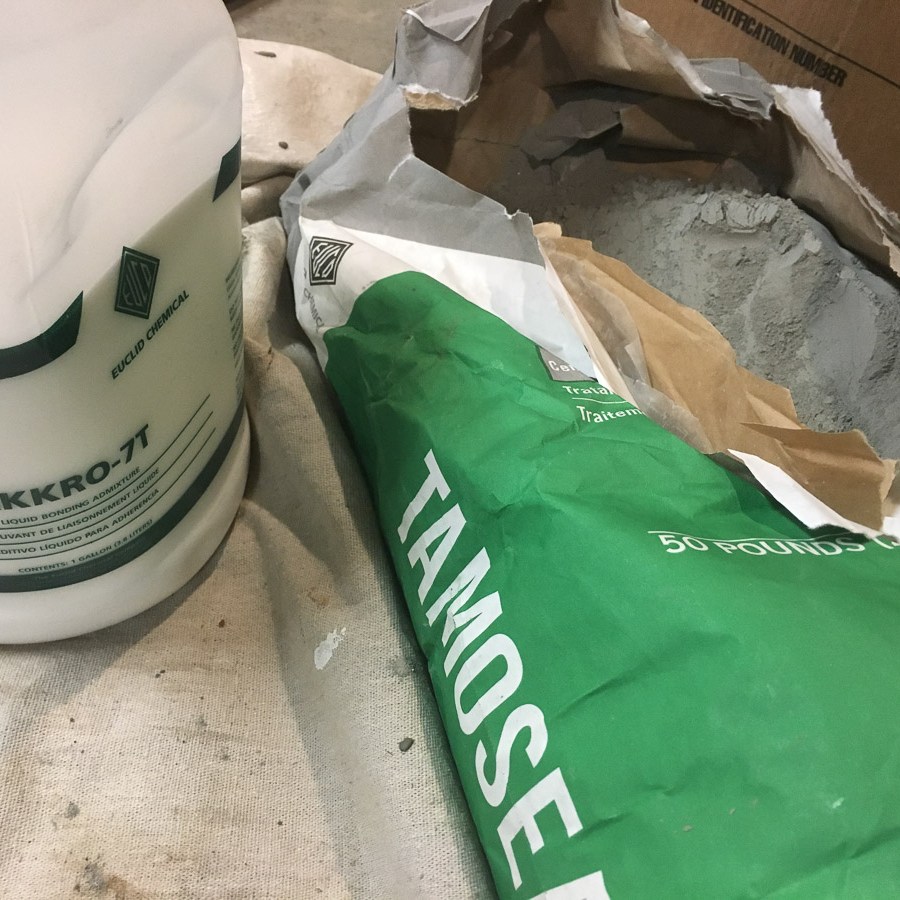
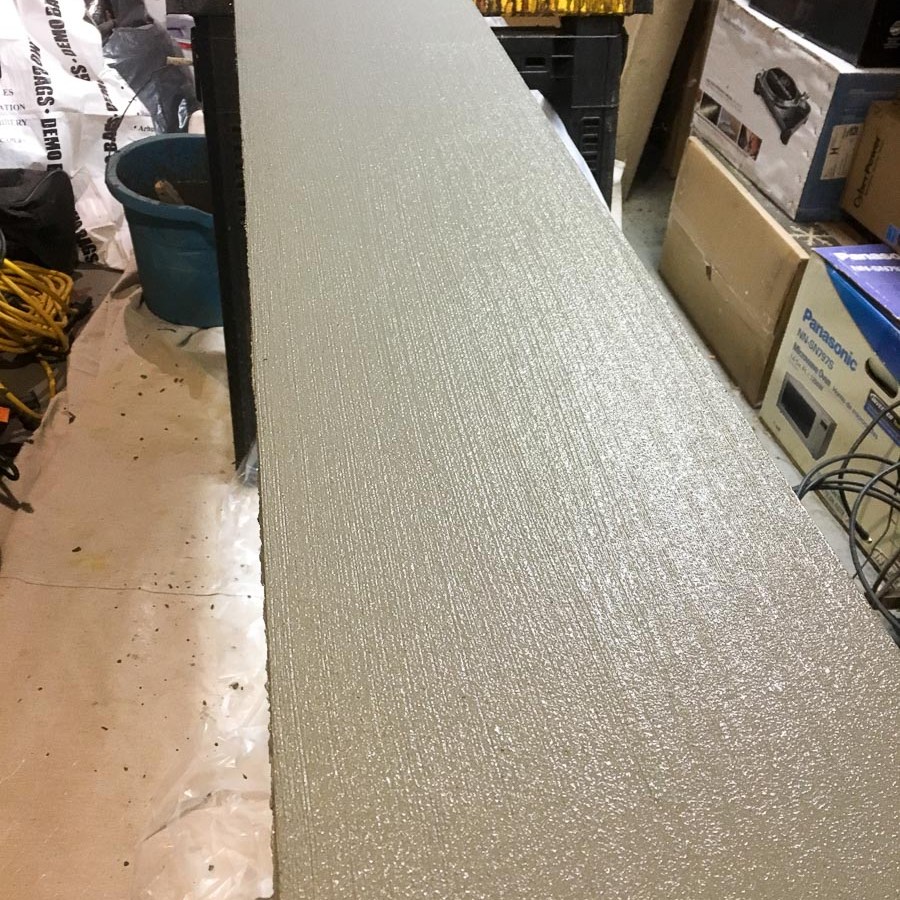
First cut the panels into foot-wide strips (for my foundation 8-inches above grade, 4 below), then apply one coat of Tamoseal on the front surface and four edges using a mason’s brush. Mason’s Supply in SE Portland has all the materials. The older guy at Mason’s took time to write down the mixing rations for the Tamoseal and the bonding acrylic for my application. The customer service there is excellent.


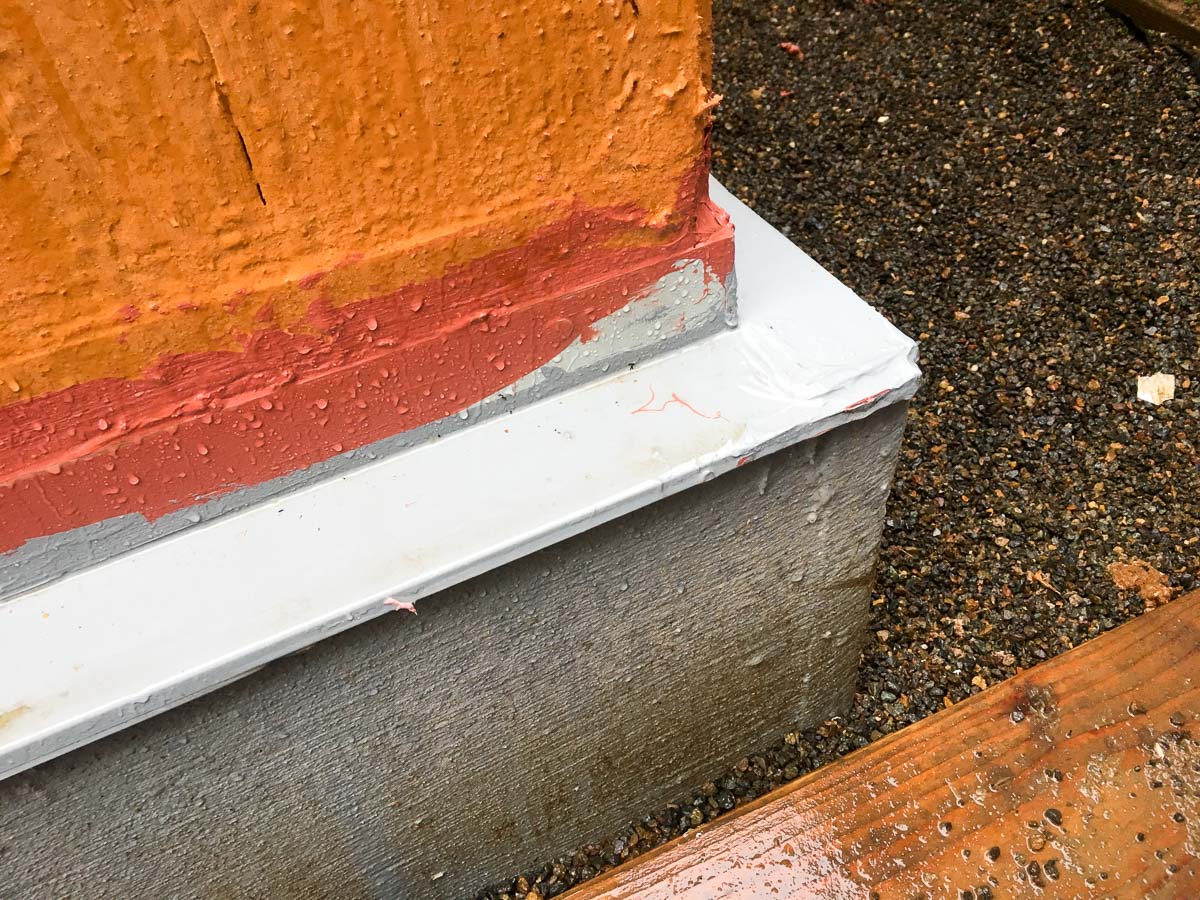
I then glued these coated panels to the XPS using Dow Enerfoam. I used Tamlyn flashing strips to protect the panel edges at joins and corners. Parr Lumber on SE Stark St in Gresham stocks this trim (my local Parr Lumber branch on MLK does not). There’s a display of the trim types on the left of the counter as you go in so easy to select what you need.
I then coated the mounted panels with a second coat of Tamoseal.
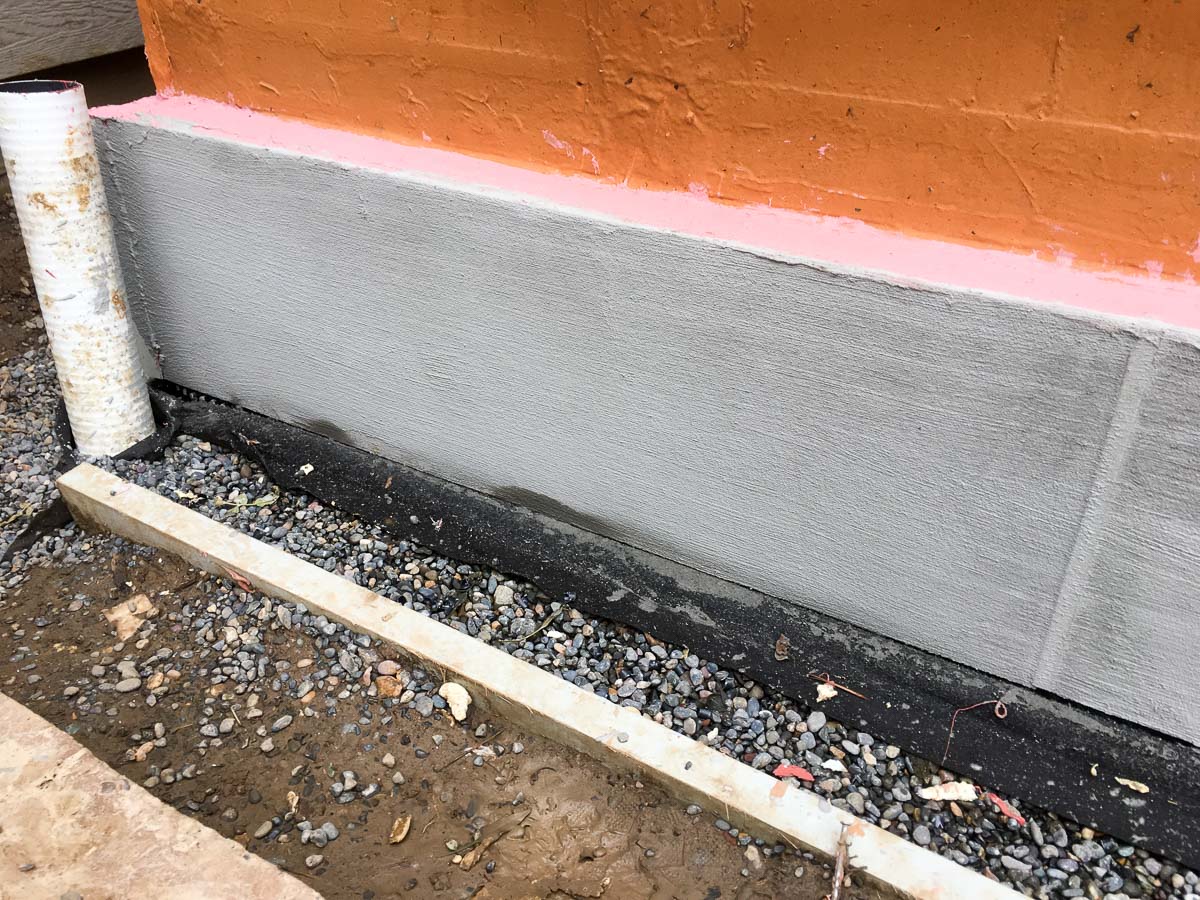
I then applied two coats of Drylok (probably overkill).

Then two coats of paint.

Finally I installed metal Z-flashing over the top of the XPS to protect it and keep the rain off. I’ve found the easiest place to buy this is Lakeside Lumber in Tualatin. There have an excellent selection graded by 1/4 and 1/2inch.
I applied a bead of Prosoco FastFlash to the back top of the flashing, placed it in position then nailed in every 1-2 feet using stainless steel shingle nails. The flashed over the top seam using FastFlash. Do not flash the bottom; water needs to be able to freely drain out.
I then covered the bottom 4 inches of the hardiepanels using 1/4-inch clear gravel. I did this rather than use soil as I want water to drain away from the hardiepanels as quickly as possible given this product is not rated for ground contact.
