The foundation design includes a waterproofing layer, rigid insulation, then drainboard and a protective cover.
Hammer and Hand
Hammer & Hand – a Portland-based construction company (they also have an office in Seattle) – are an awesome resource for constructing energy-efficient houses based on the latest building science. They have a repository of how-to videos for various projects that I have found invaluable. Their online “Best Practices Manual” and their youtube channel contain excellent information for DIYers.
You can find them here: https://hammerandhand.com/
One of their projects – the Pumpkin Ridge Project – contained a bunch of techniques for waterproofing and insulating foundation walls. In particular the use of an elastomeric waterproofing membrane, foam glued on using an adhesive expanding foam, and the use of Tamoseal-coated Hardiepanel to protect the foam above-grade.
https://www.youtube.com/watch?v=tzLiXk-VXUY
https://www.youtube.com/watch?v=IpvGF4dxNfo&t
Waterproofing
On the main house I used a bentonite-backed membrane (Tremco HDPE/Bentonite Sheet Membrane) to water-proof the basement walls below grade. It’s a sturdy product and I expect it will outlive the house. However that would be overkill for the ADU concrete slab where there is no interior living space to protect from water intrusion.
One option was to get in a contractor to spray on a waterproof layer however it would have been difficult to do this at a reasonable cost. It would have also mean having to plastic wrap the fence and neighbor’s garage to protect against spray drift.
So instead I opted to roll on a waterproofing membrane myself. I’m a fan of Tremco products so I went with a roller grade of TremProof 250GC.
I’m gradually getting to know the main building product suppliers in Portland. TremProof is distributed by Dealers Supply Co. It’s a massive warehouse in NW Portland and a temple of Building Science Chemistry.

TREMproof is super-viscous (several minutes of mixing before use helps) and it pretty much destroys any clothing it comes in contact with – in that it’s never coming off.

It stuck tenaciously to the concrete although less so in a couple of spots where the concrete was wet. So only apply this to dry-ish concrete. Because of the cool temperatures (30s/40s) it took several days to cure. I’d think it could take some rain within 24 hours of application. Moisture helps the product cure although I’d think heavy rain could cause problems.
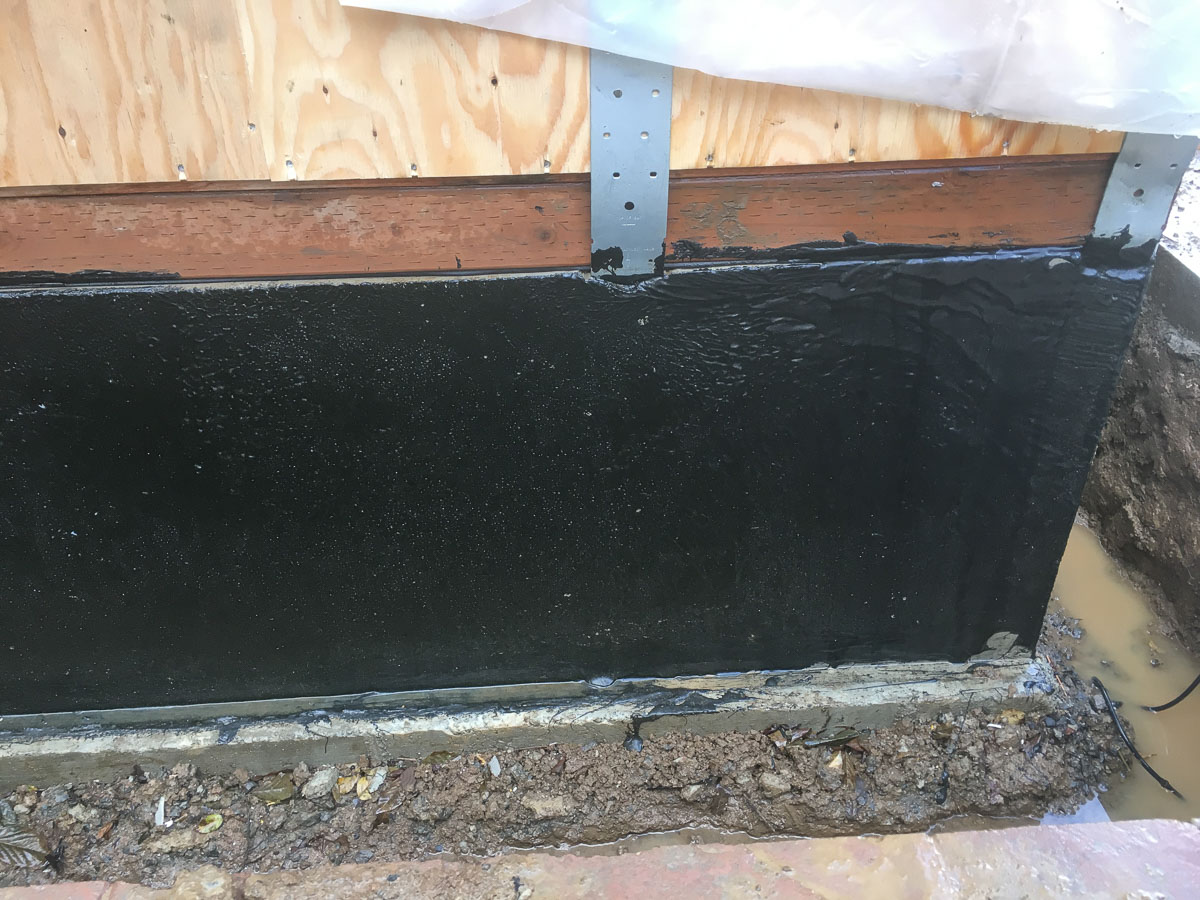

I caulked the seam between the concrete slab, and the mudsill to prevent water from running down behind the foam. (Prosoco R-Flash Joint & Seam Filler.)

Insulation
I’m insulating the outside of the slab using 2-inches of XPS foamboard. On the main house I used Hilti Insulation Anchors to attach the foam to the concrete. This requires drilling into the concrete slab. However Hammer & Hand use an adhesive foam – Dow ENERFOAM Foam Sealant – to glue the foam to the concrete. It’s an expanding foam – similar to Dow’s Great Stuff range – but with an adhesive mixed in. You can find more information here:
https://www.dupont.com/products/ENERFOAMProfessionalFoamSealant.html
I couldn’t find a distributor in Portland – it’s definitely not at Home Depot or Lowes – and the consumer-grade expanding foams they stock are not the same kind of product at all. However Amazon was able to get it shipped from New Jersey within about 5 days. Because of the nature of the product it has to come by ground transportation – it can’t go air freight.
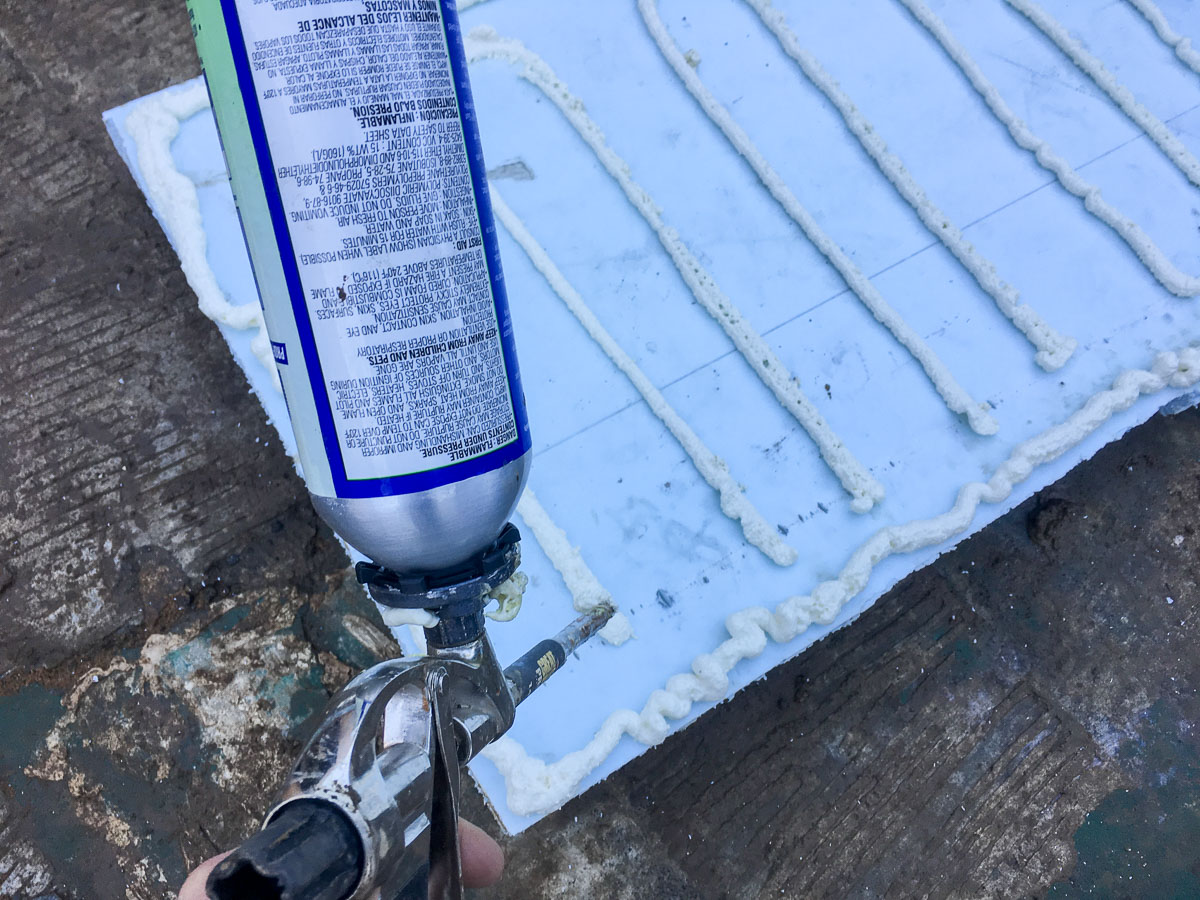
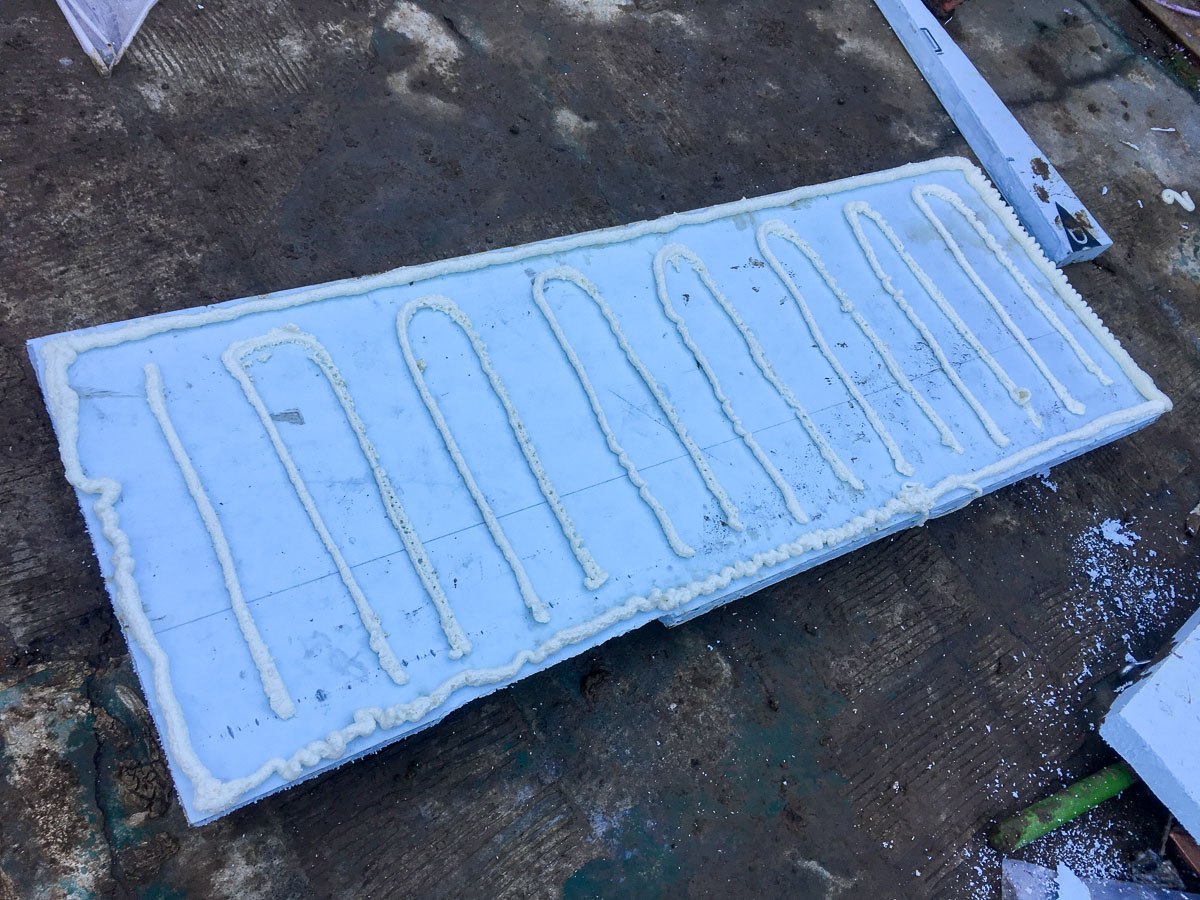
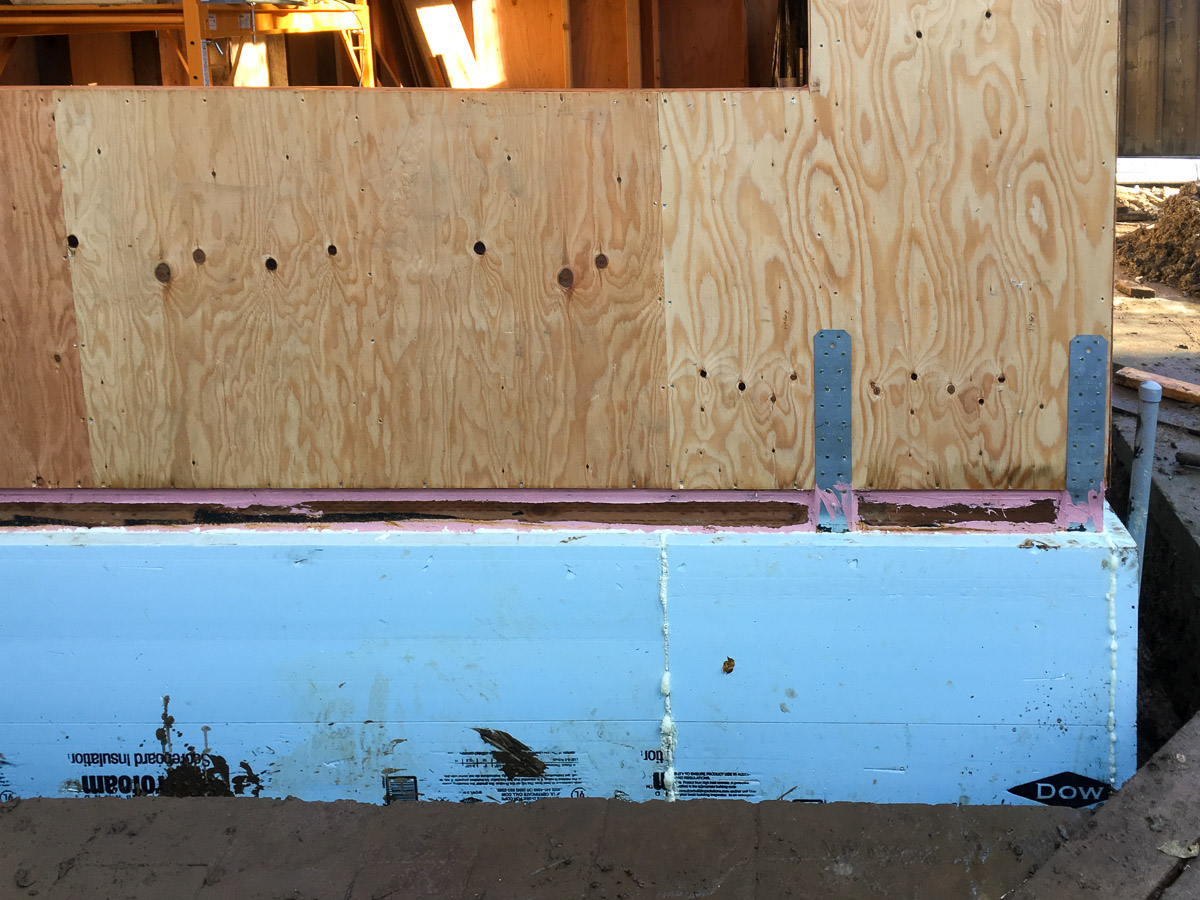
Hammer and Hand talk about covering the entire back of the XPS panel however that seems like a huge amount of foam and the gun doesn’t distribute it fast enough to do that, so I sprayed in a pattern. You only have a few minutes to get the panel pressed in place against the foundation wall as it starts to firm up quickly. It’s possible to move the XPS around against the wall to get it in position for a minute or two and then the adhesive really starts to grab on. I pounded the panel using my hand to squash the foam against the wall and get the gap as narrow as possible. I then used bracing to keep the panel under pressure while the adhesive sets up. It could potentially be braced for as little as 30 mins as it sets in place quickly.

It holds the foam in place very strongly. For example it was easily able to take the weight of heavy DensGlass panels being rested on the foam while they were being installed.
Protective Cover and Drainboard
This will be done at a later time as I need to have the city inspect the insulation before I cover it over.
