Another technique I picked up from Hammer & Hand was the use of liquid flashing in place of traditional housewrap.
There are some advantages to liquid flashing: it’s relatively straighforward to apply – which is not entirely the case with housewrap which needs to be carefully shingled, especially so around window openings.
Liquid flashing also serves as an air barrier which is not the case for housewrap. Peel and stick membranes can block water and air however they’re expensive and I’d think difficult to apply without experience.
The product Hammer & Hand uses is made by Prosoco – a Portland based company. It’s well adapted for the Pacific Northwest as it can be applied in a damp environment and moisture helps it cure.
Initially I had the product shipped down from Small Planet Supply in Washington state but then found a local distributor: Atlas Supply in SE Portland.
It comes in sausage tubes which require a special caulking gun – not the usual Home Depot/Lowes product range at all. It’s an excellent caulking system: high capacity tubes, the nozzle doesn’t dry up and clog so easily. Best of all there is no bulky tube to dispose of later. Just the thin compressed skin. Here’s a photo of the reusable nozzle and the used skin.

Prosoco Flashing Products
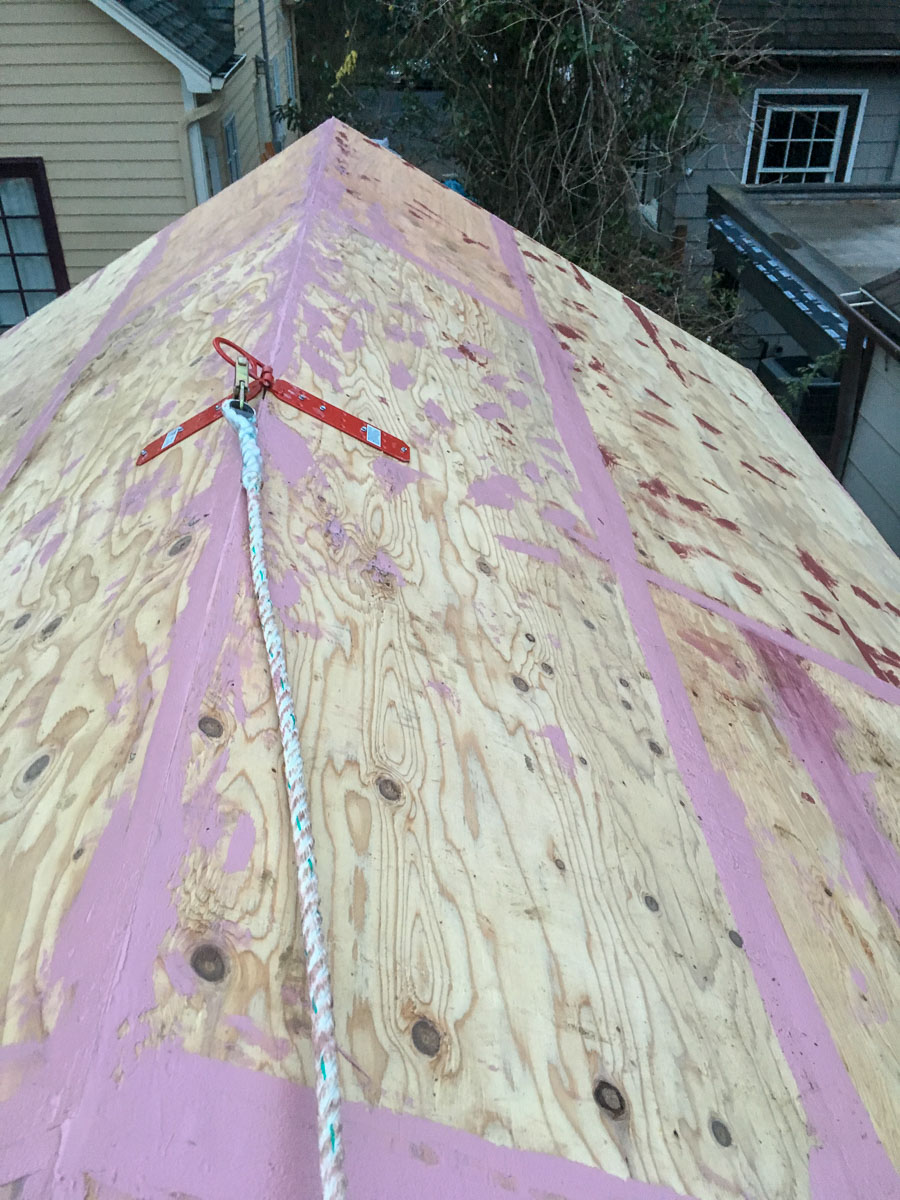
R-Guard Joint & Seam Filler: fiber-re-enforced for filling gaps (Pink color)
https://prosoco.com/product/joint-seam-filler/
R-Guard FastFlash: for filling nail holes, flashing rough openings, and sealing sheathing penetrations. (Red color)
https://prosoco.com/product/r-guard-fastflash/
R-Guard Cat 5: elastomeric weatherproofing membrane for exterior sheathing (Orange color)
https://prosoco.com/product/cat-5/
Application Techniques
Prosoco has a comprehensive guide to using their flashing products:
https://prosoco.com/products/air-water-barriers/resources/r-guard-installation-guidelines/
Hammer & Hand also provide a bunch of videos that explain how to apply these products. This video demonstrates the R-Guard Joint & Seam Filler
My Experience
I used R-Guard Joint and Seam Filler wherever there was a gap between two plywood sheets, also between the framing, the concrete slab and the slab insulation foam. I also used it to fill in any large holes or imperfections in the plywood outer layer.
I used R-Guard FastFlash to fill in nail holes, to cover where two plywood sheets butt up to each other with little or no gap, and to flash the window and door rough openings.
I used R-Guard Cat 5 to cover the roof and walls.
Some comments:
- It’s more efficient to keep two caulking guns loaded – one with Pink Joint & Seam filler, the other with Red FastFlash. Initially I only used one gun and found myself continually swapping between the two products which wastes both product and time.
- The most efficient way to work is to setup your ladder, then apply both Joint & Seam filler, and the FastFlash to that section of wall. Then move the ladder and do the next section. Finally, once both products have cured, then roll on the Cat 5 liquid membrane on the roof and walls.
- I think it worth covering all knots in plywood sheathing with Red FastFlash. It’s extra product and work, however if you don’t do this then when you roll on the Cat-5 membrane there will be gaps left around the edges of some knots.
- Protect adjacent surfaces with plastic before rolling on the Orange Cat 5. It sticks tenaciously and probably don’t come off whatever it lands on.
- The product literature suggests these products can be applied in a damp environment however there are limits to this. The Joint and Seam and FastFlash fillers can be applied to damp surfaces but it requires more force on the plastic spreader tool to get it to adhere compared to a dry surface. They skin over quite quickly so you only need a half-day or ideally a full 24 hours of rain-free conditions.
- The Cat 5 liquid flashing is another story. The surface is better dry as it’s only rolled on. It’s hard to get enough force on the roller to get it to adhere well to damp surfaces. I found that the Cat 5 membrane was not well adhered on one section of roof sheathing that had been quite damp when I rolled it on. You also need at least 2-3 days of no rain in cool winter temperatures, to allow the Cat 5 membrane to skin over and partly cure. It could be different in summer. The first time I applied Cat 5 to the roof it rained 3 hours later. This turned the surface into a spongy crater-like mess. Worse there was a wind-storm and a bunch of leaves and seeds from a nearby cedar tree embedded themselves in the membrane. I ended up spending hours picking out debris from the membrane, Finally I applied a second coat. This time when there was 4 days of clear weather forecast.
Here’s the structure after applying the Joint & Seam Filler and the FastFlash

Here’s the structure after the Cat 5 liquid membrane is applied:

