I used Rockwool for both exterior and interior insulation. It’s slightly more expensive than XPS however not a big deal considering most of the cost is labor.
I was wondering how difficult it would be to work with, whether it would compress too much under the strapping, however overall I found it easy to cut and install.
Stud markup
I carefully marked out the location of all the studs on the exterior using a marker pen. This is important to get right as the strapping has to be fastened by long screws through up to 2-inches of rockwool and the ply sheathing to hit the center of the stud.
Exterior Rockwool panels
Rockwool cuts easily with any serrated blade.


I used 2-inch rock wool on two sides. I was limited to 1-1/2-inch rockwool on the two sides within the lot setbacks.
For the back of the ADU I ran out of rockwool and had to switch to XPS for half the wall as there was no 1-1/2-inch rockwool available locally. (2-inch seems to be a standard thickness.)
I transferred the stud markings onto the rockwool as I installed each panel.


I used Round Cap roofing nails to hold the panels in place until the strapping was installed. It’s only necessary to use 4-6 of these per panel as the strapping is what will really hold them.
You need to think about the length of the nails and whether you’ll be embedding them into a stud if you want to avoid penetrating the sheathing and creating a potential path for water and air.


Strapping
I used 1×3 strapping for the interior field, 1×4 strapping for the corners. Cedar happened to come in the length I wanted however this made the strapping actually quite expensive. It was overkill and I suspect some kind of spruce or fir would have made more sense.
Having carefully marked up the stud locations it was easy to drive in the long screws and hit the stud. Once again you need to think about the length of the screws to stop short of hitting any electrical wiring.
I used Heco Topix Therm Insulation Screws and they’re available from Small Planet Supplies.
https://smallplanetsupply.us/heco-topix-therm-insulation-screw-4-7-to-17-75-inches/These screws allow you to smoothly move the strapping in and out into alignment and create a flat wall plane for the siding. They cost quite a bit however they’ll save you a bunch of time and frustration trying to get the wall aligned.

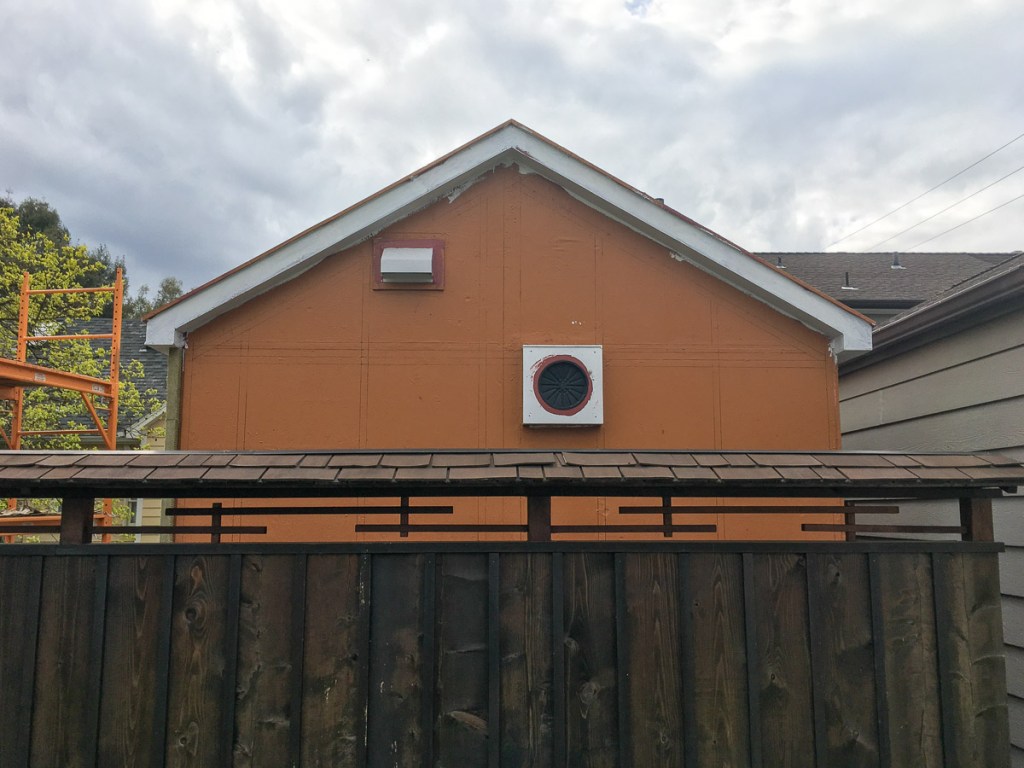
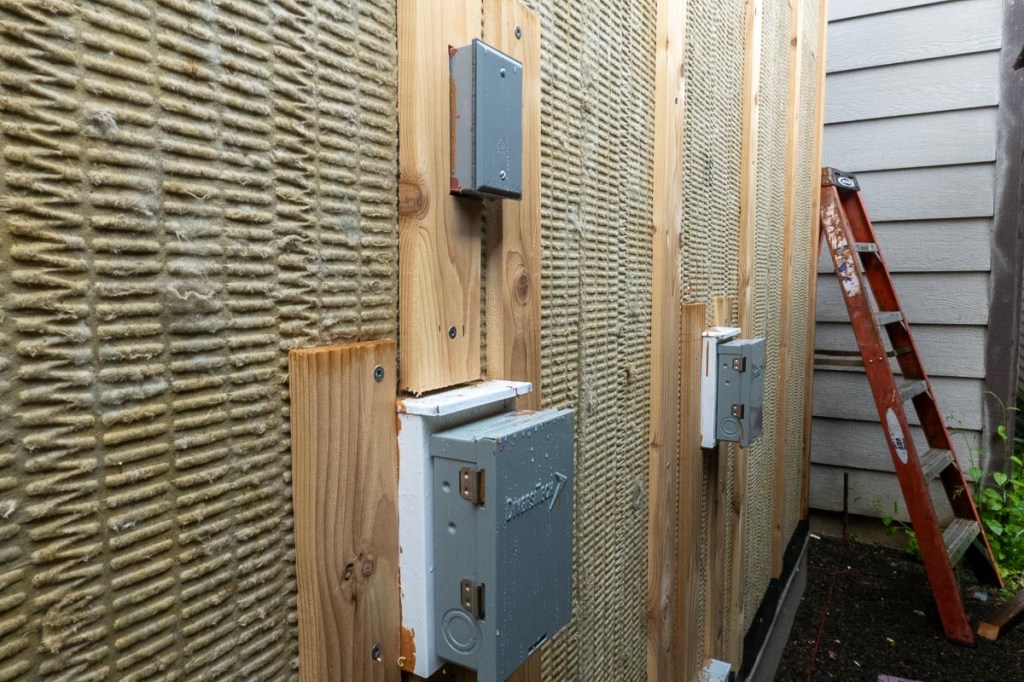
It’s necessary to add small pieces of strapping next to penetrations like electrical outlets and vents so that the siding will be properly supported. It’s also needed on the gable ends where each course of siding will need a nailing base. This took almost as long as installing the main panel strapping.

Rainscreen
I nailed in Cor-A-Vent 3/4-inch strips at the bottom and top of each course of strapping. This will allow airflow from the bottom up and out the top at the gables and eaves and help keep the inside of the siding dry.
I nailed blocking at the top of the wall on the eaves and gables and stopped the strapping and Cor-A-Vent a 1/4-inch short of that to allow a gap for airflow.
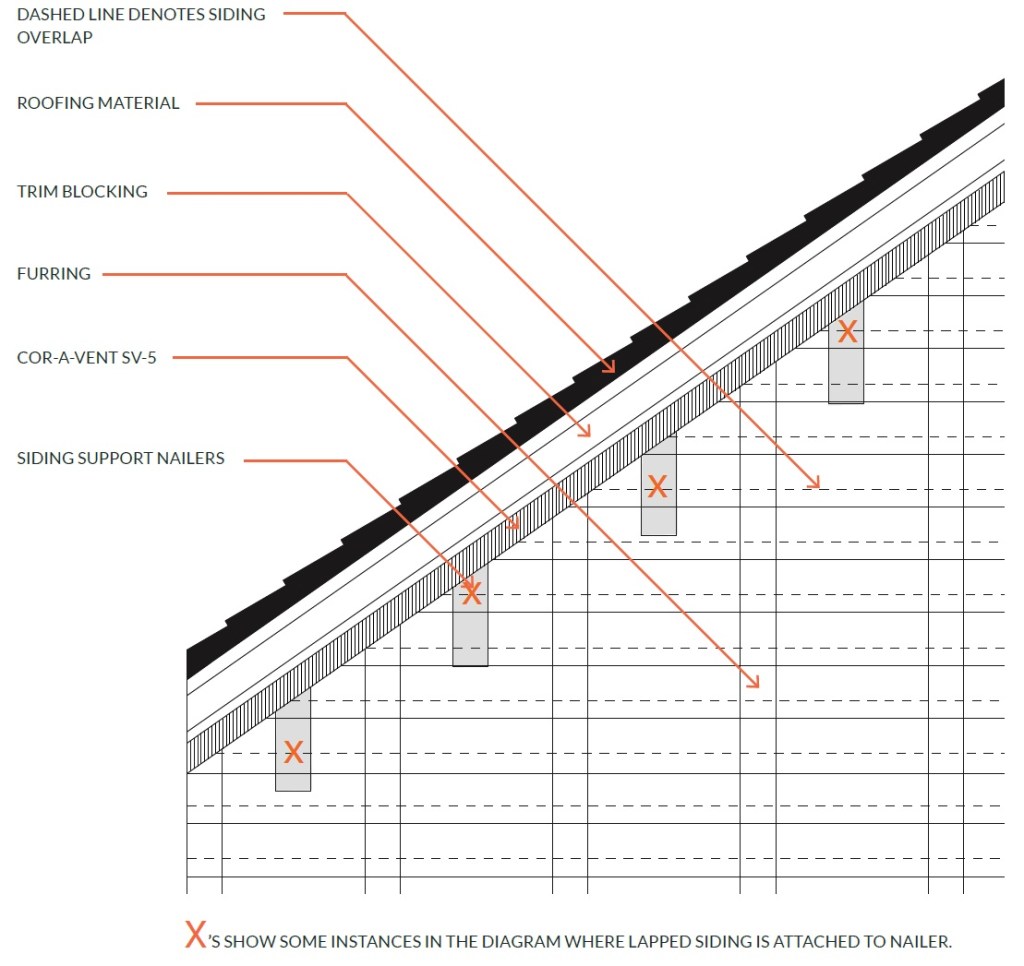
Hammer & Hands best practices manual contains a bunch of detail on how to do this.
Insect Screen
Before installing the rockwool panels I had tacked on insect guard around the perimeter of the base of the wall. After installing the rockwall, strapping and Cor-A-Vent, I then wrapping the insect guard up and tacked it to the strapping. This will prevent insects (ants) from getting up into the insulation which is where they would love to be.


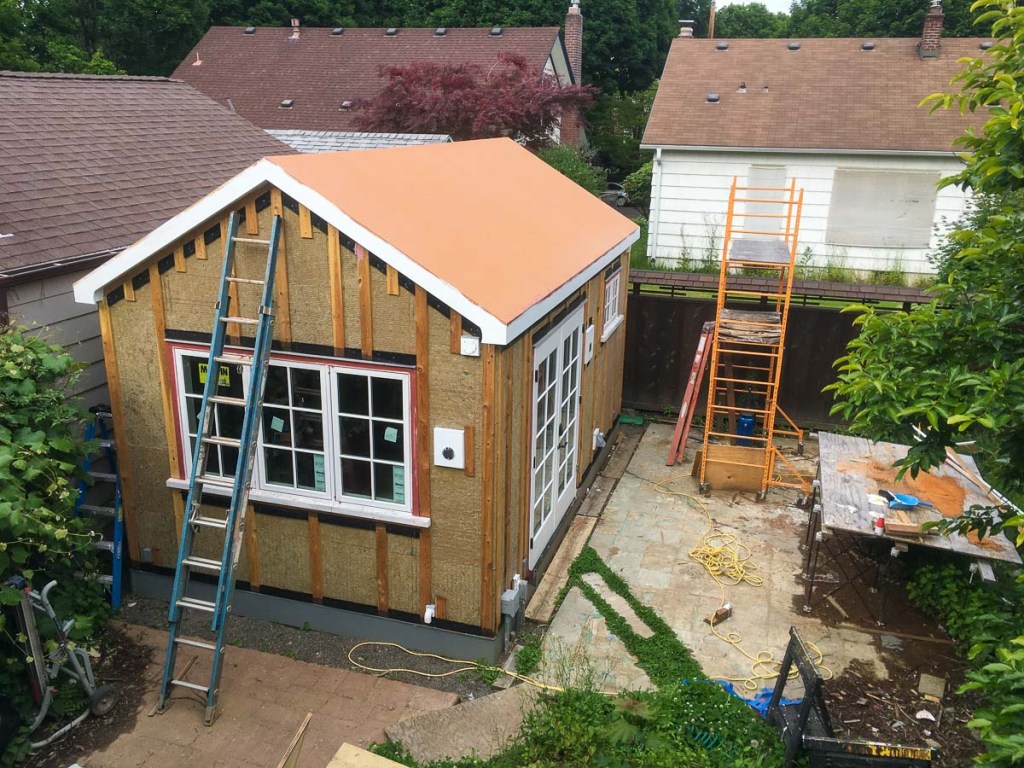
The Completed Insulation and Rainscreen
Here’s the ADU with the exterior insulation, strapping, and rainscreen completed. You can see the gable-end strapping here that will support the siding courses. You can also see the Cor-A-Vent installed below and above the windows.